Guide
Creating Widgets
The Odyssey Guide to Widgets
Widgets are fully interactive mini applications that live in their own windows or panels and are driven by a workflow. Almost any workflow can be converted into a widget, and there’s a widget editor with which you can customize your widget’s appearance, layout, and functionality.
From Workflow —> Widgets
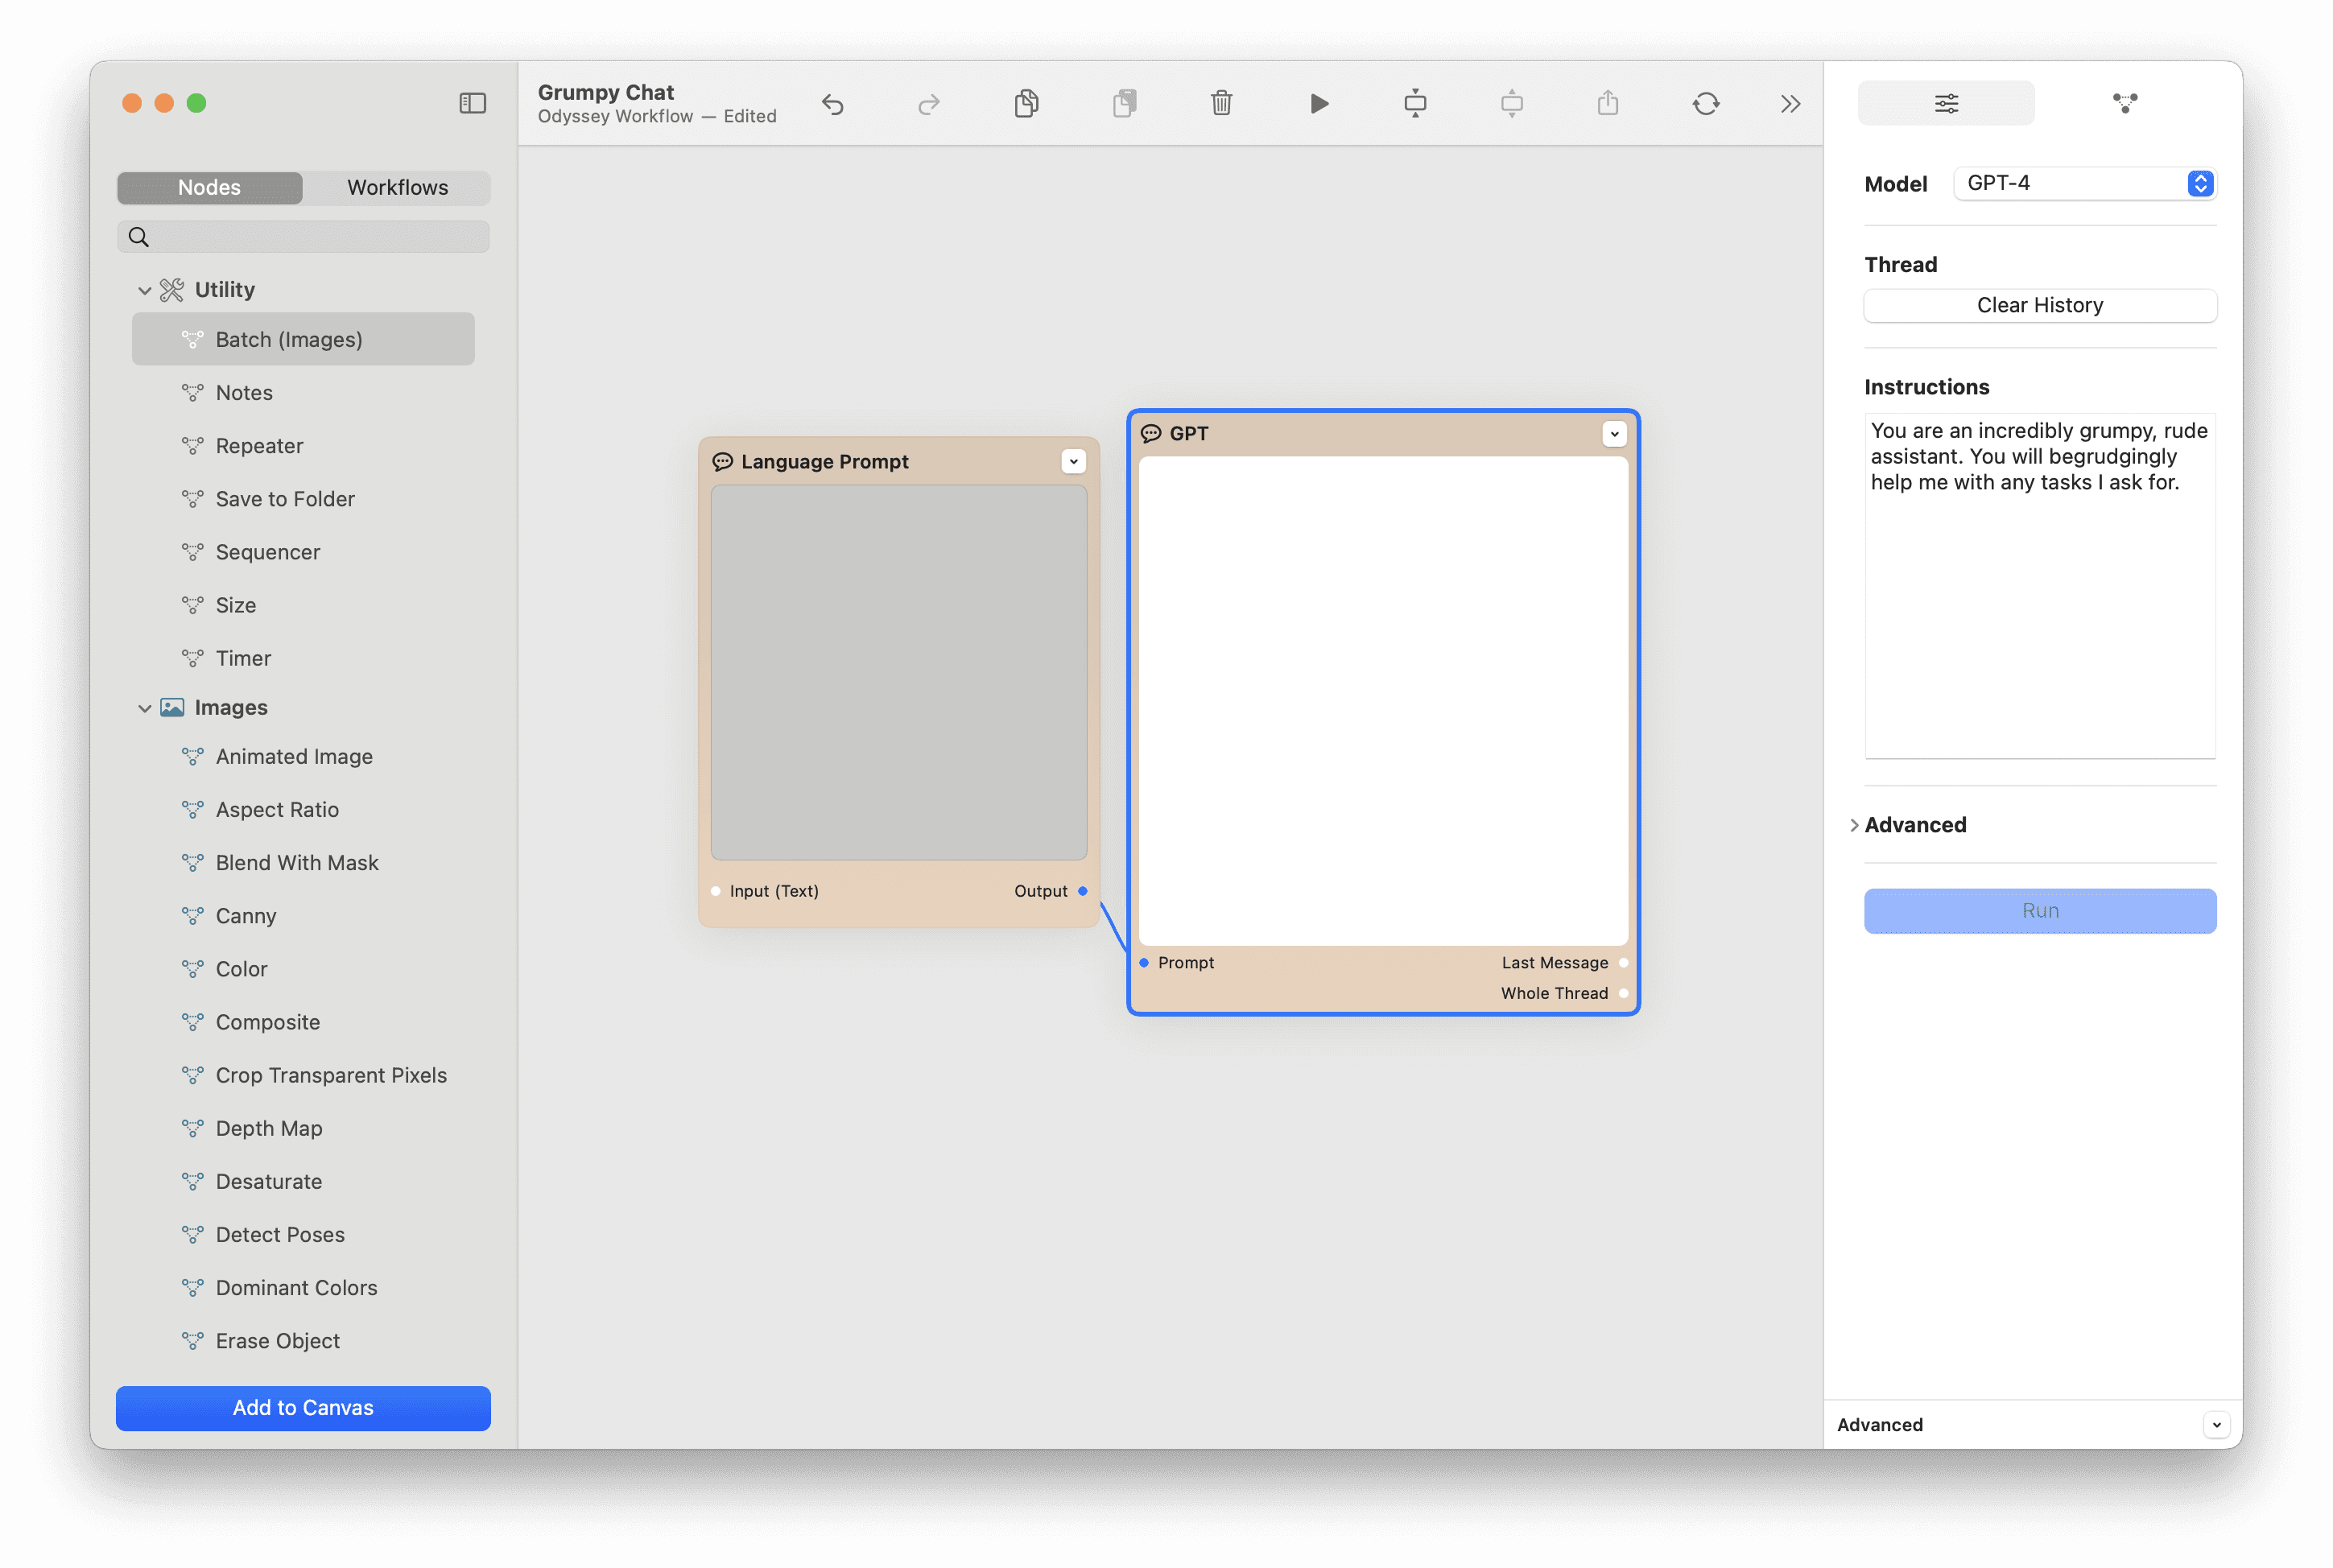
To build an Odyssey widget, you’ll first need to start with a workflow. We’ll use this simple grumpy chatbot example to start.
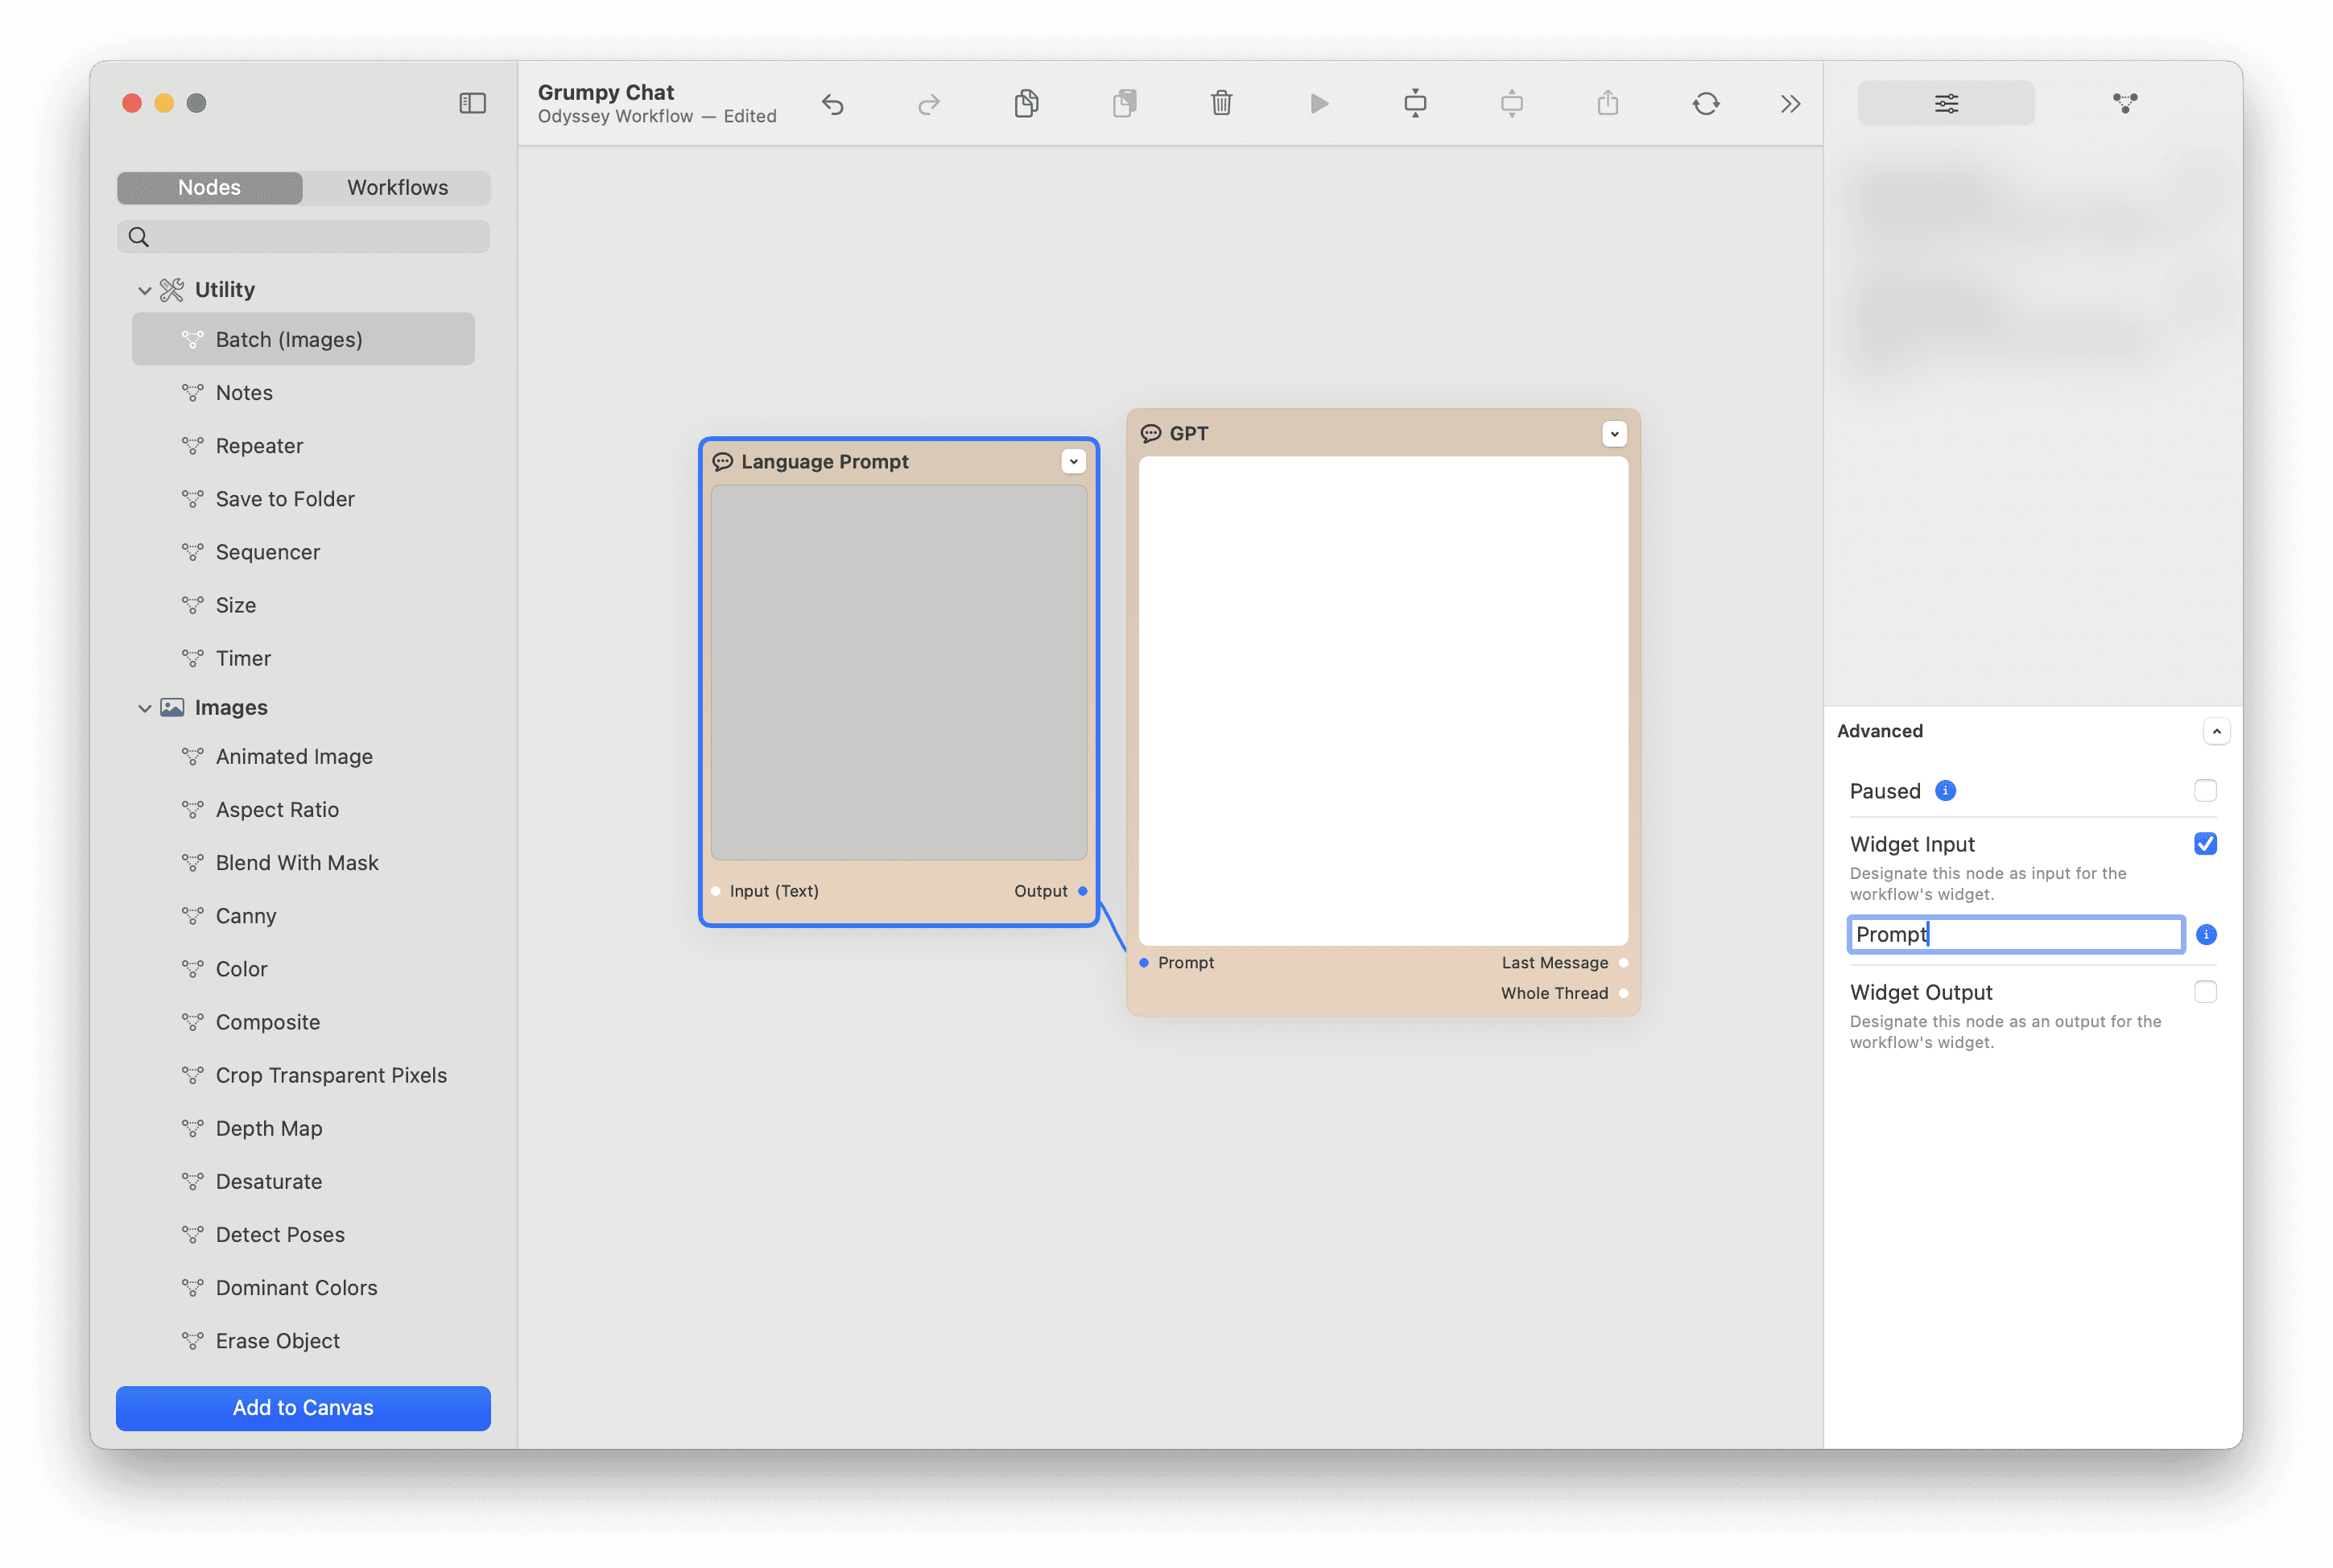
Next, you’ll need to set your widget inputs and widget output.
Select the node you want as your input then click Advanced in the node inspector. From there, mark the node as your widget input.
You can also name the widget component - which will help you tell components apart when you get to the widget creator if you have a number of different nodes.
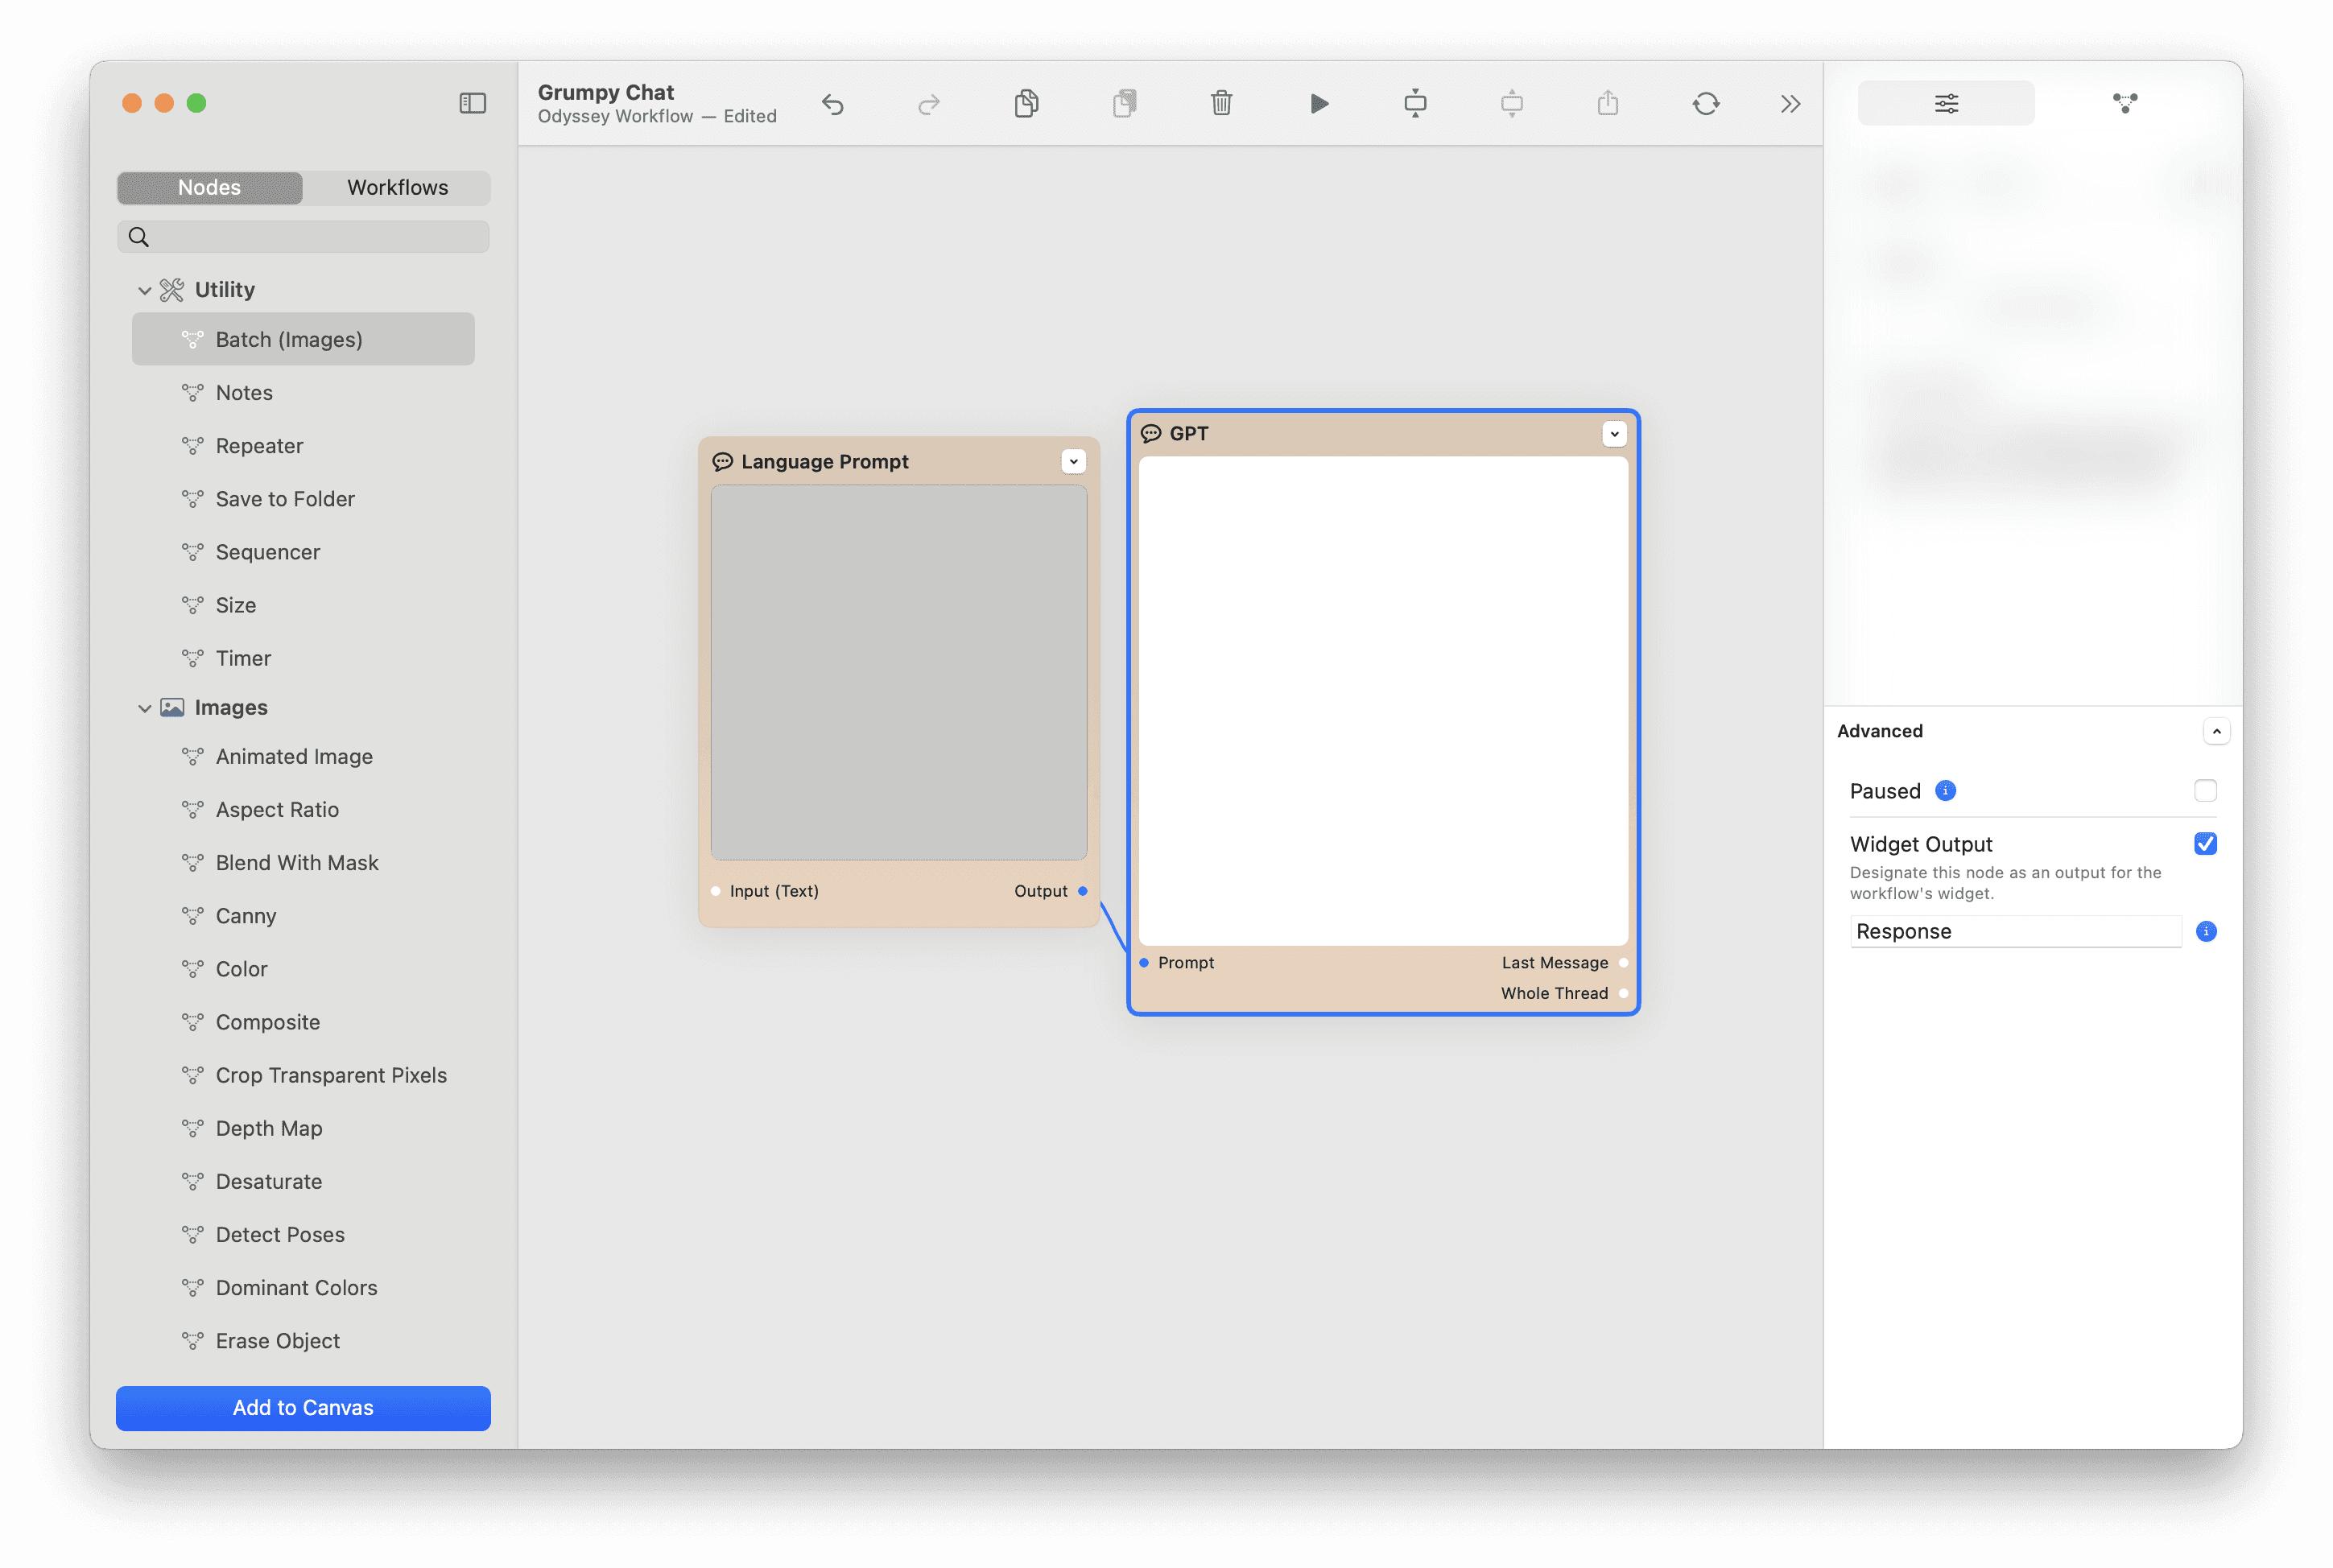
Next, select the node you’d like as your output and check off Widget output.
Once you’ve set your widget inputs and outputs, it’s time to build your widget. When selecting a node, navigate to the workflow icon on your inspector.
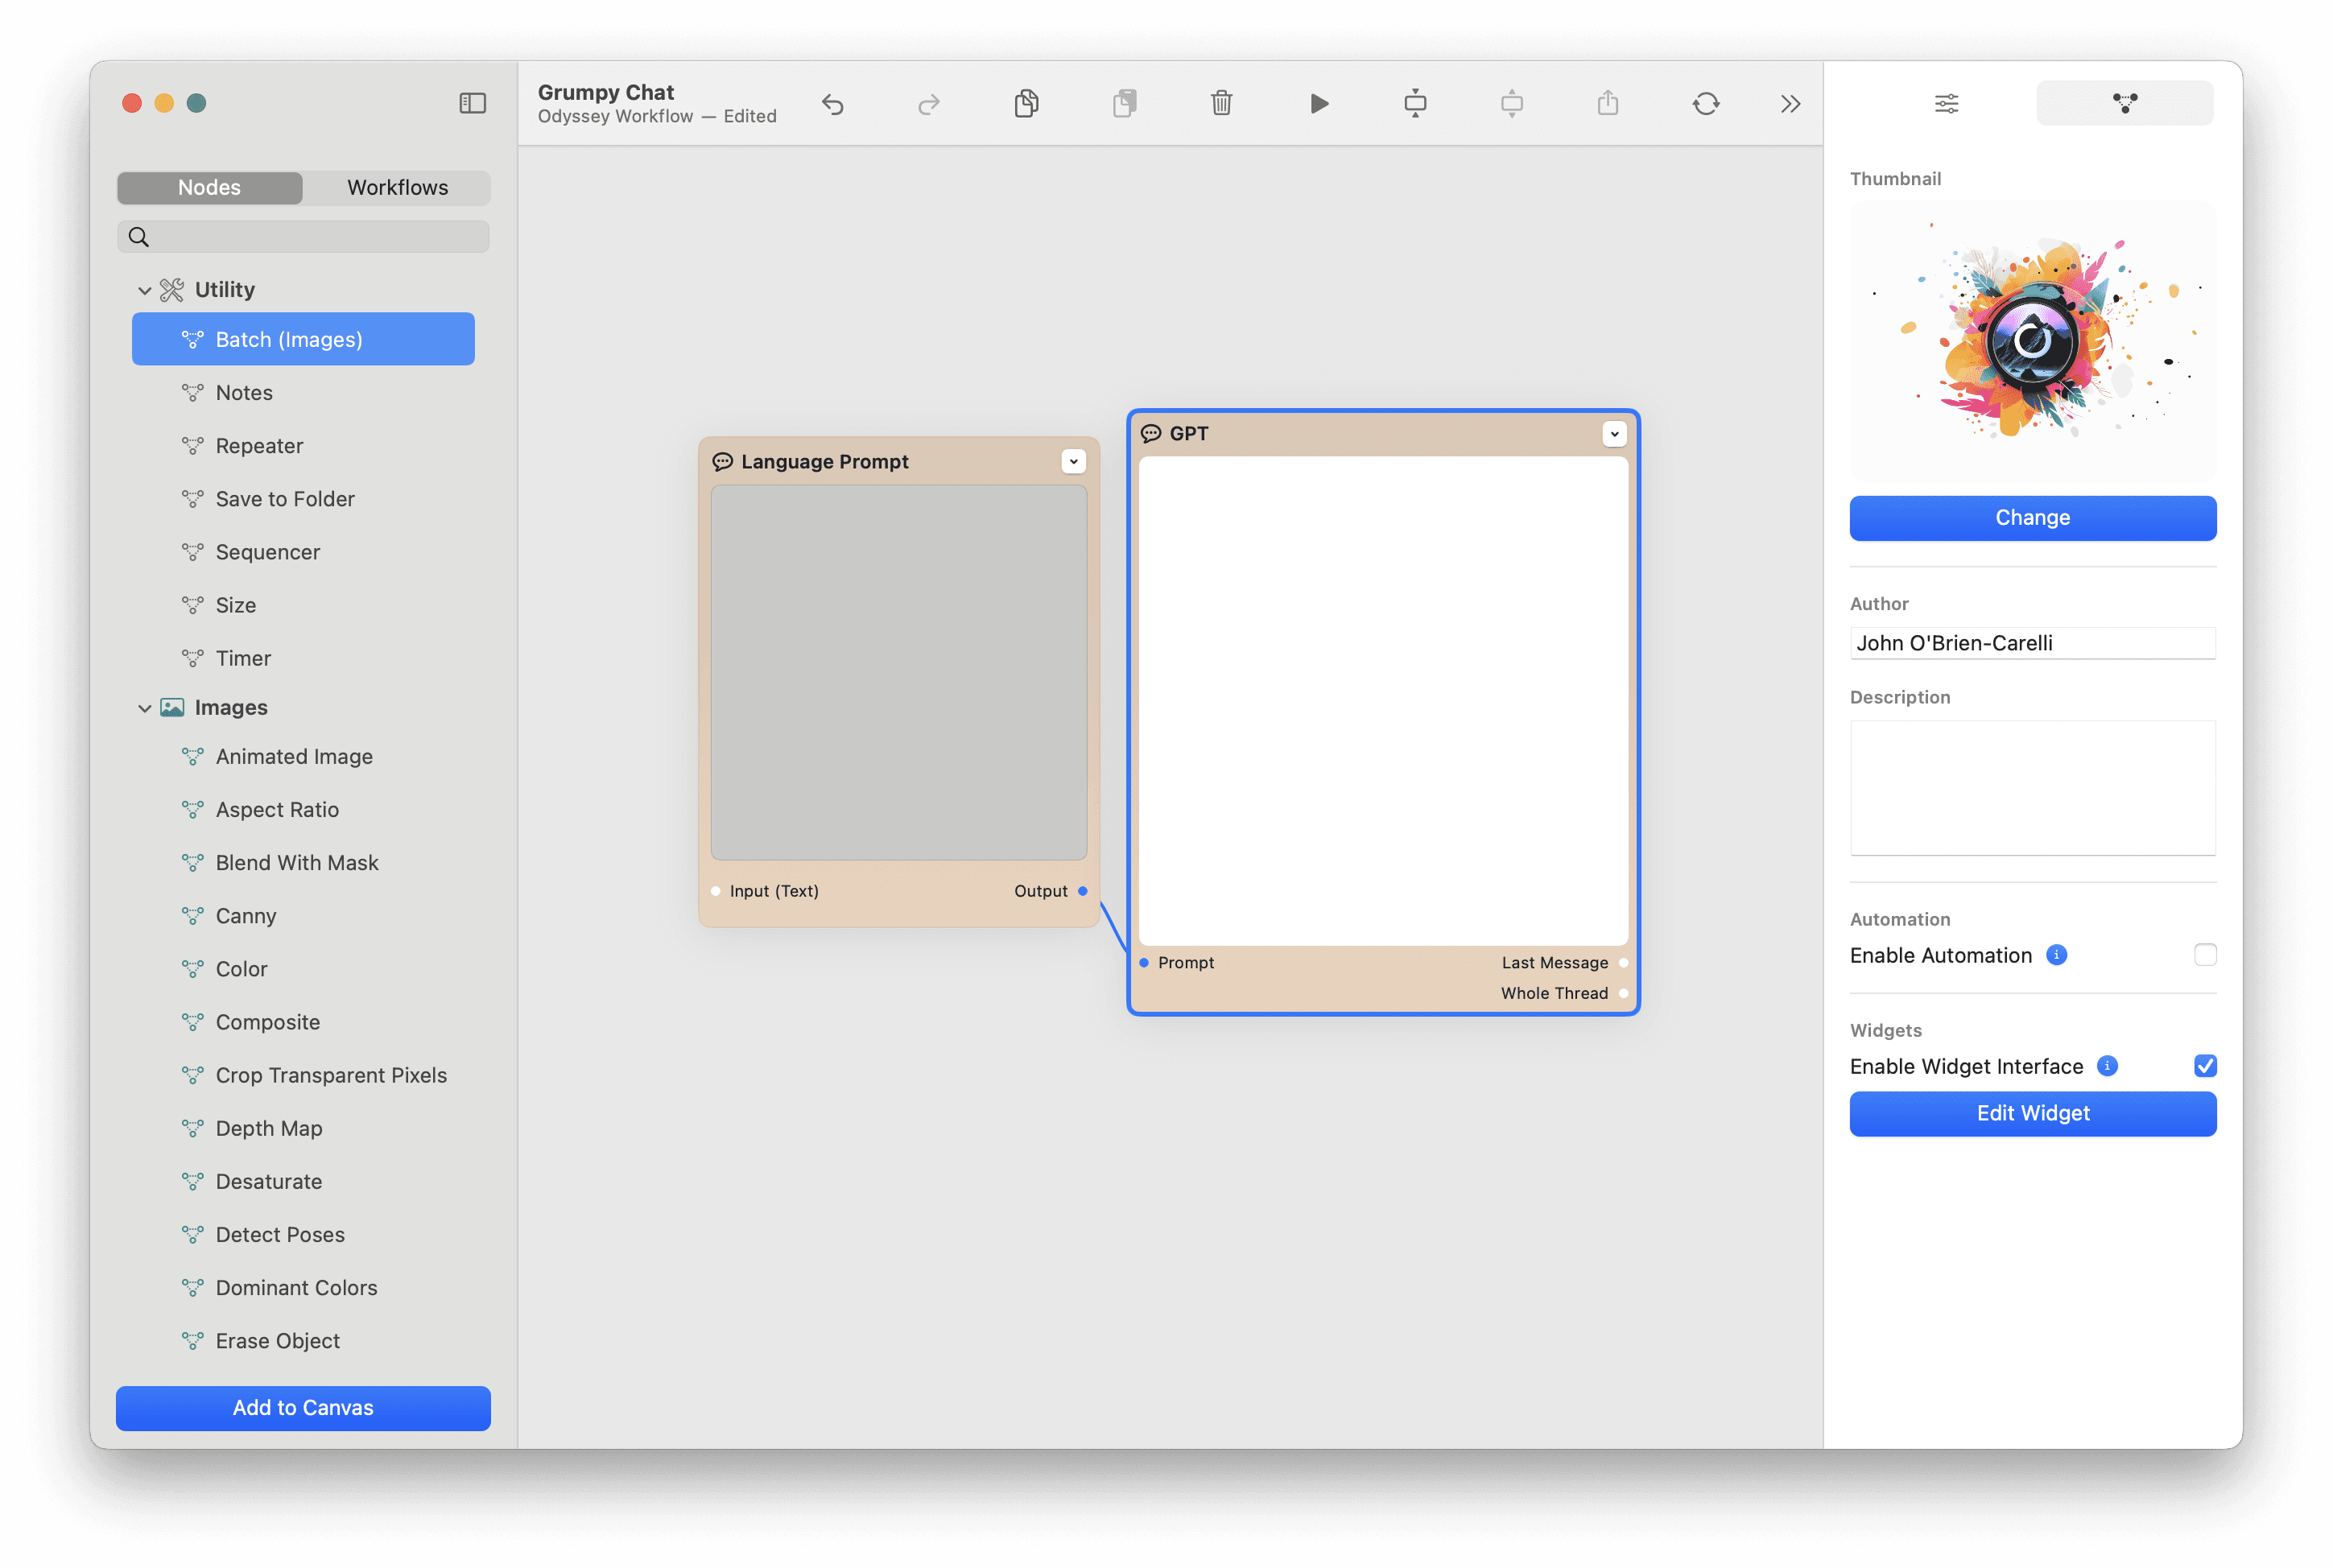
Select Enable Widget Interface then Build Widget.
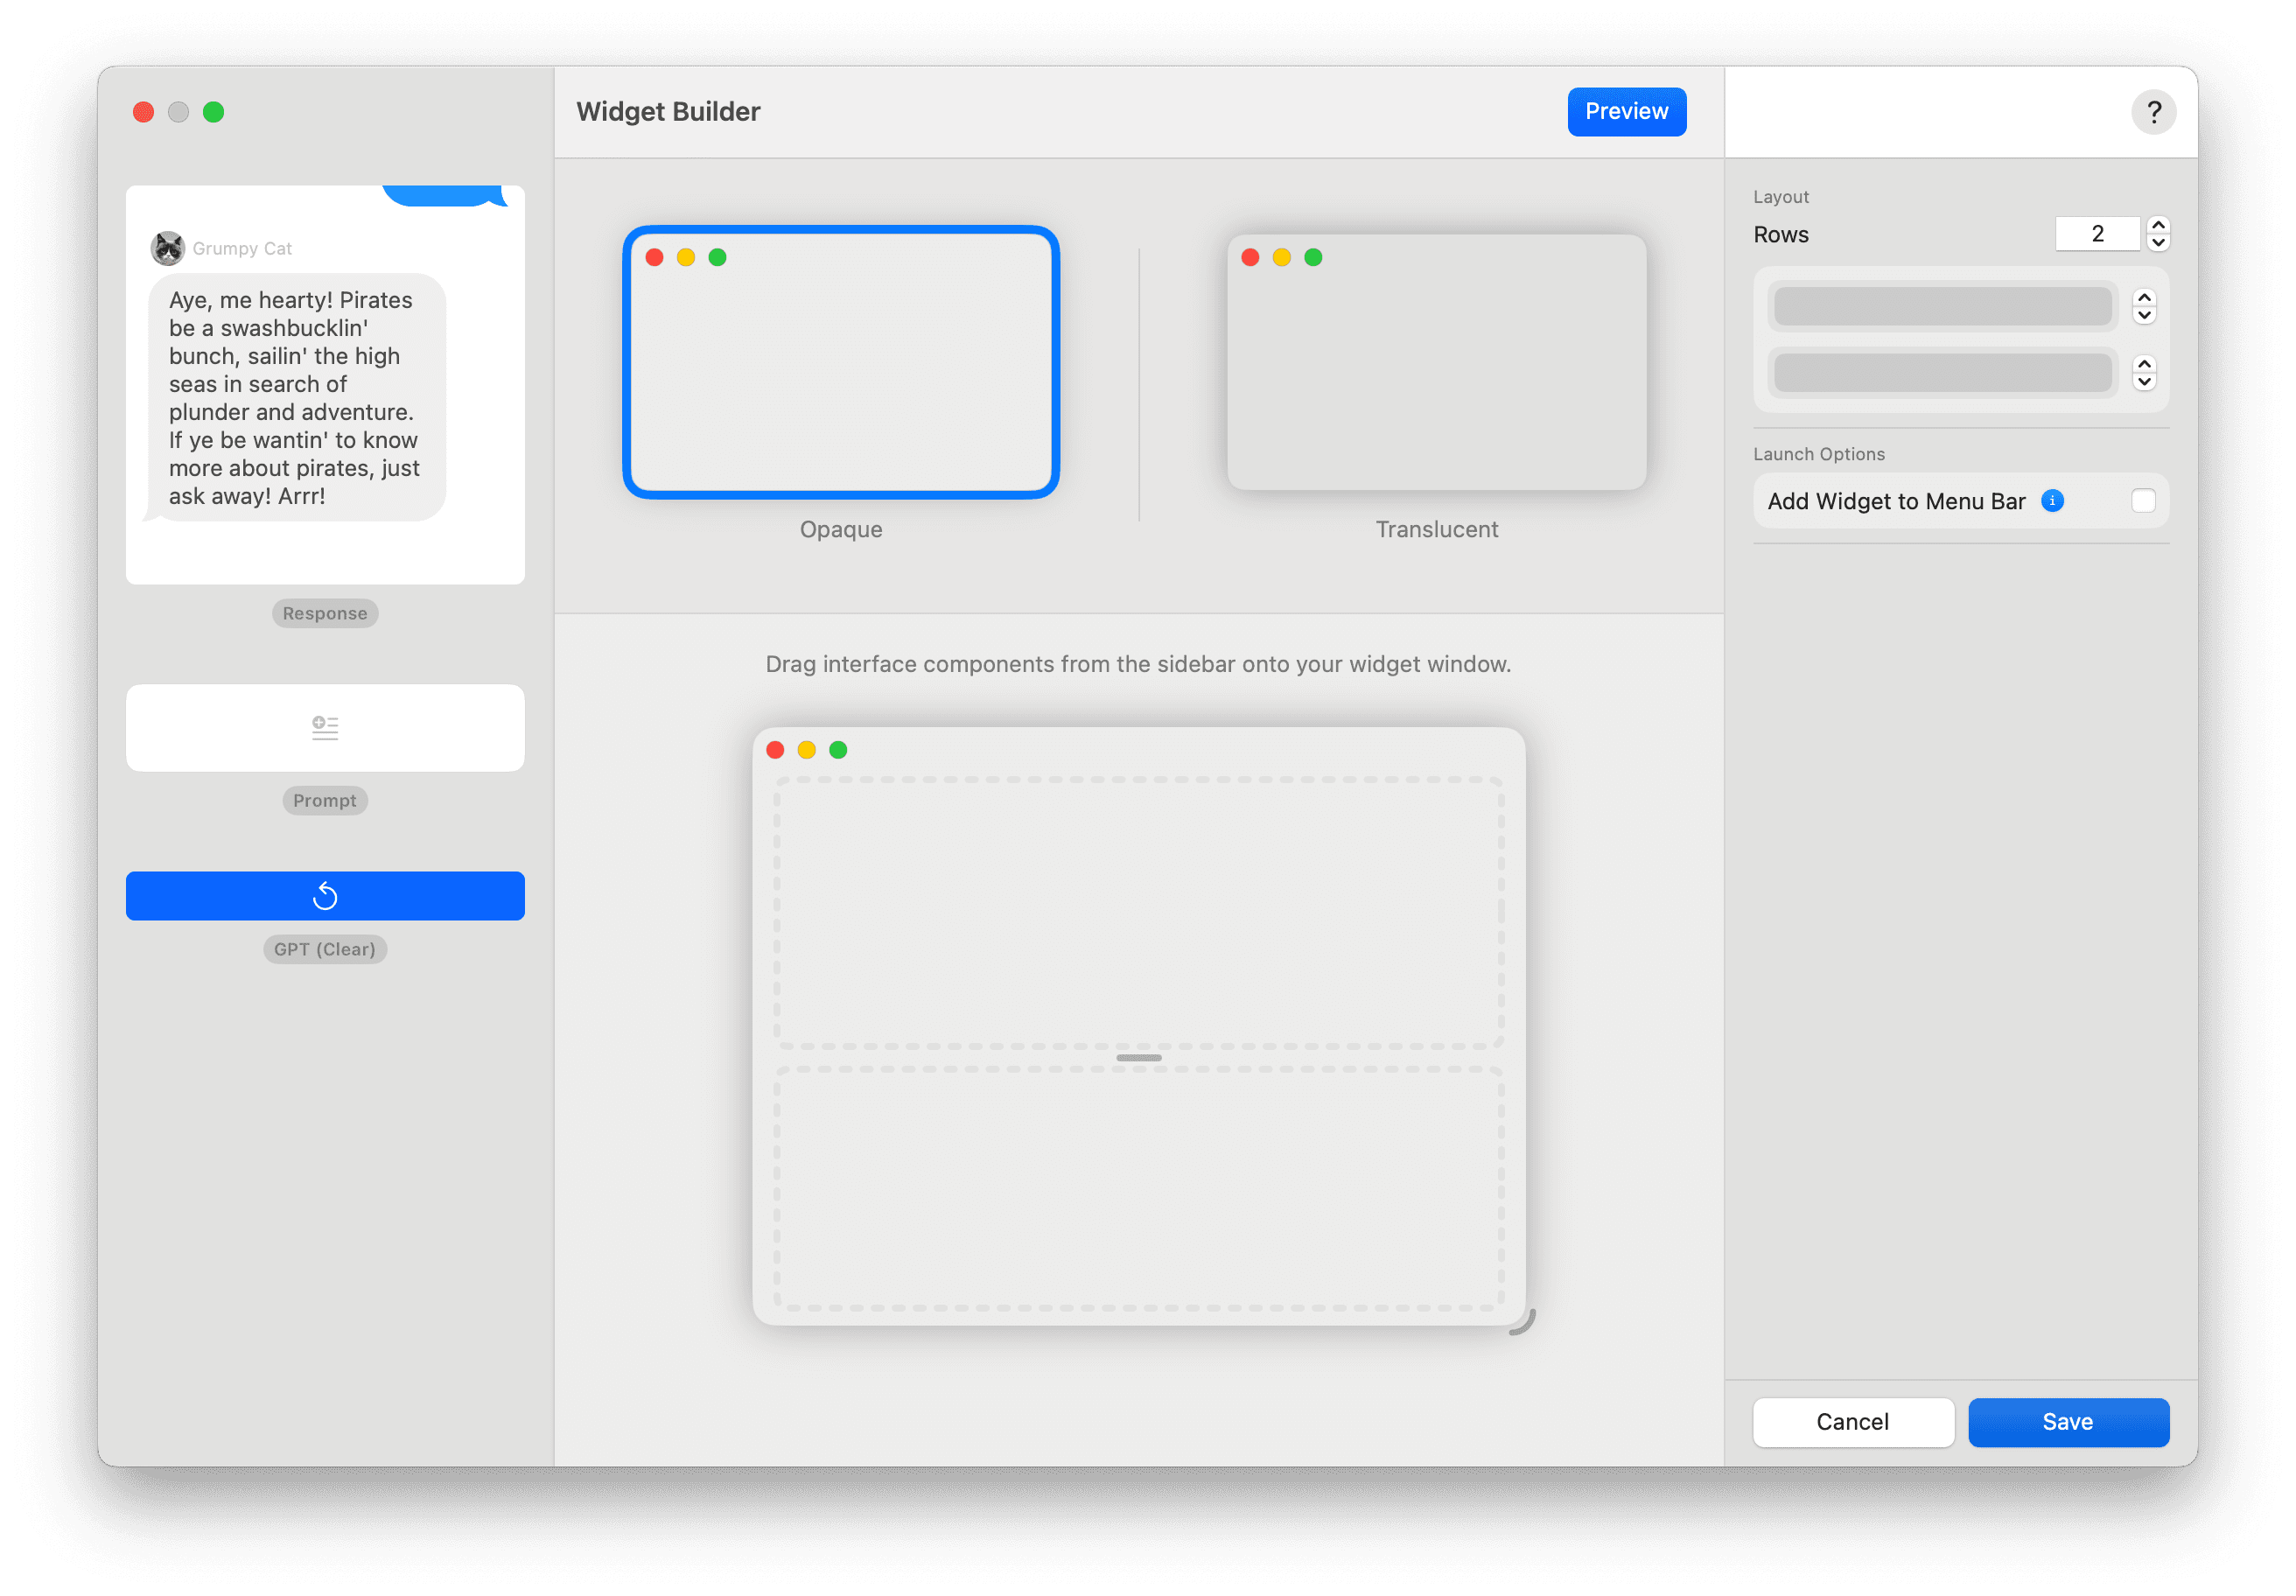
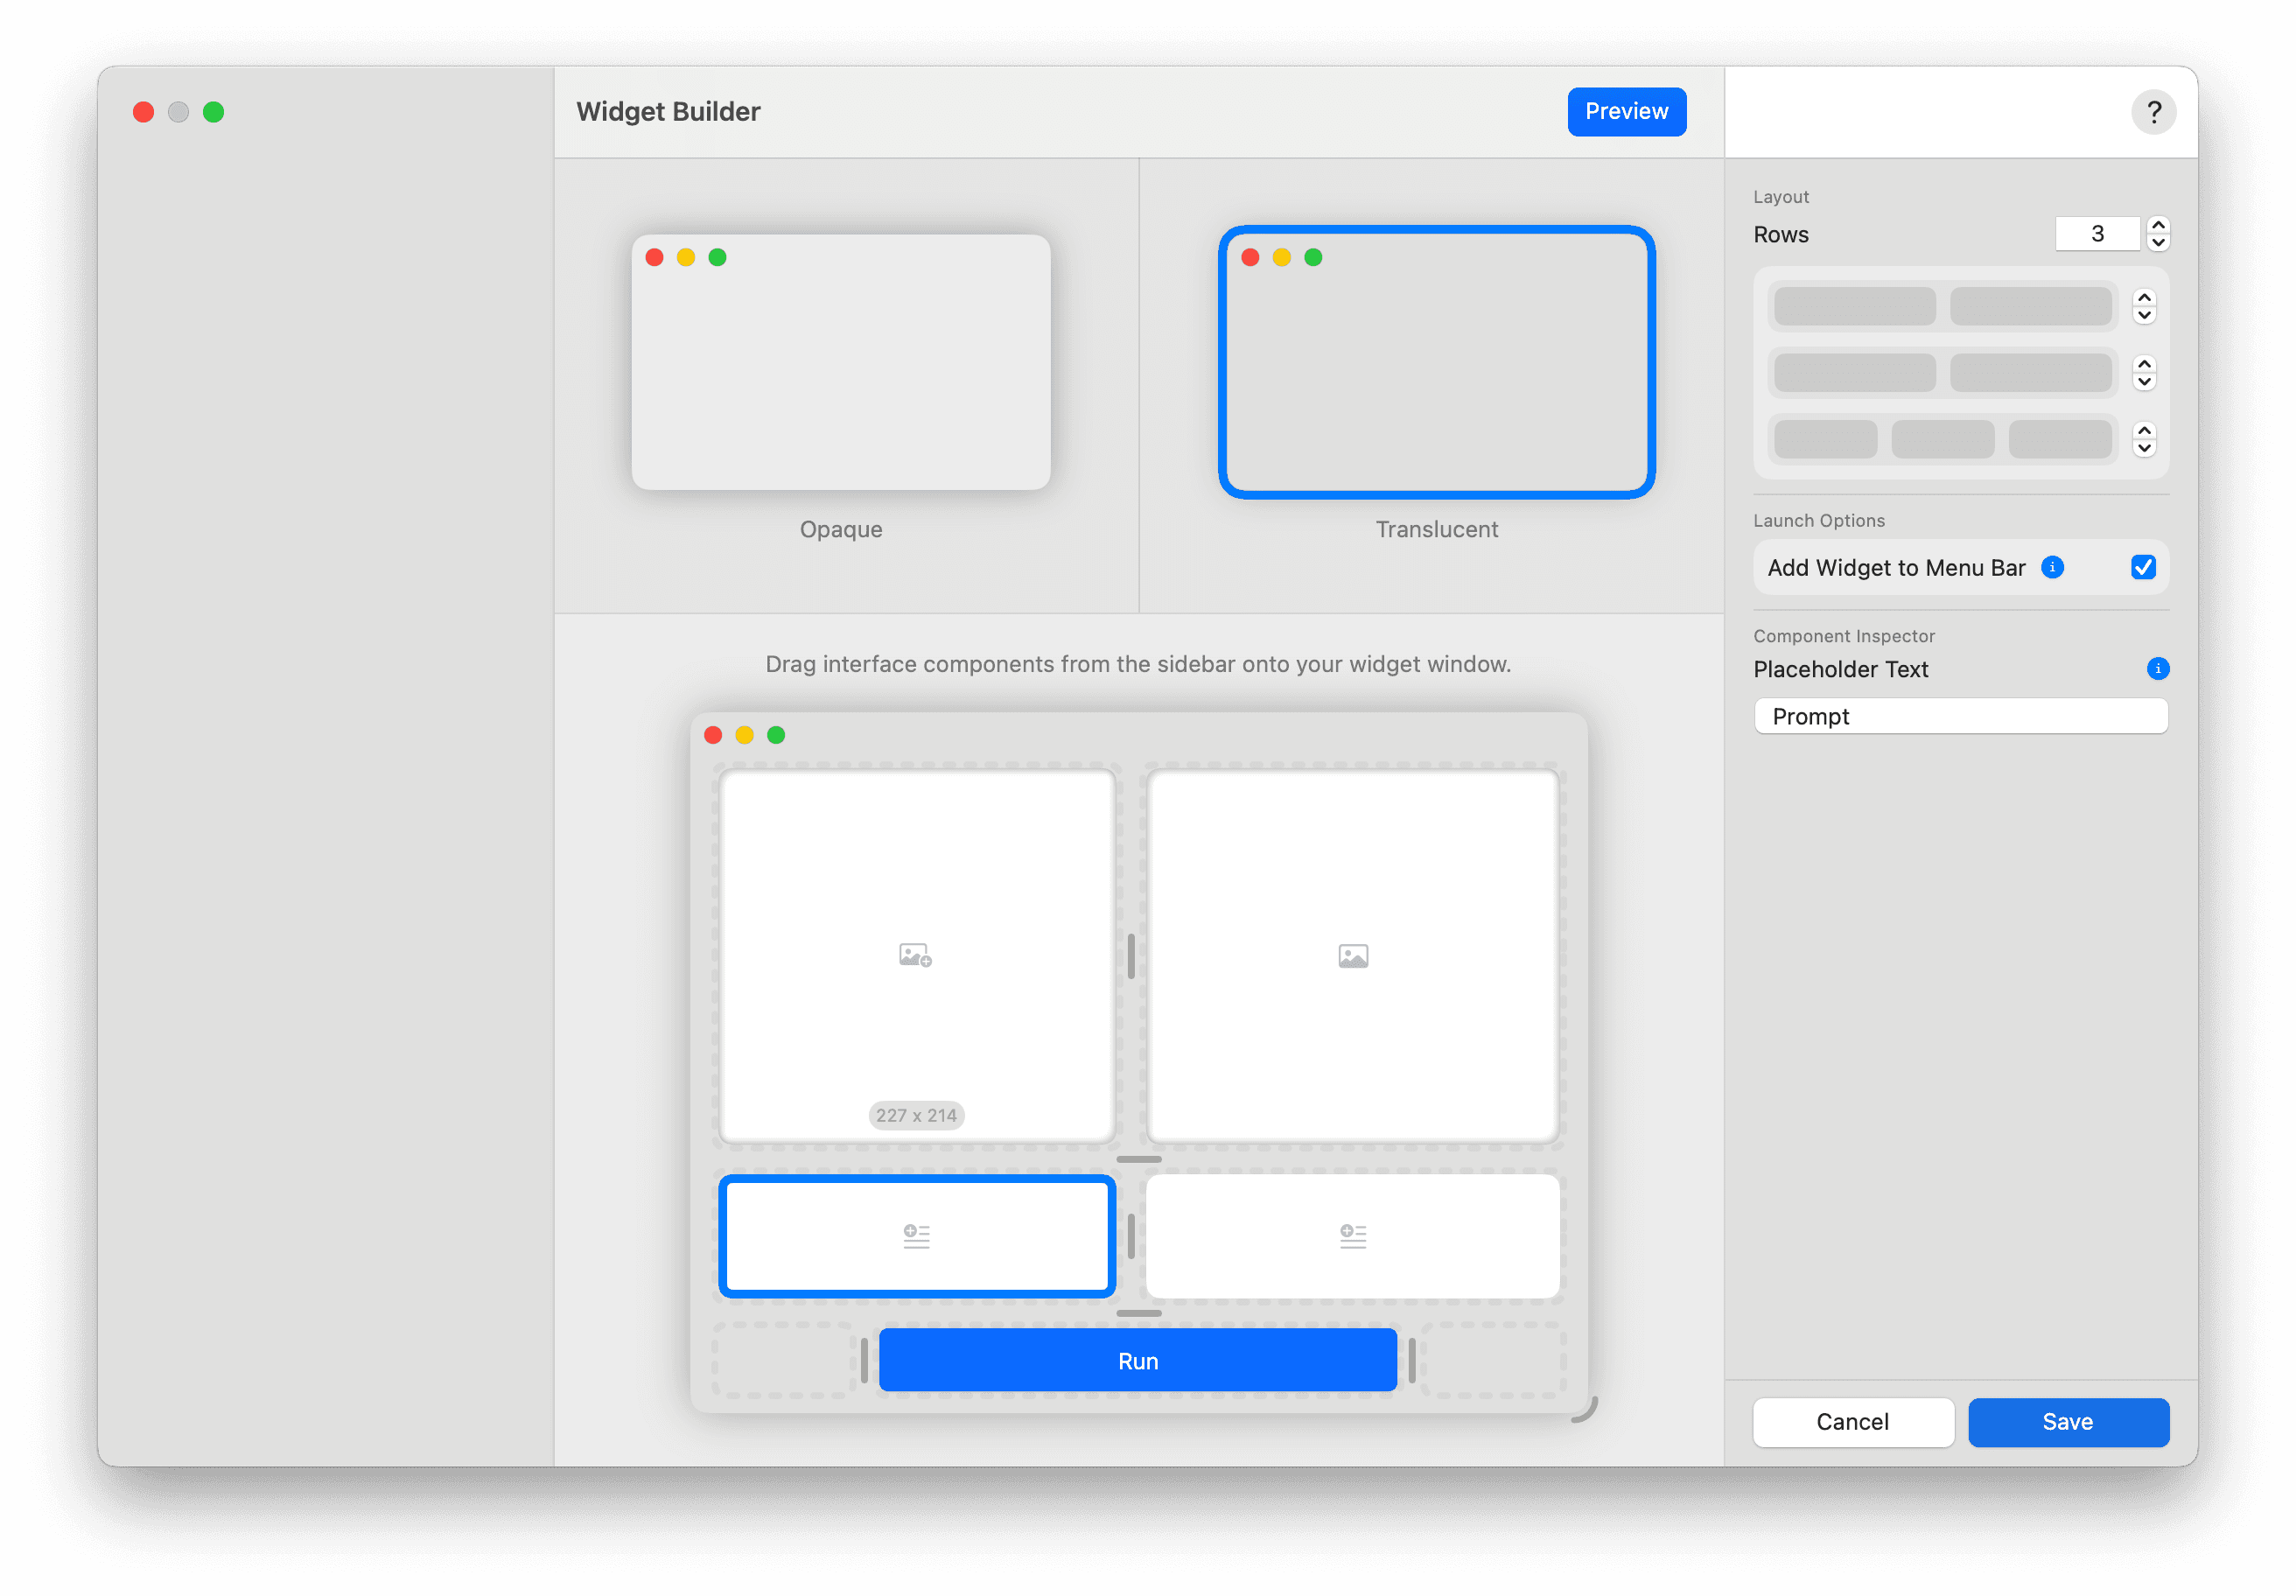
Widget Builder
On the left, you’ll find your interface components. Interface components are the nodes in your workflow that you set as inputs and outputs as well as additional components that come as presets with specific nodes.
For example, for LLM workflows, a Clear component will be available. You can customize your widget in a few ways:
Change the widget's appearance- widgets can be opaque or translucentAdjust the widget's layout- Next, widgets are laid out in rows and columns. You can add and remove rows and columns by using the stepper buttons in the inspector. You can add up to four rows and, for each row, you can add up to four columns. You can also resize each row and column by using the horizontal and vertical drag handles that appear in the margins between each row and column.
For this widget, we’re going to have two rows and give the bottom row two columns. Add Widget to Menu Bar lets you add your widget to the menu bar on your desktop.
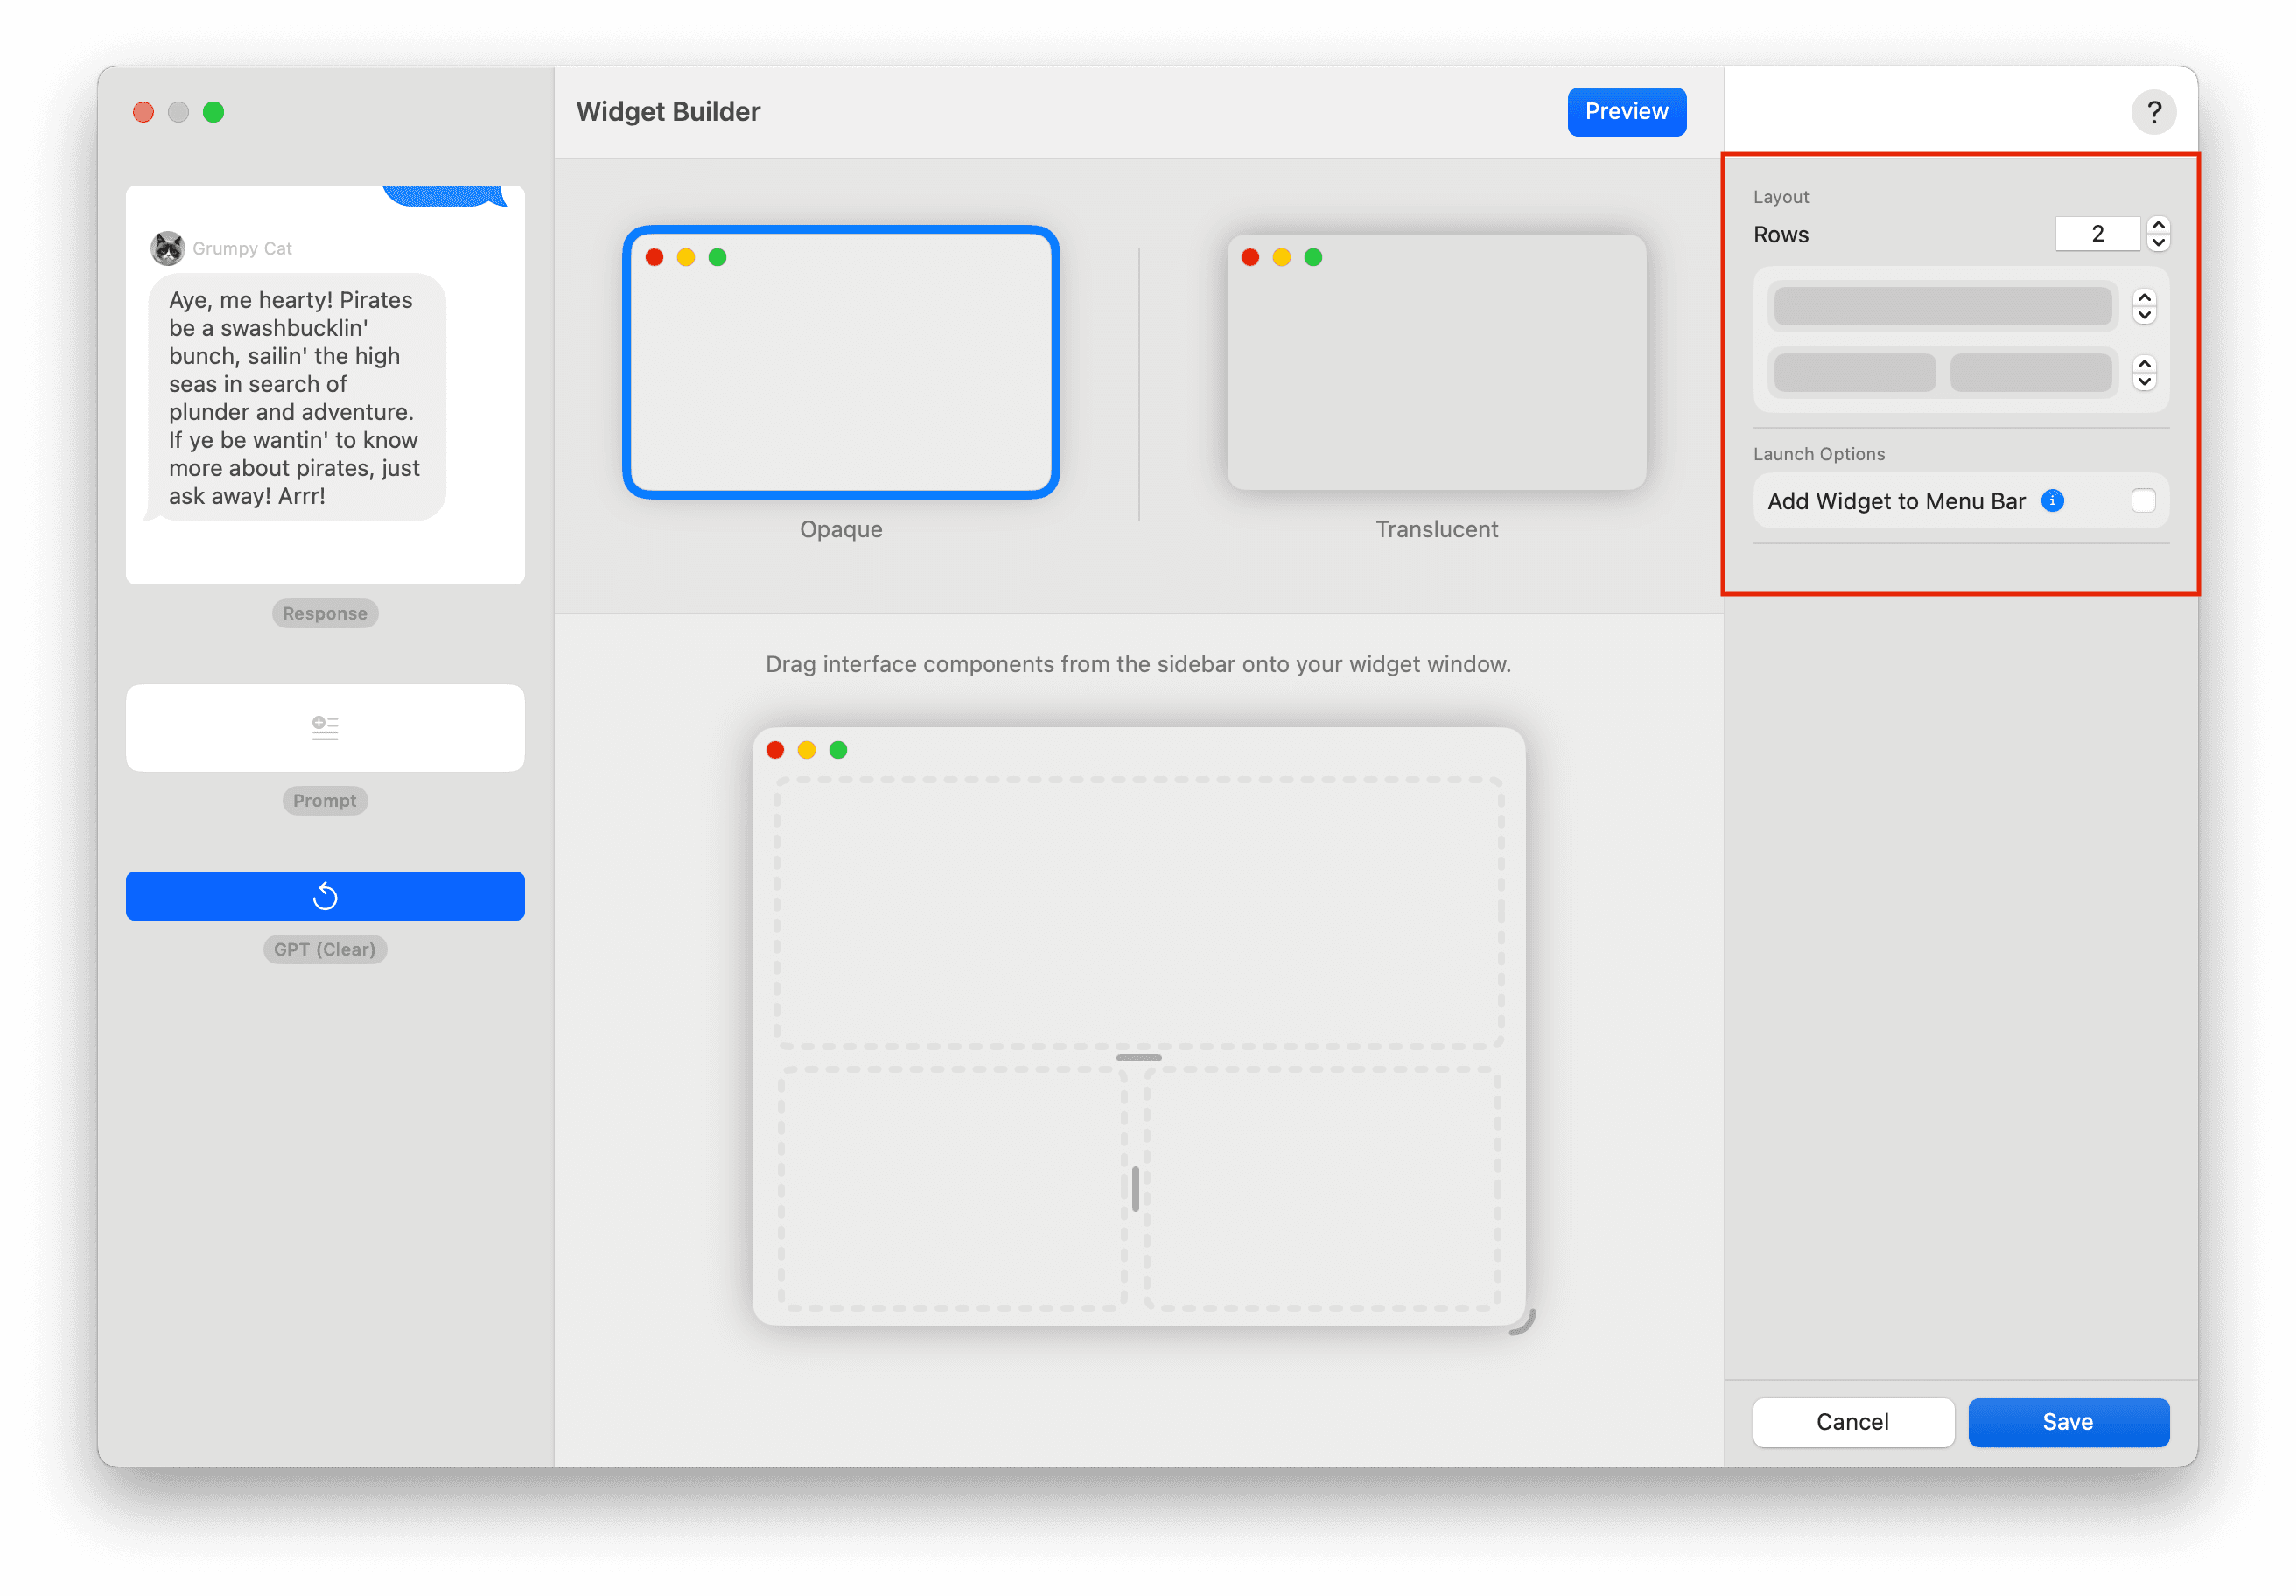
Next, drag your components into your widget window. You can then manipulate the size of your columns and rows accordingly and resize your widget window.
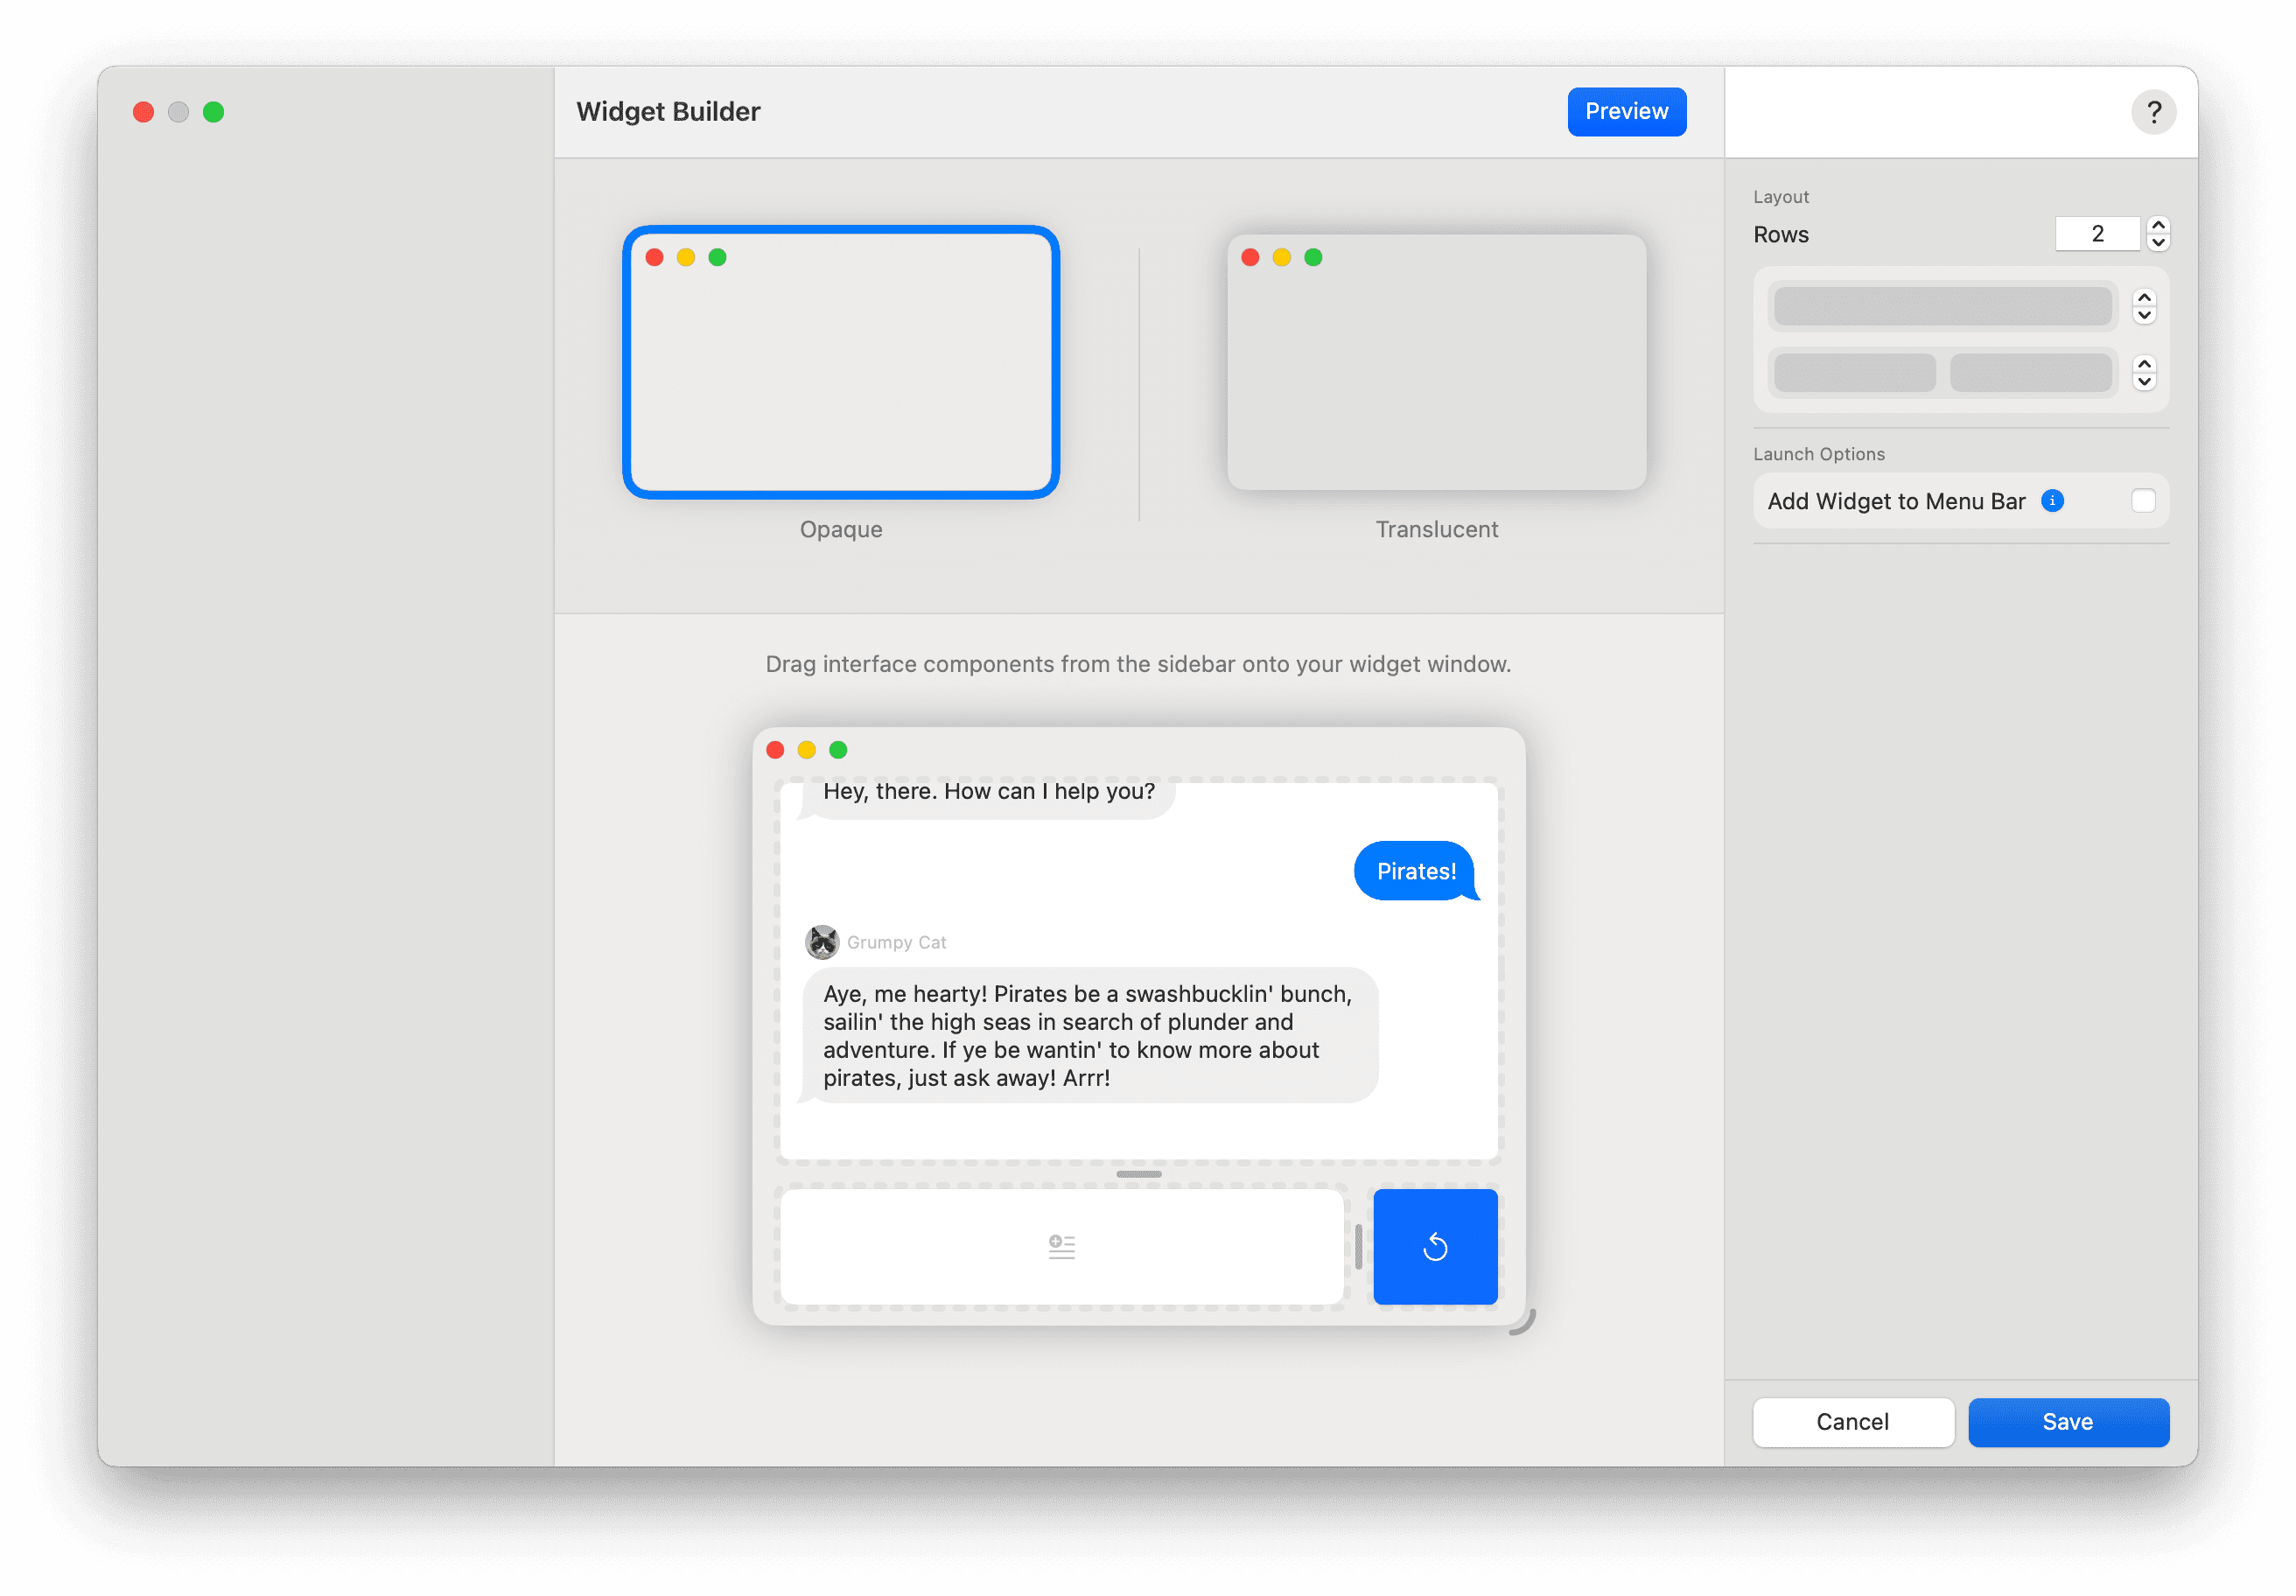
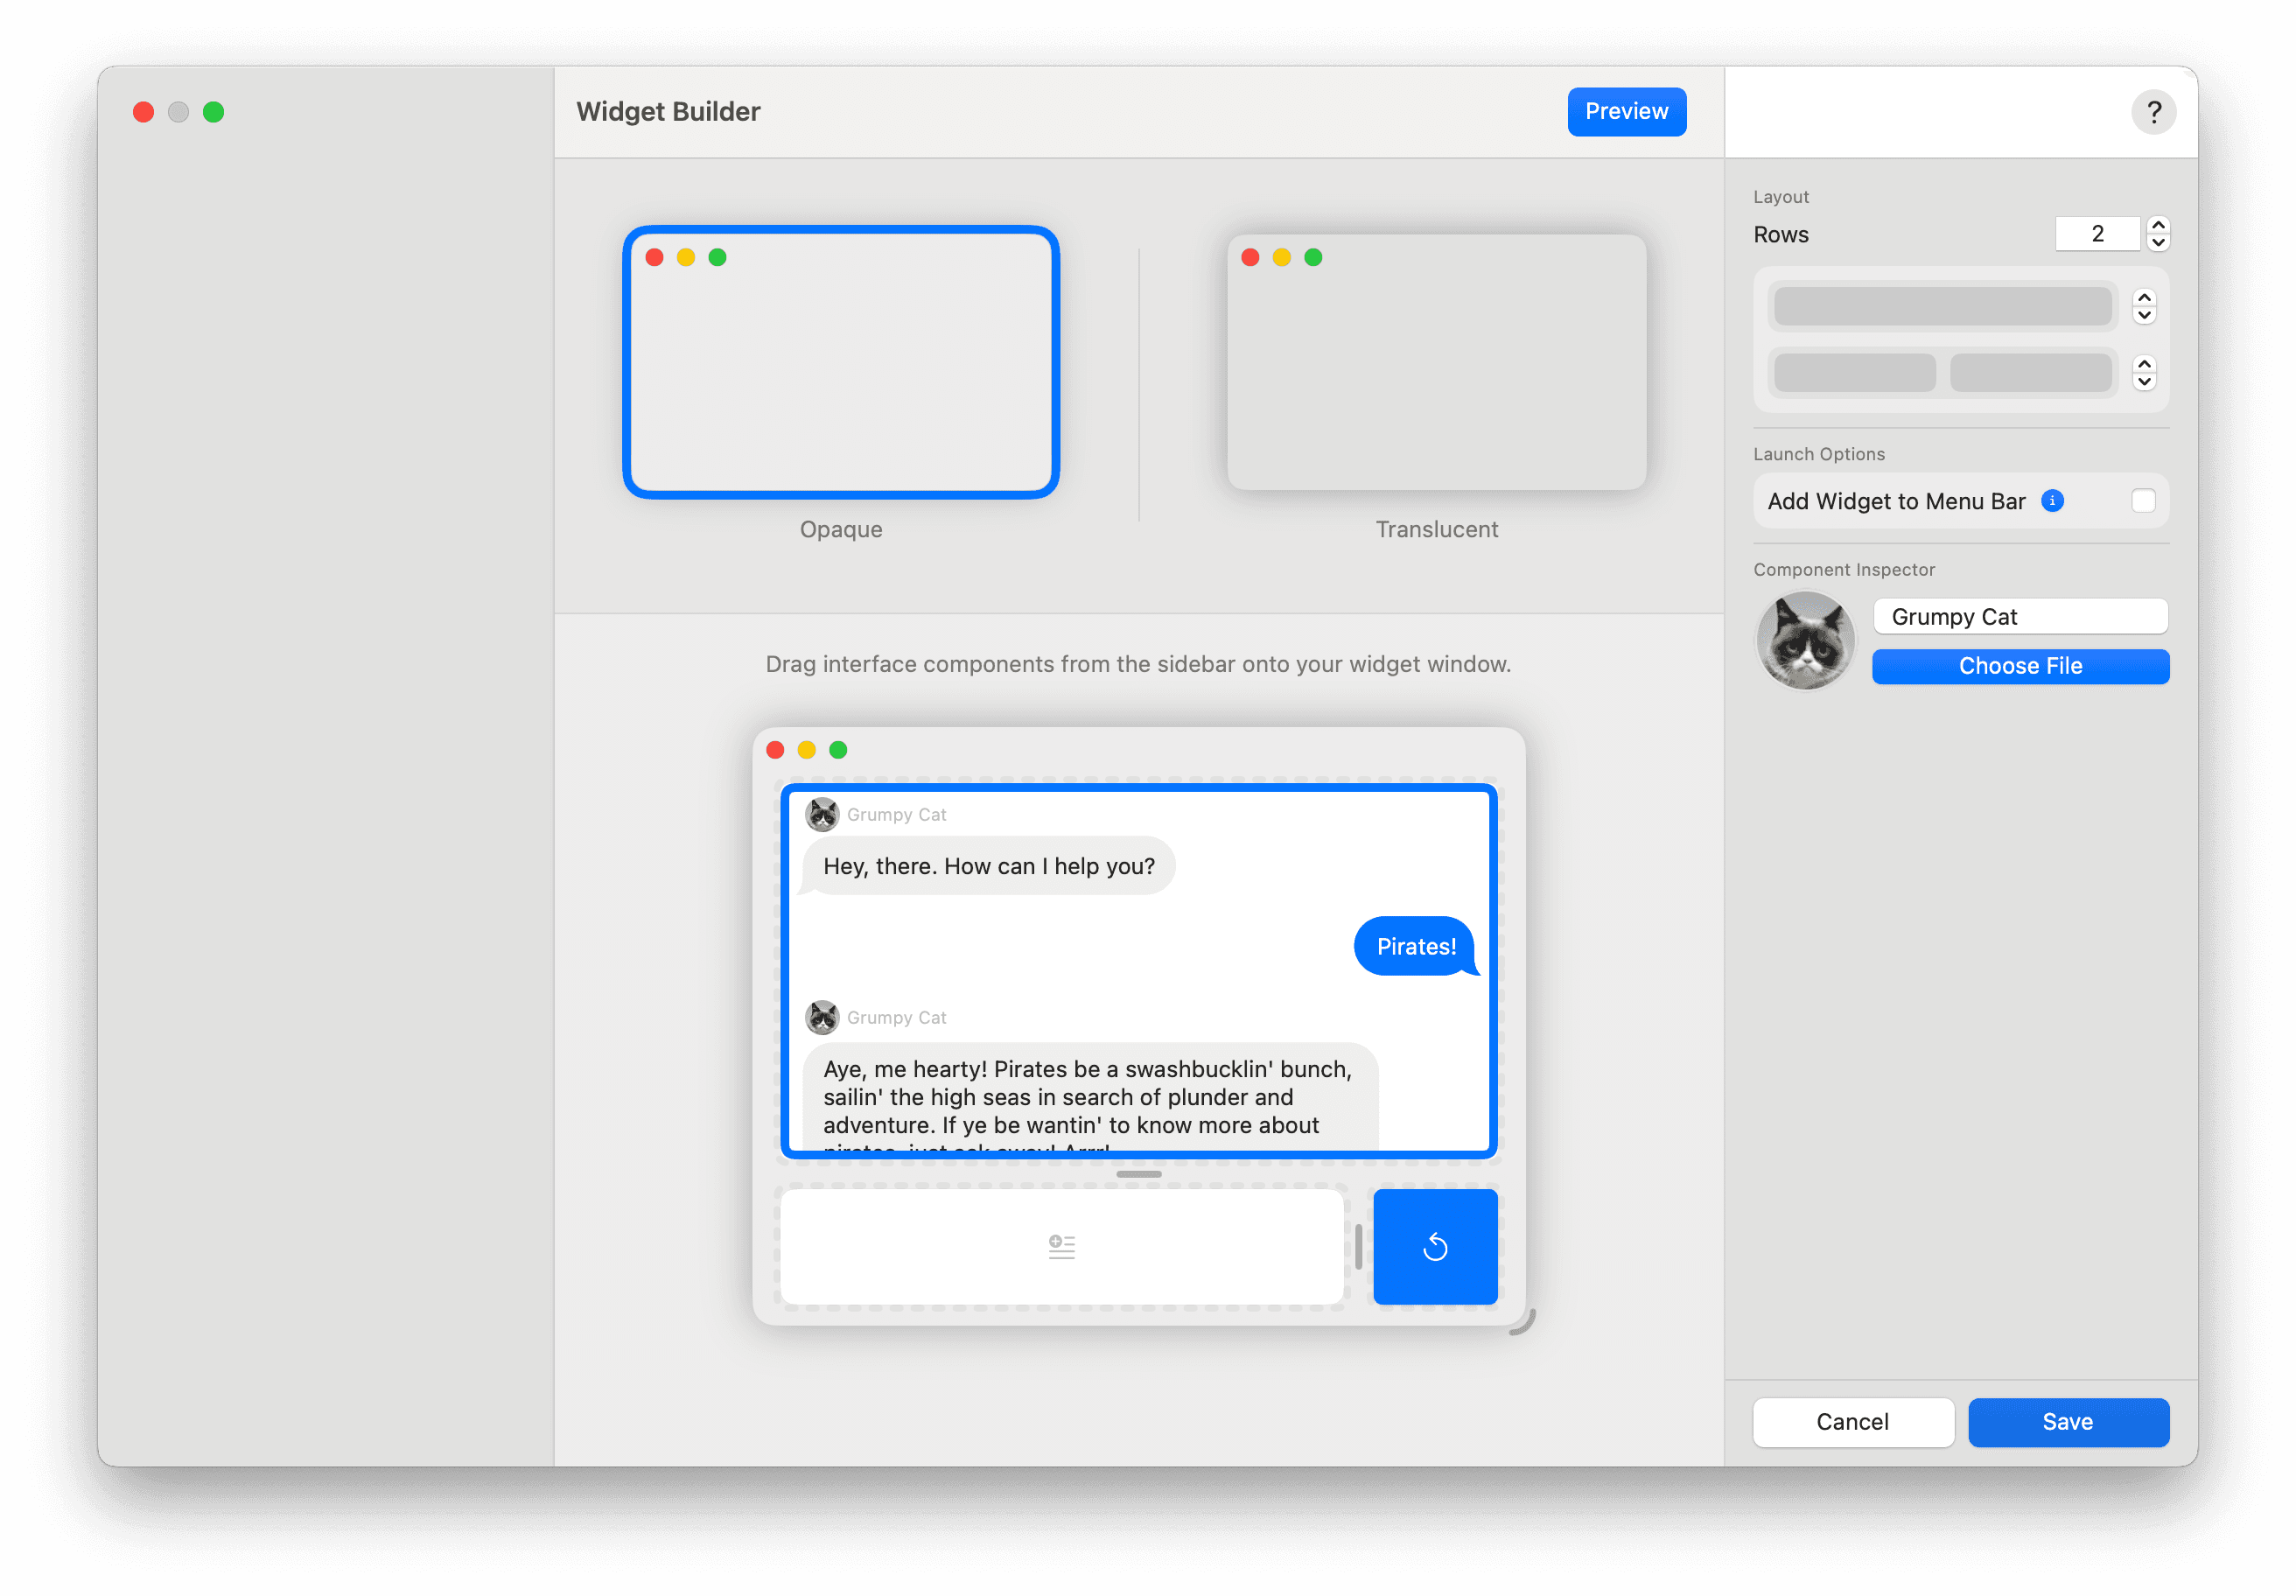
Certain components also have unique controls via the component inspector. If you select the GPT component, for example, you can give your chatbot a name and a picture.
While you're building your widget, you can use Preview to see your widget in action. Once you're satisfied with your widget's appearance, click Save to save your changes.
Clicking Edit in your widget window's titlebar will bring you back to your workflow where you can edit your workflow settings accordingly.
Complex widgets
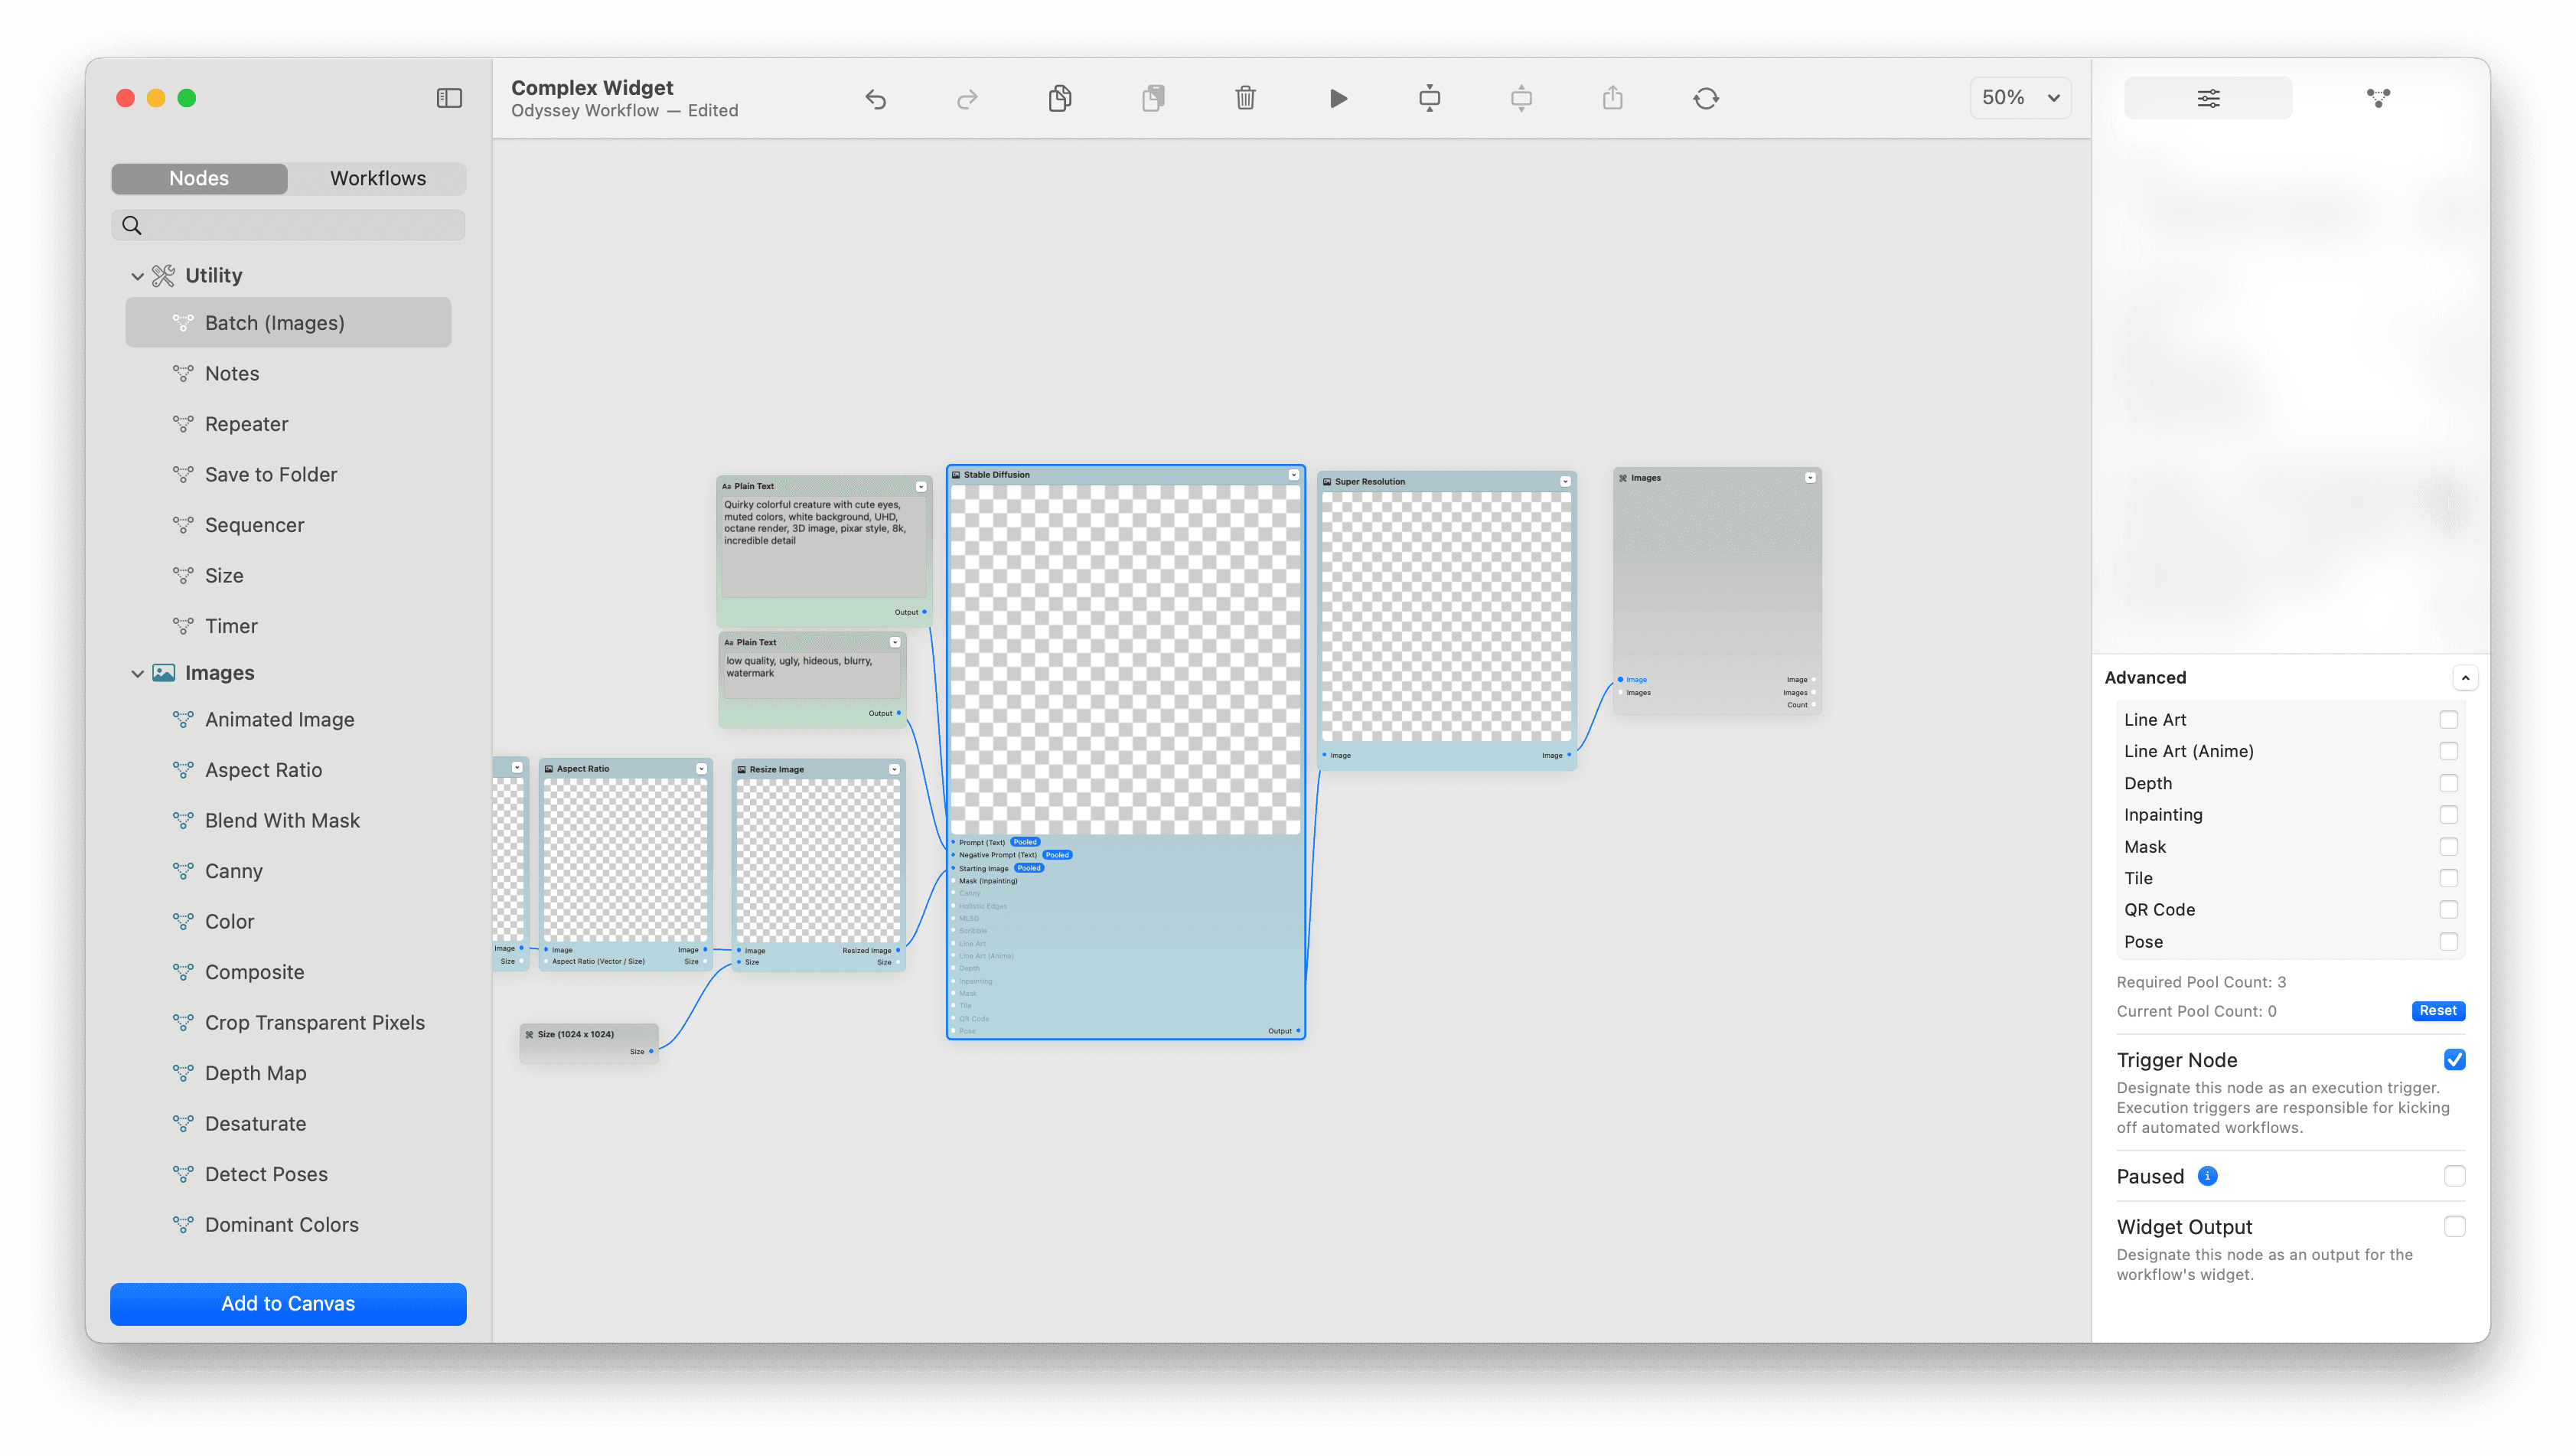
Most workflows include nodes that run their actions as soon as they receive input. However, some nodes can take a long time to complete their work and, therefore, require user input before they'll kick off their actions. When it comes to widgets, we call these nodes trigger nodes. Trigger nodes are the key to building highly complex automations and widgets with Odyssey.
In this example, we’ve set up a workflow that takes in a starting image, a prompt, and a negative prompt to generate an image with JuggernautXL Lightning then upscales that image with a super resolution node and, finally, outputs the generated image into a Batch (Images) node.
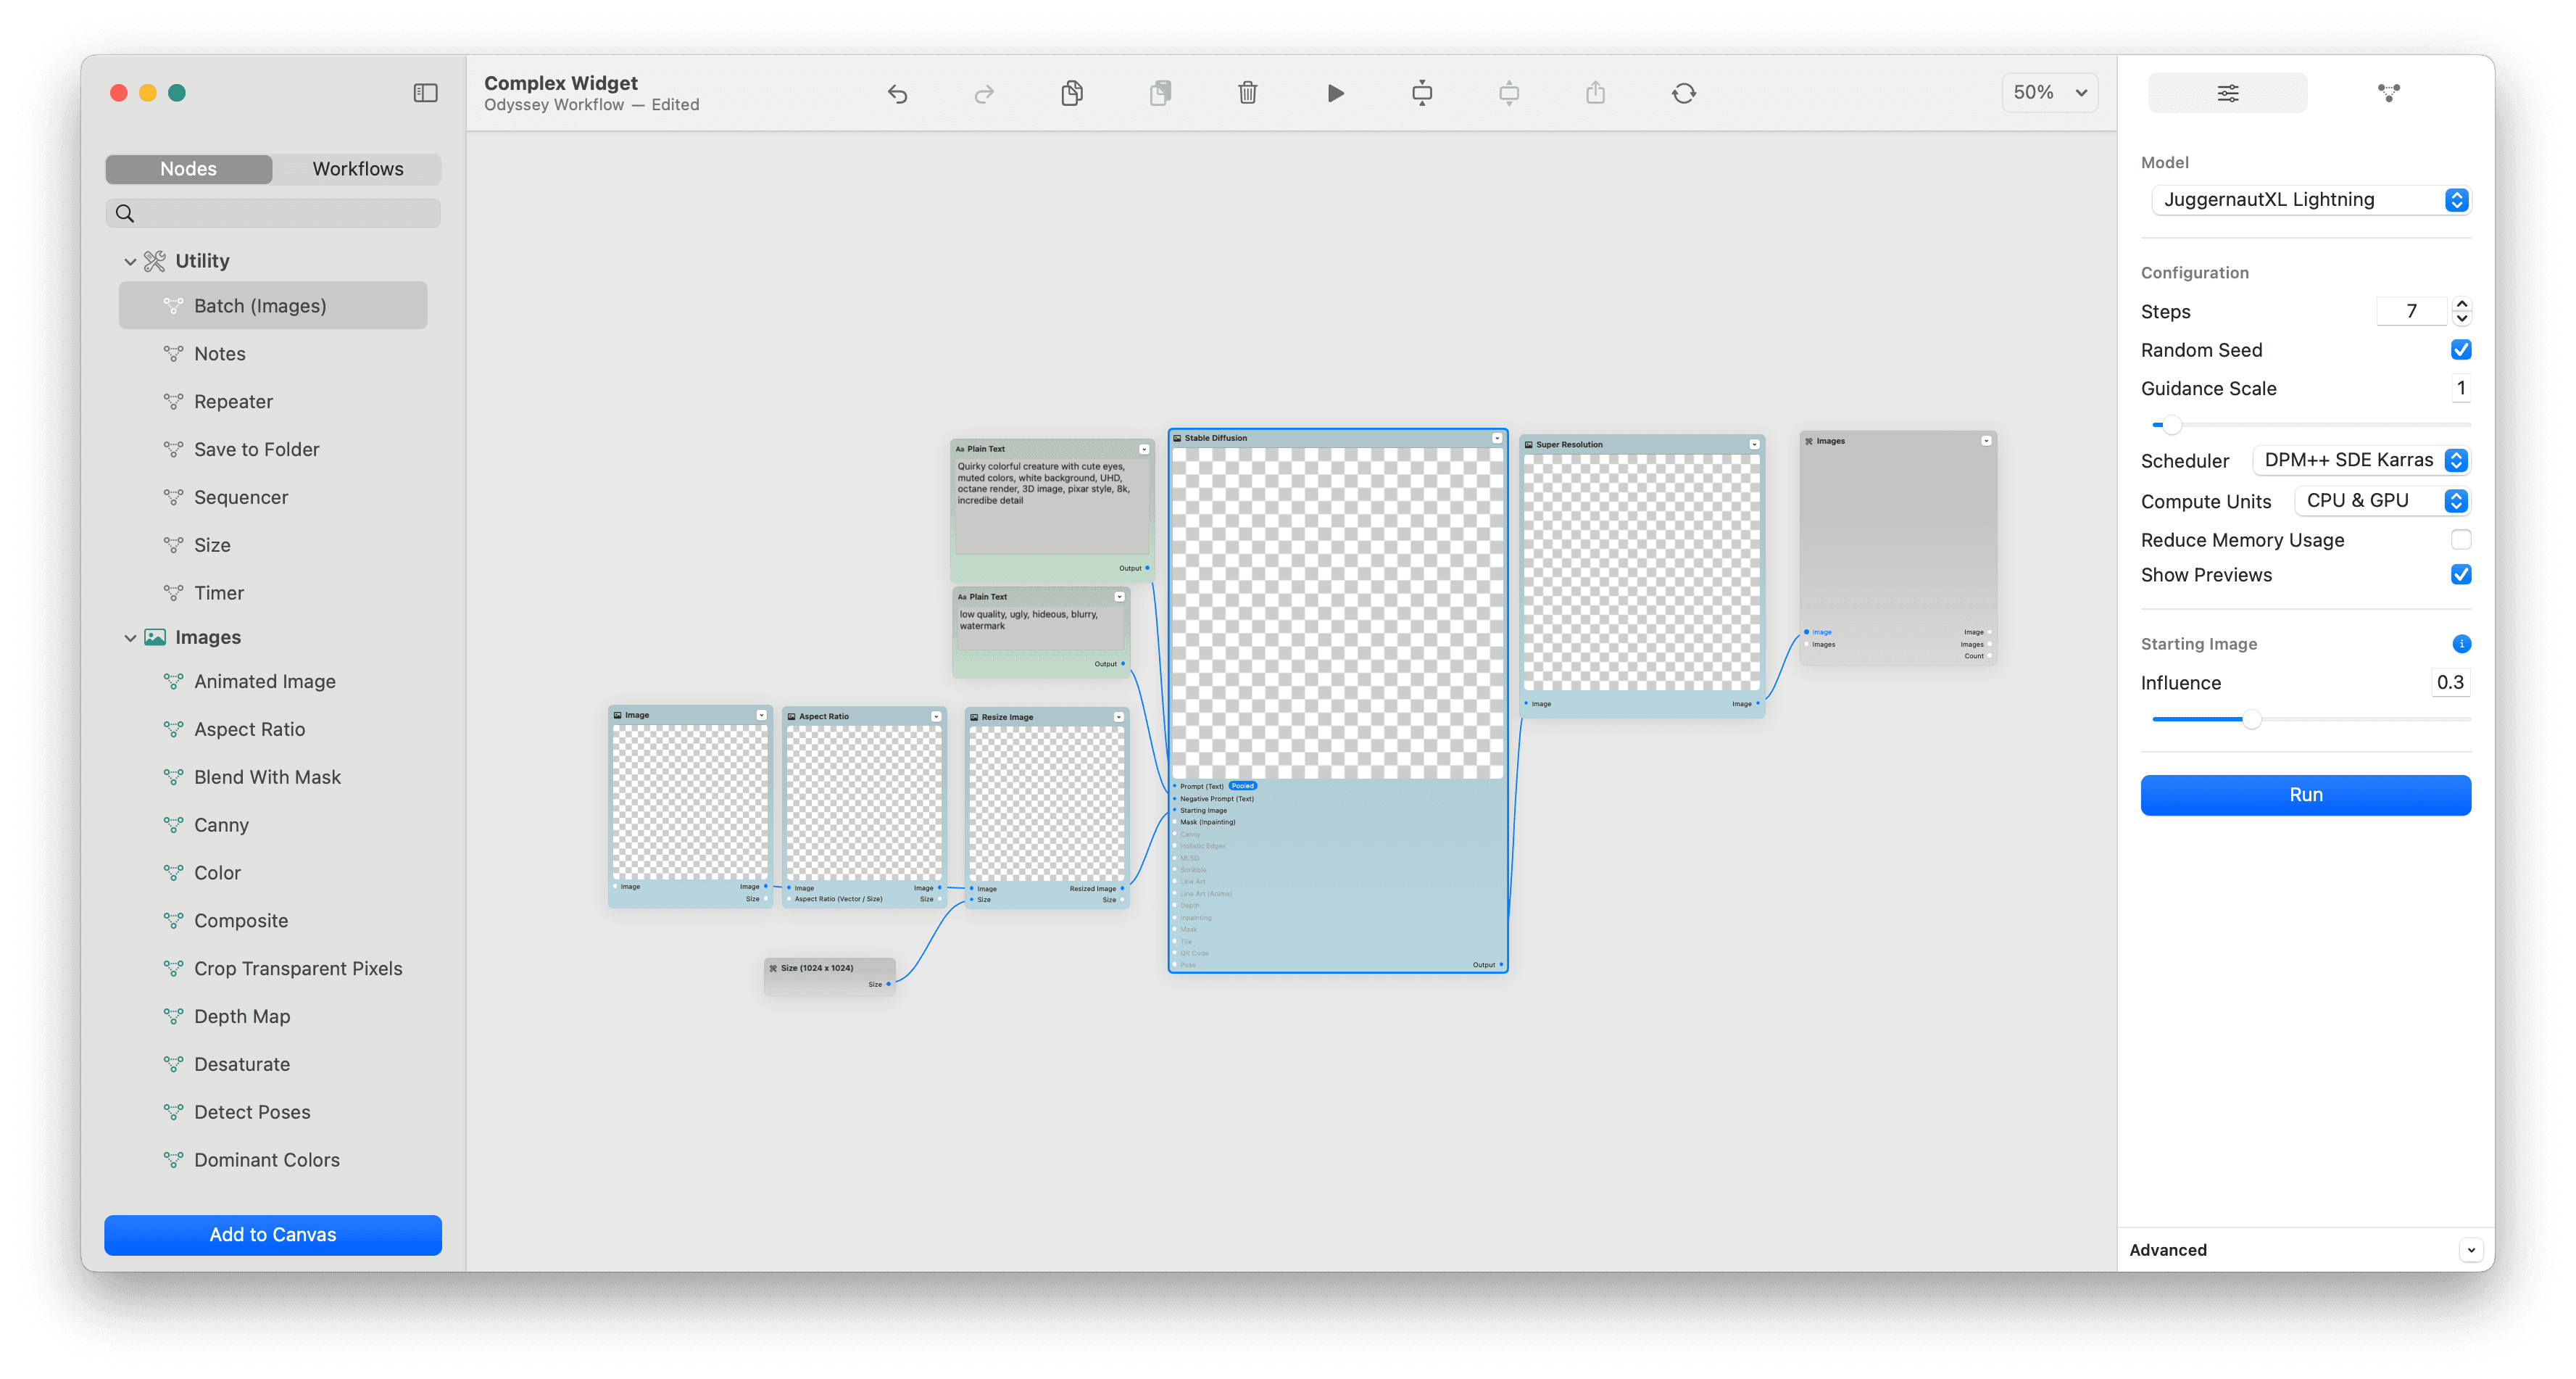
For our widget, we want three widget inputs: the image, the prompt, and the negative prompt. So let's set each as a widget input and give each one a unique name, so that we can tell them apart in the widget builder.
Since the Stable Diffusion node will kick off the work in this workflow, we need to set it as a trigger node.
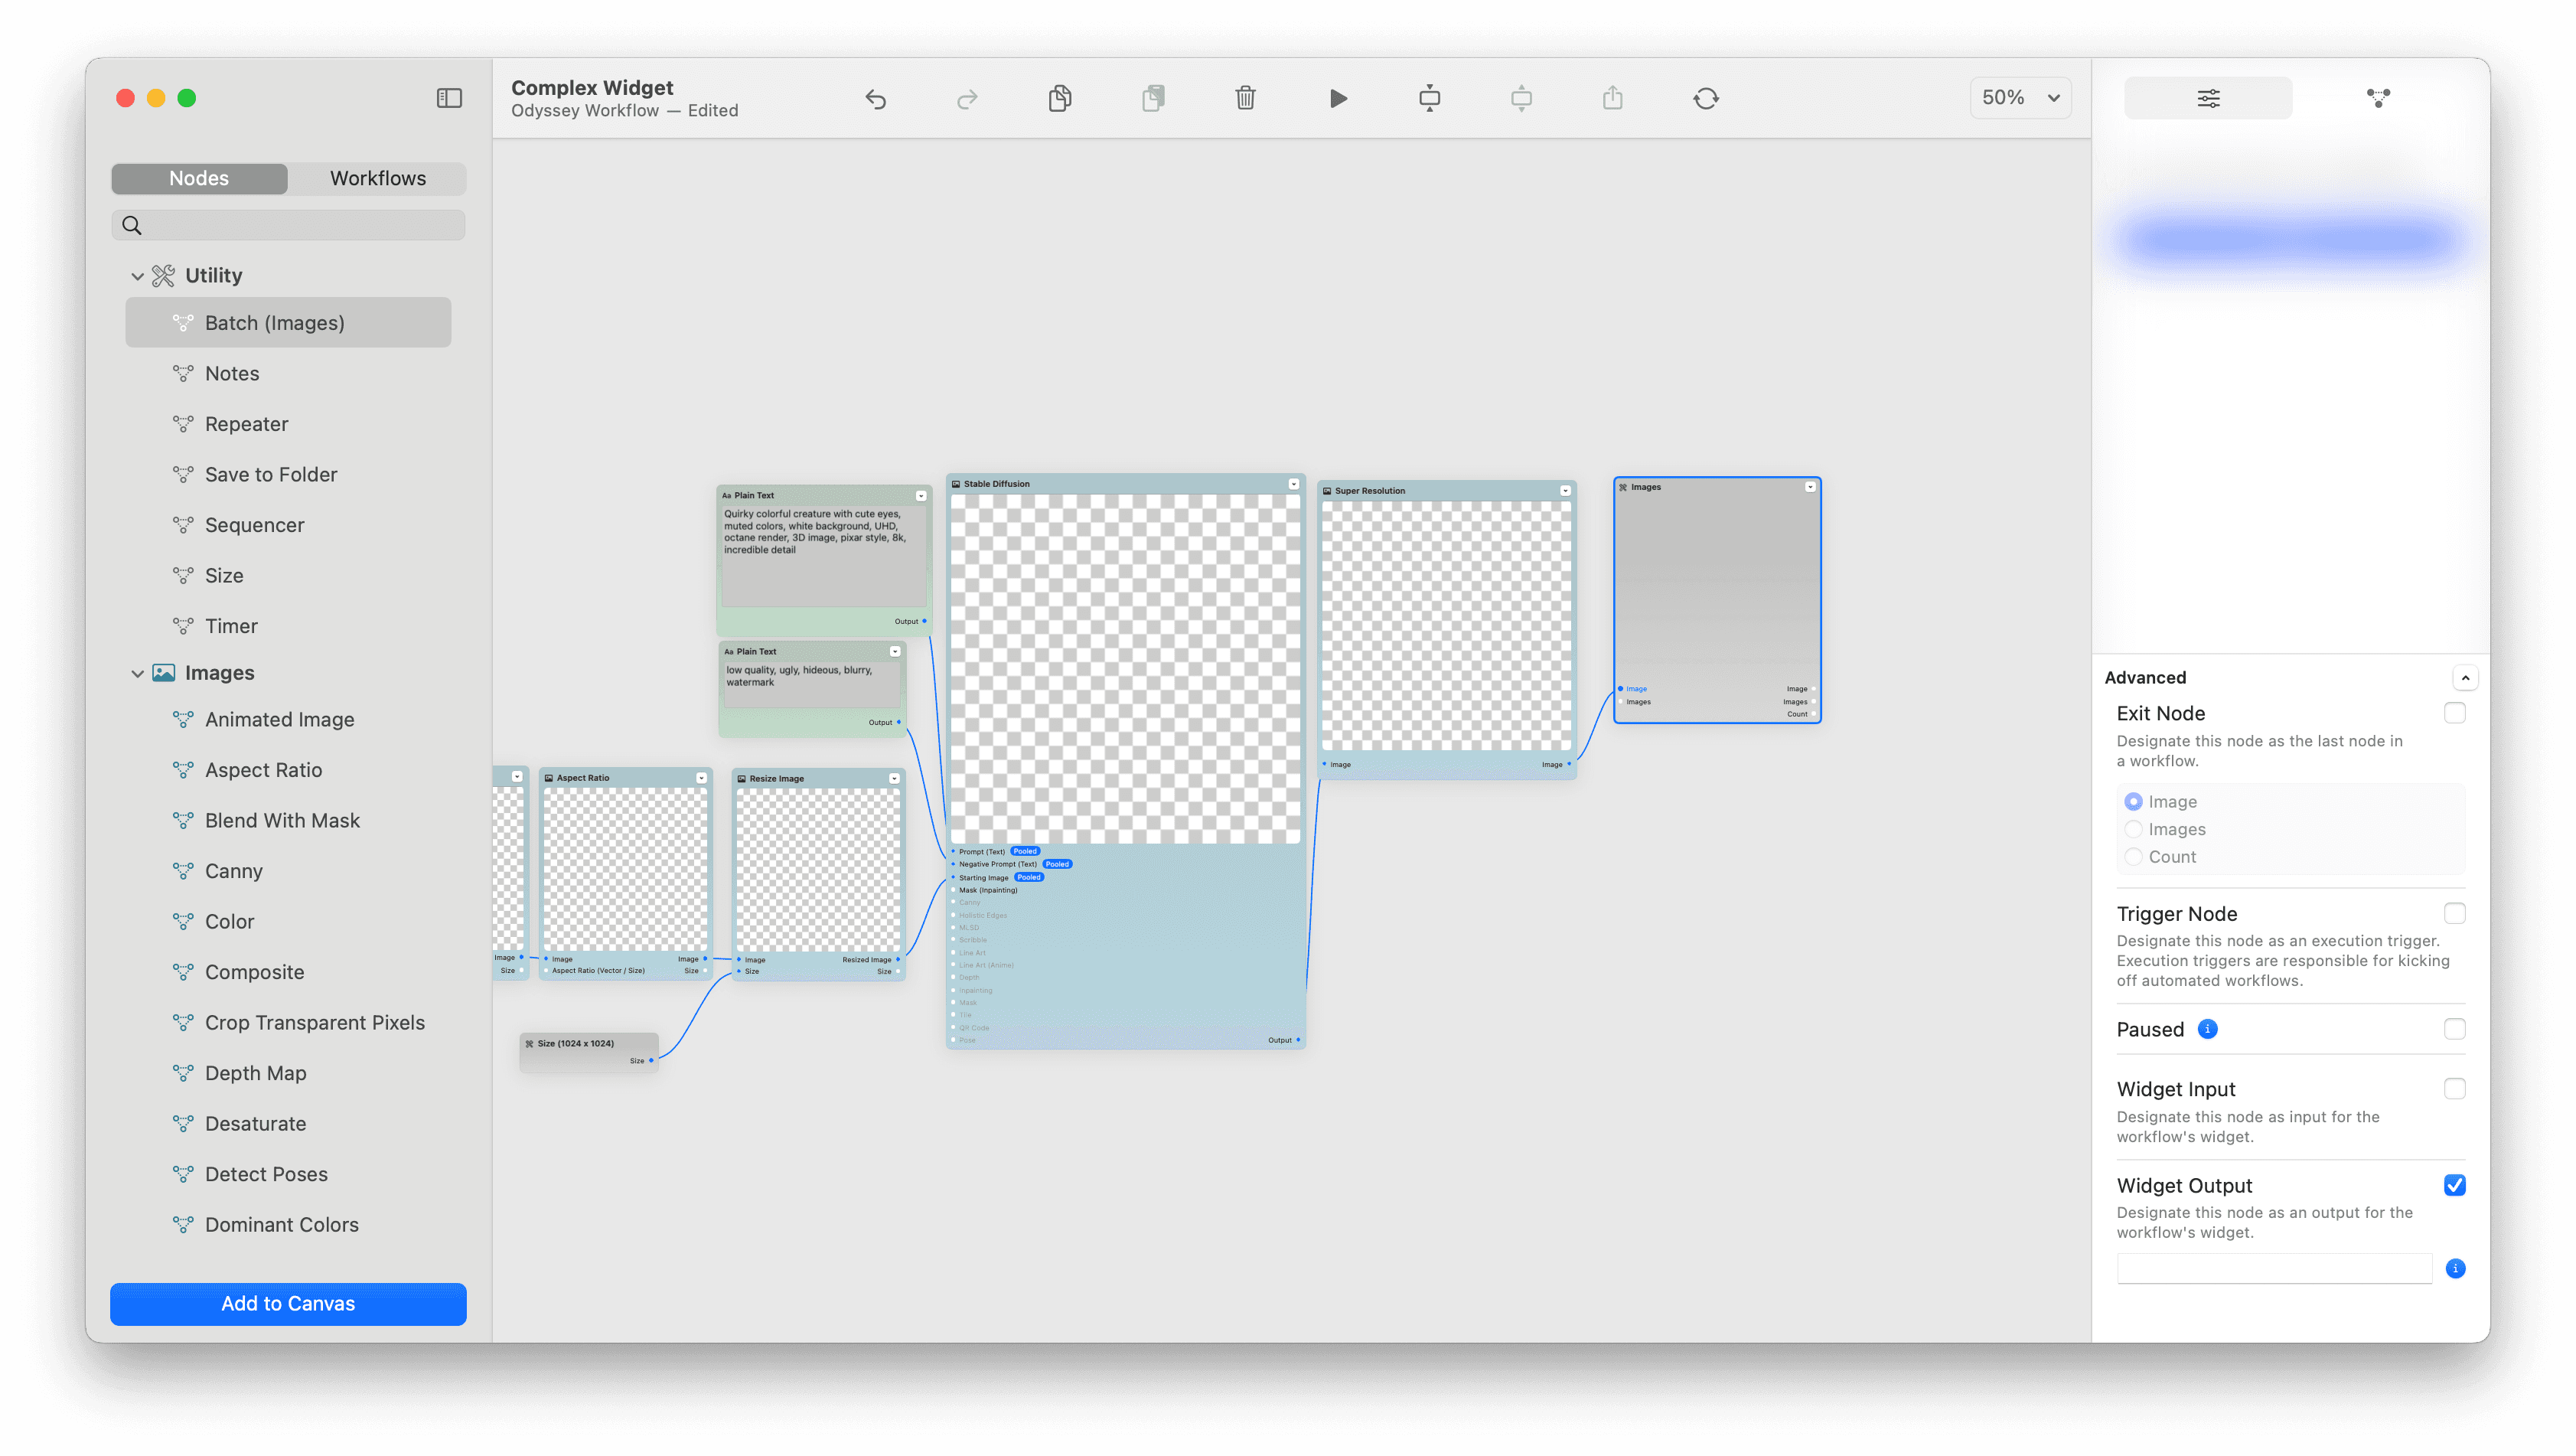
Finally, our Batch (Images) node needs to be set as our widget's output.
Now it’s time to build our widget! In the widget builder, you’ll notice all our components are laid out in the component gallery in the sidebar.
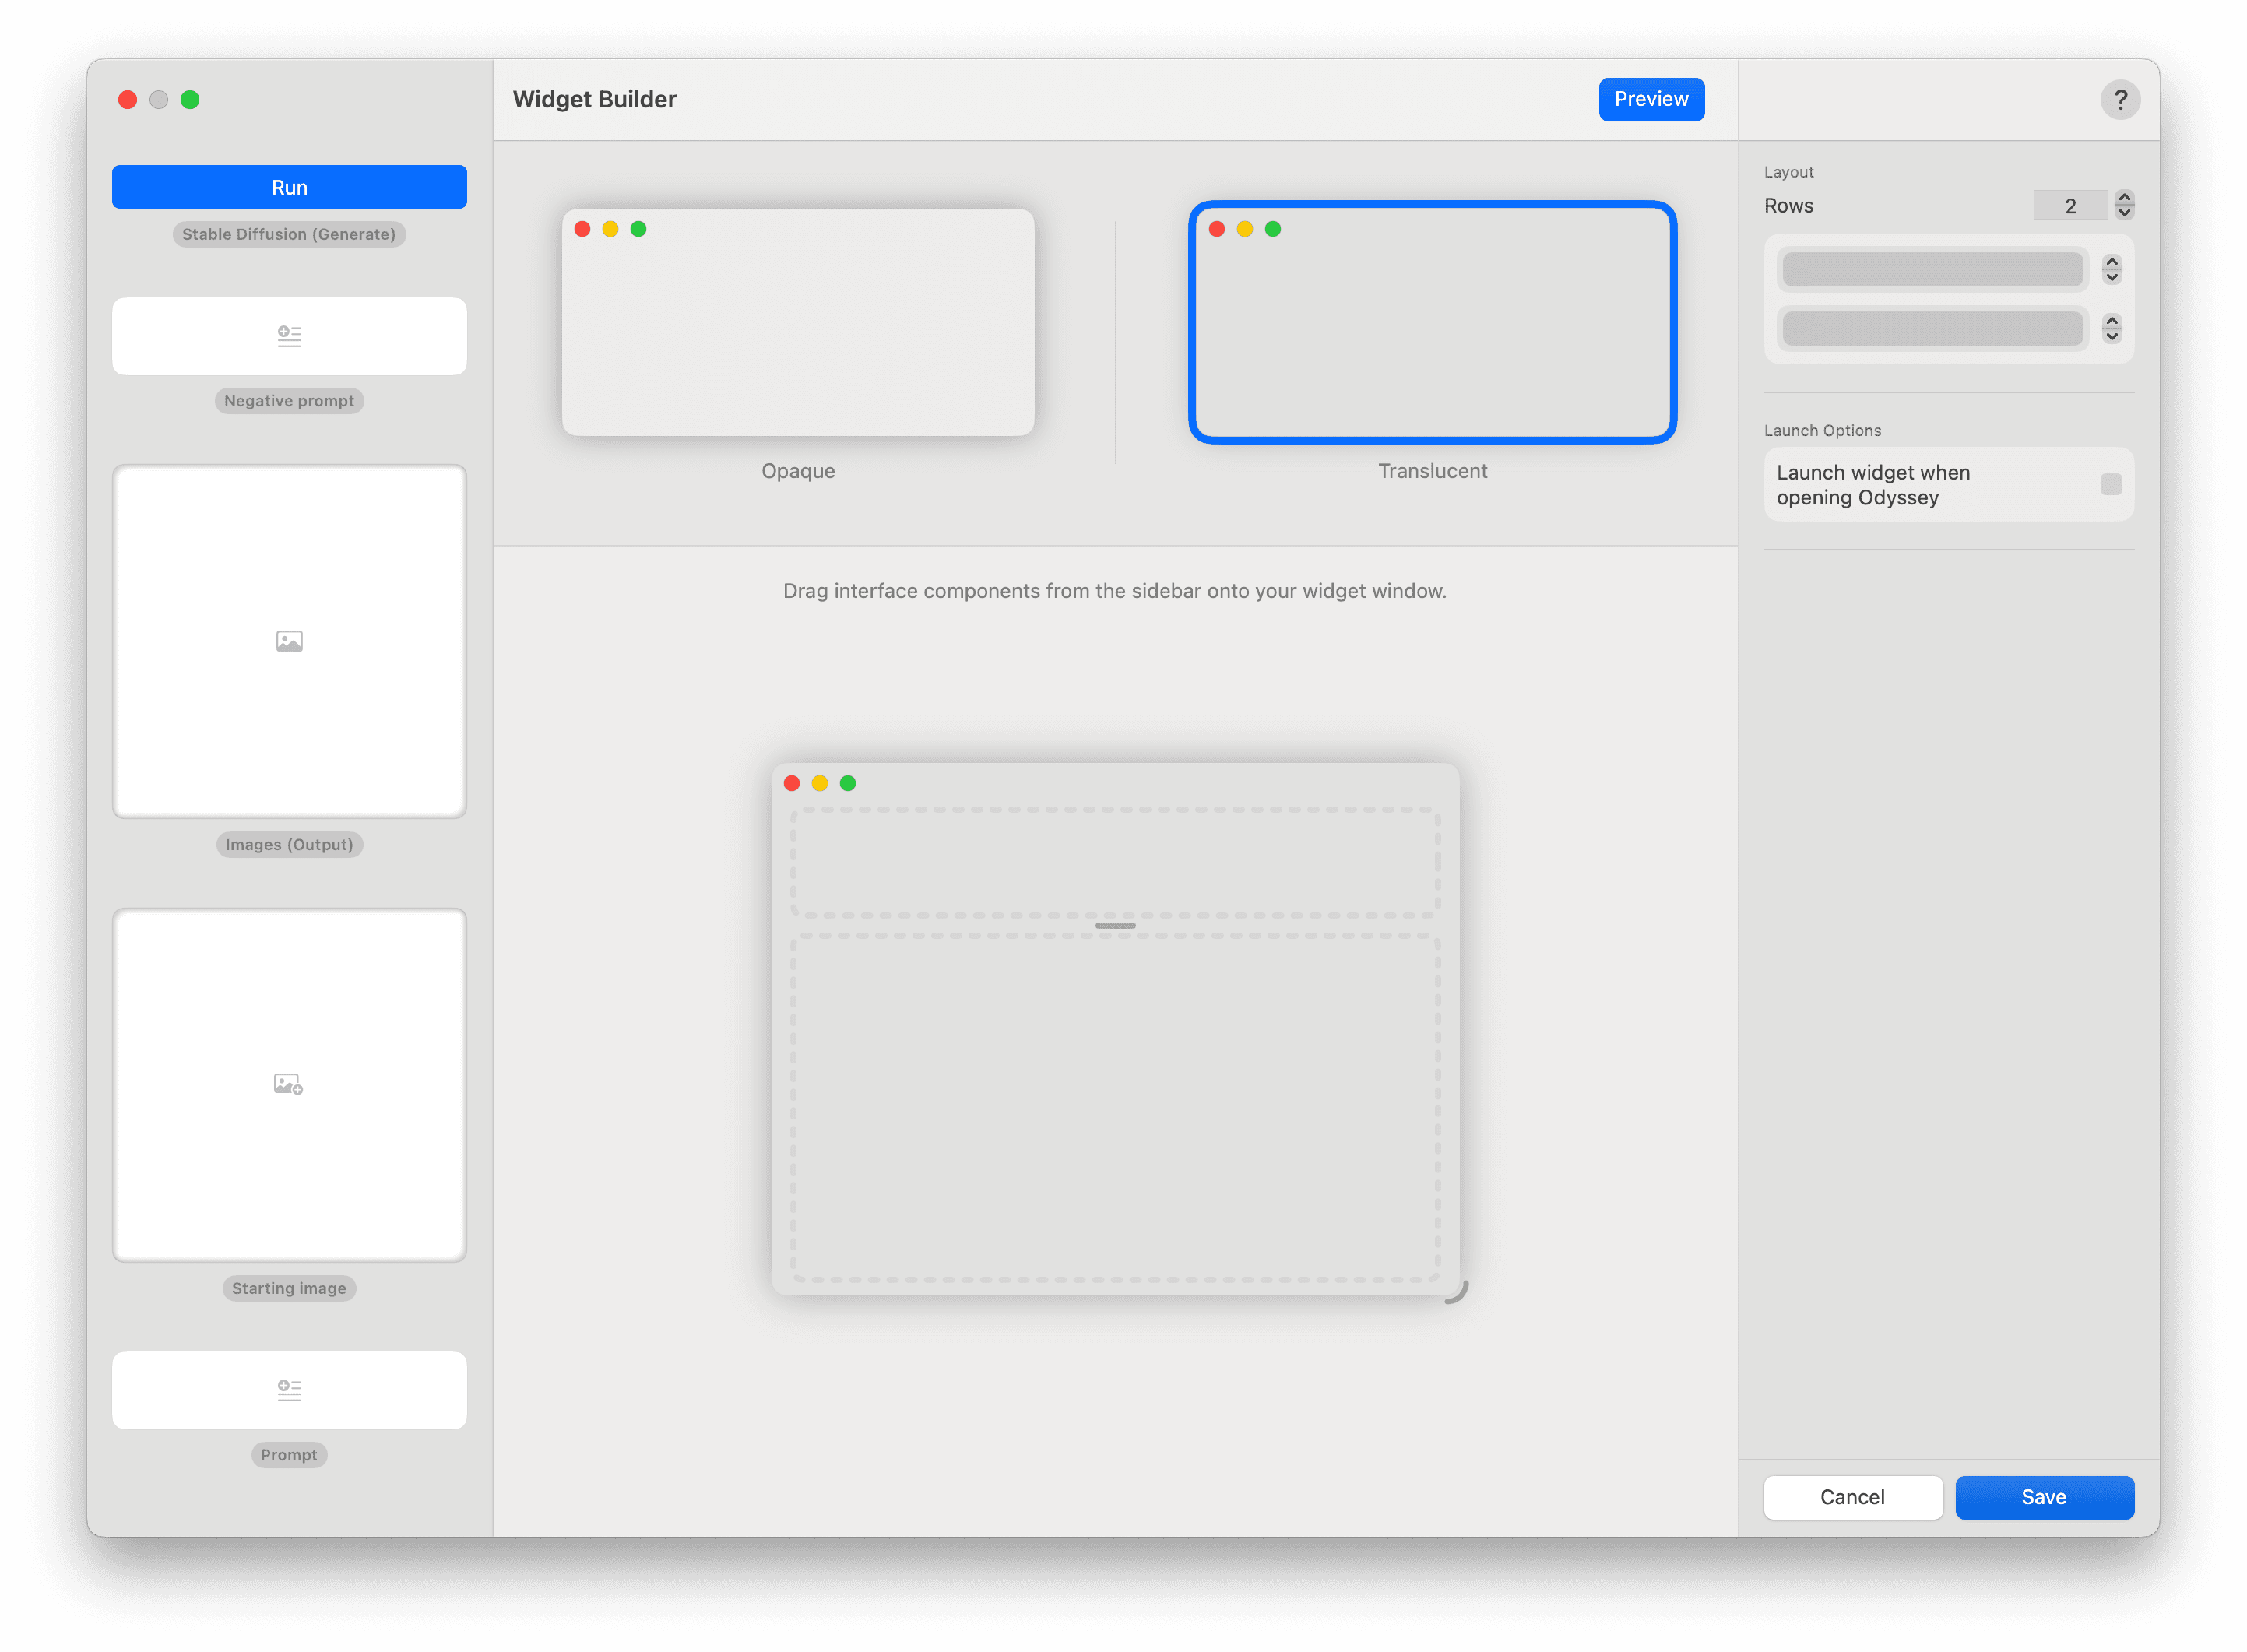
Let’s go about assembling our widget.
Now that I’ve built my widget, I can save it and see it on my desktop. From there I simply paste in a prompt and a negative prompt, drag in a starting image of my choice, and click Run button to generate a weird-creature version of my puppy.