Guide
Custom models
Custom models
Odyssey supports using custom Stable Diffusion models with one key distinction - models must be converted to CoreML, which is Apple's framework for supporting AI models locally.
You can visit our Huggingface page to find a large list of models that Odyssey supports. For more advanced users, you can convert PyTorch models yourself by following this tutorial.
Using a CoreML model in Odyssey
When you download a model, you'll need to take the following steps to use your model in Odyssey:
Unzipthe fileIn Odyssey select
settings (⌘ ,)Navigate to
Custom modelsClick the
+ sign
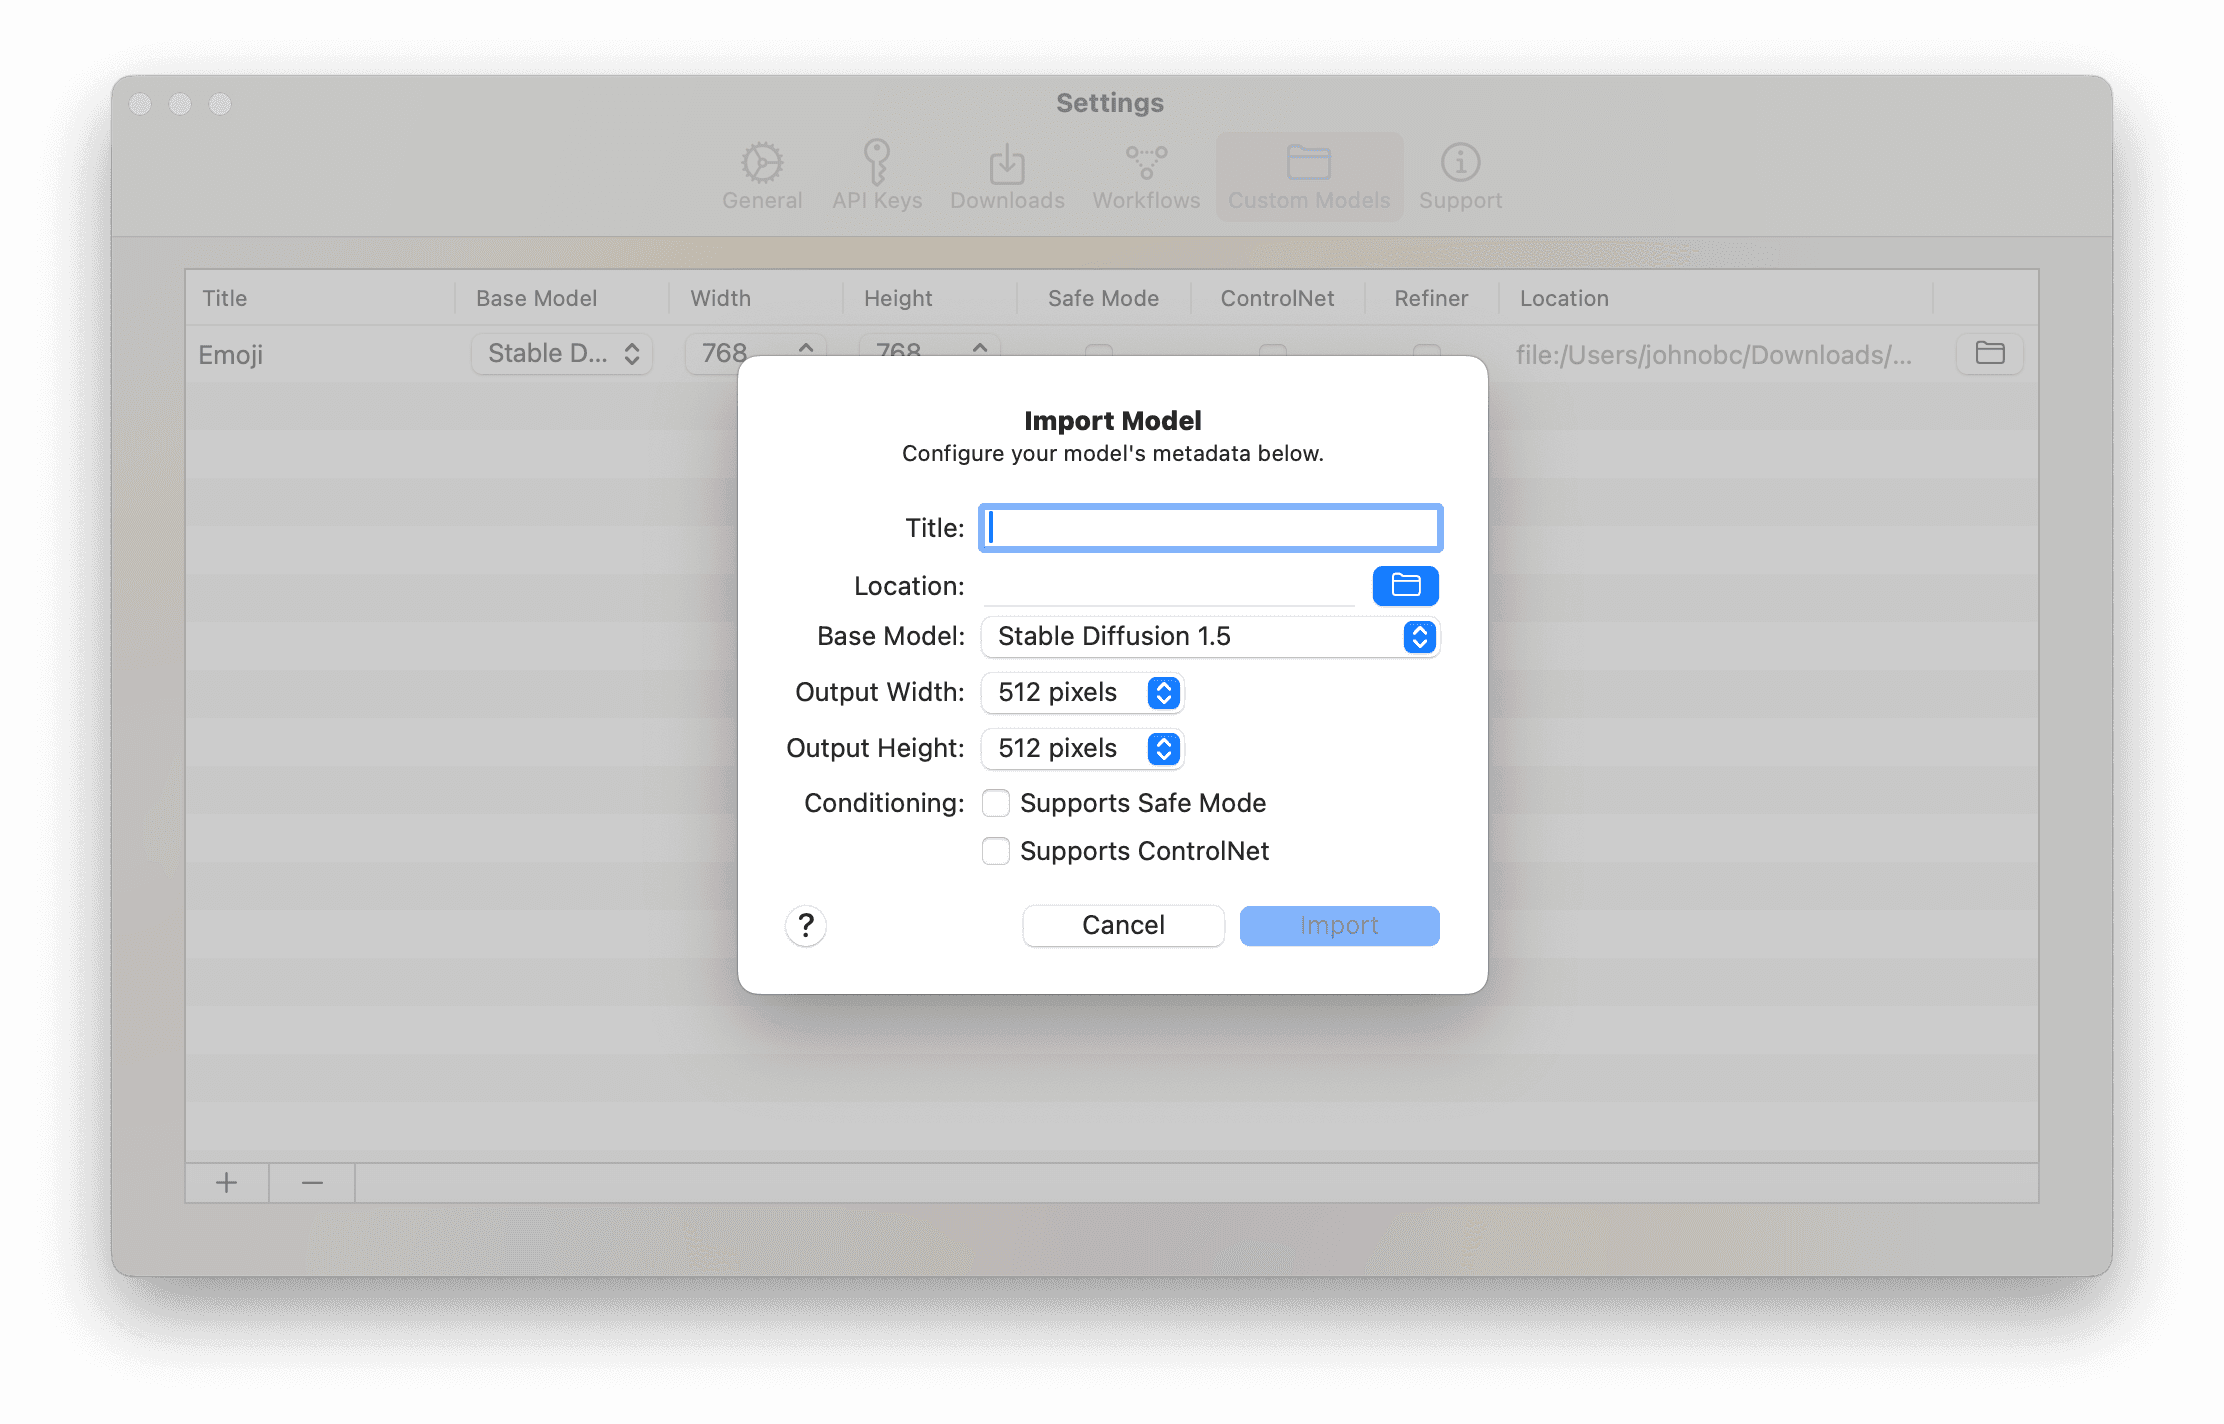
You'll now need to set the model up correctly to run with Odyssey.
Name your model.This will be the name that appears in your dropdown when running theStable DiffusionnodeSelect the location where your model's folder is.You should select the folder that contains more than just the model (meaning the .txt file and other files.)Choose the base model.Custom models are built off of Stable Diffusion base models. The options areStable Diffusion 1.5,Stable Diffusion 1.5 (ControlNet),Stable Diffusion 2.1, andStable Diffusion XL. You can typically find this information in the model's repository.Set your other settings.TheOutput WidthandOutput Heightand whether your model supportsSafe Modecan typically be found in the model card. If your model supportsControlNet, you'll see a file with_cnin the file name in your model folder.Import your model
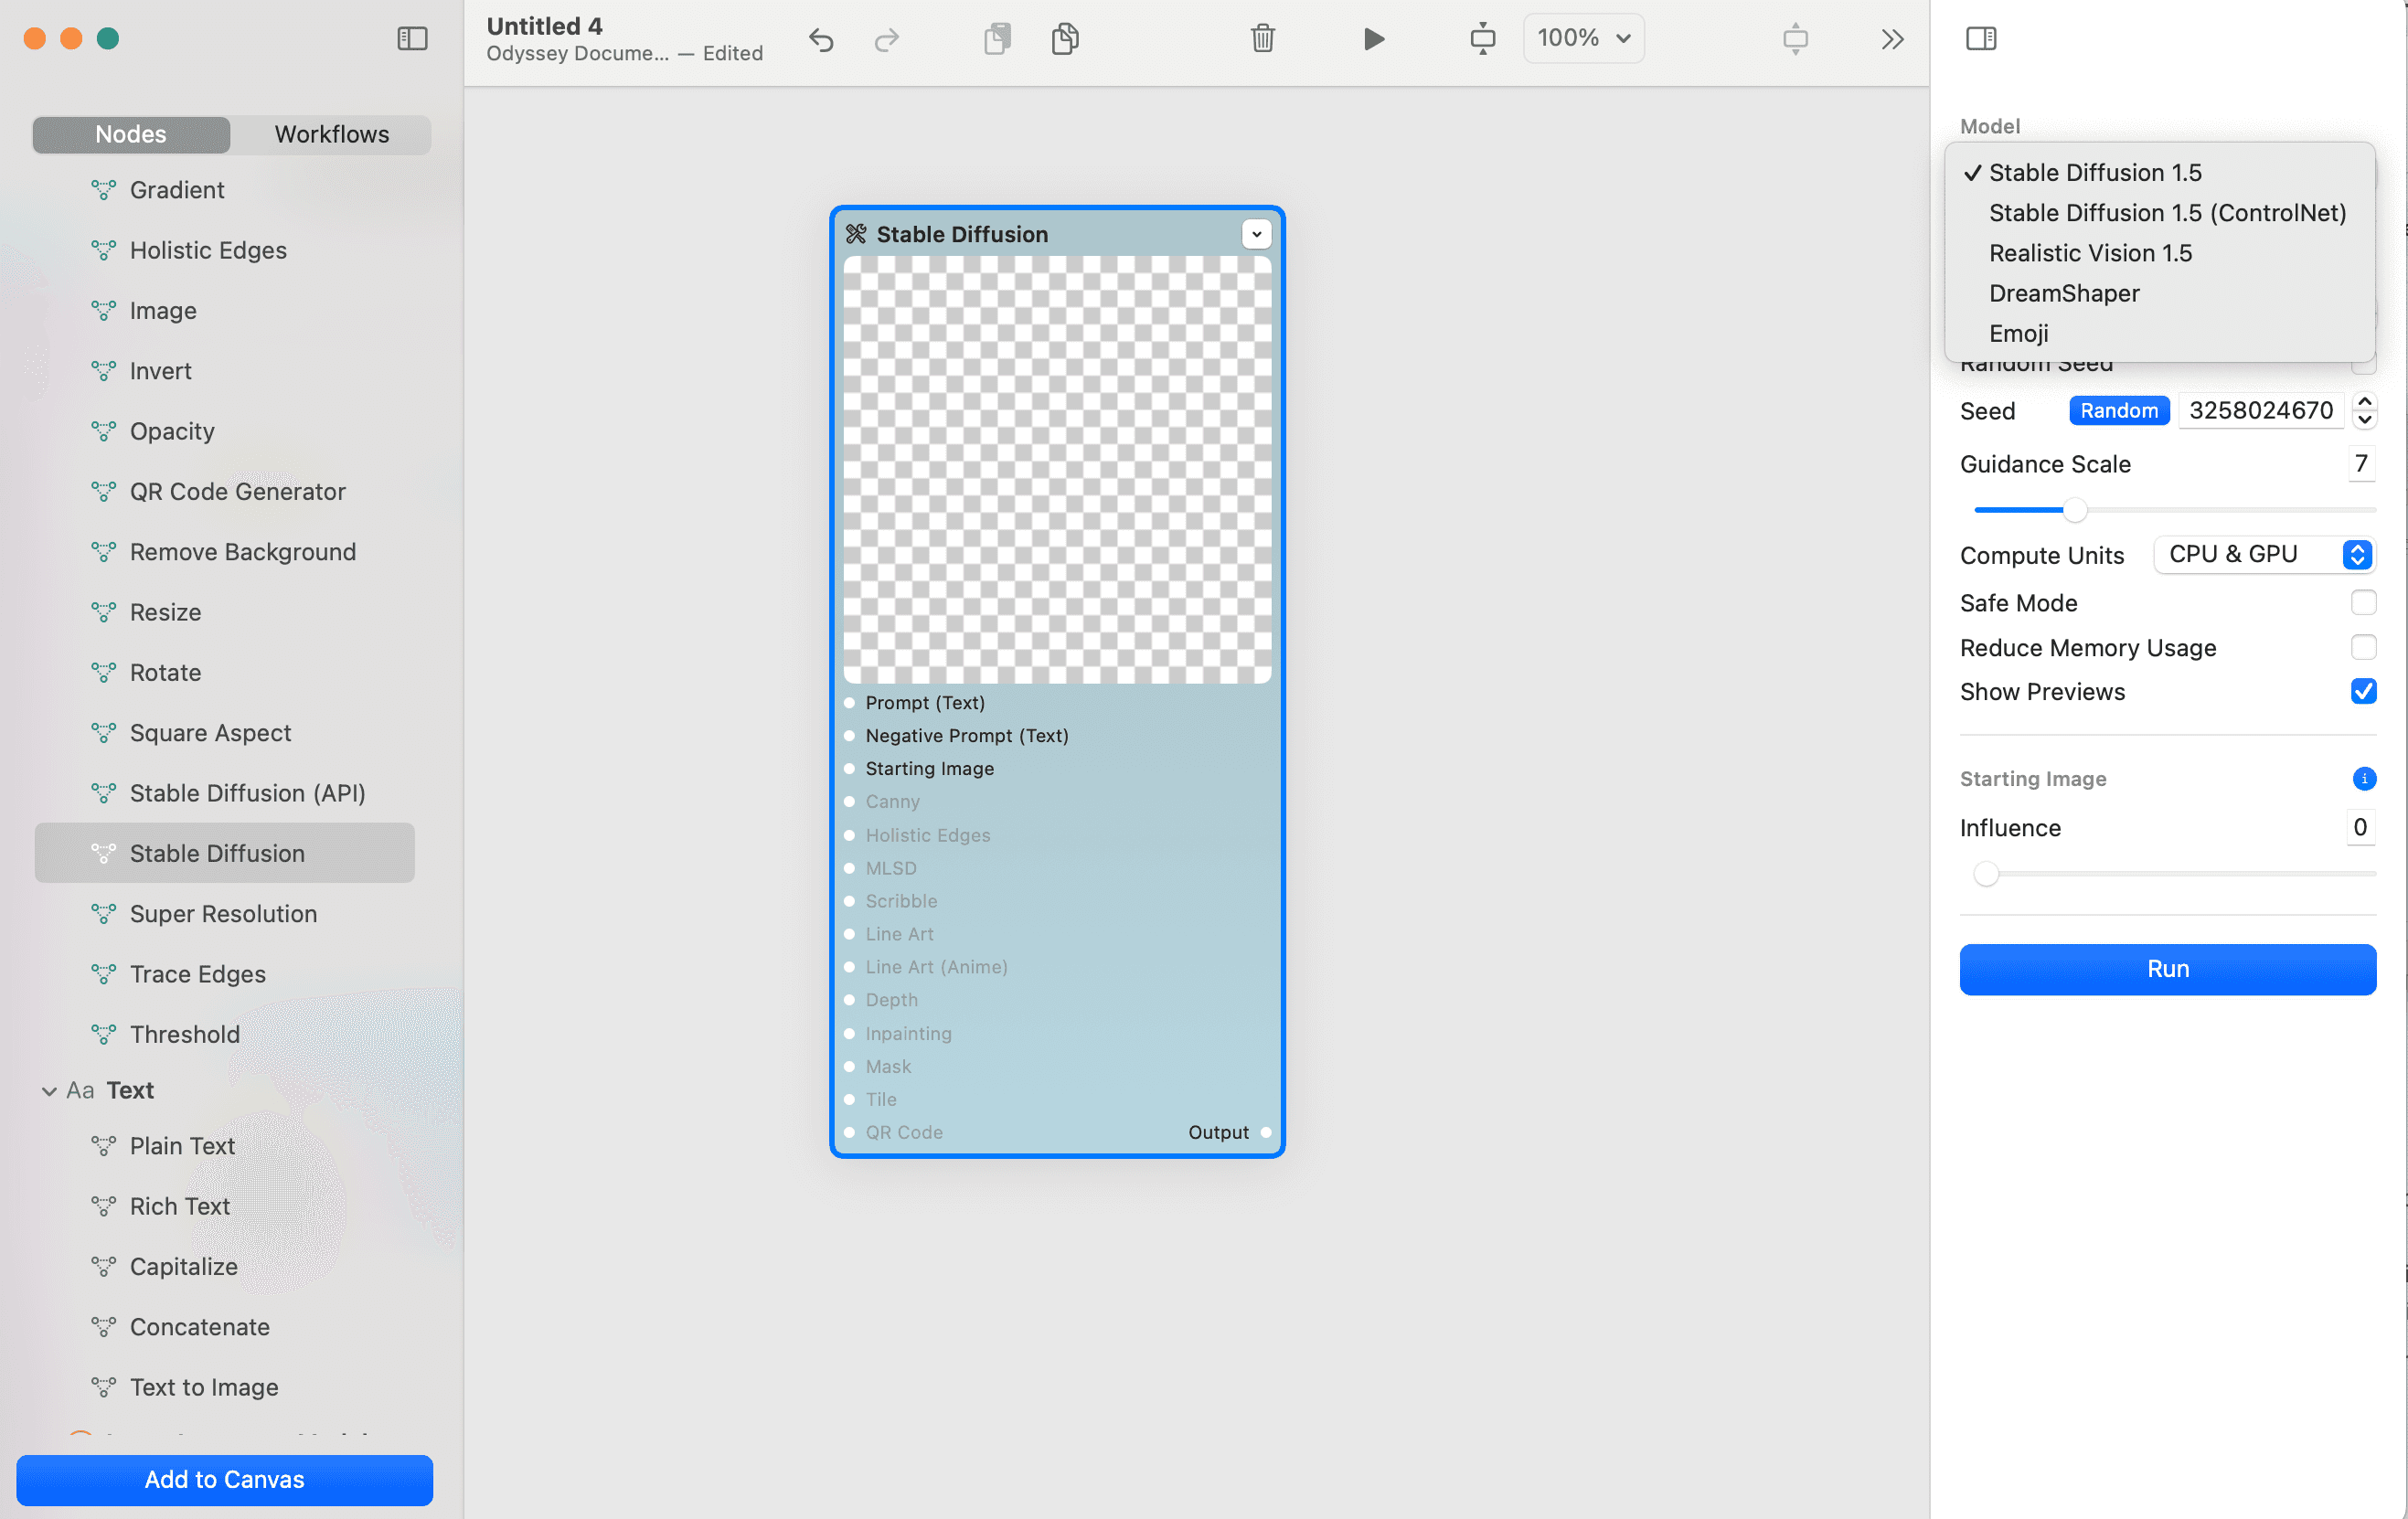
Once your model is imported, you should be able to select your model from the model dropdown when running the Stable Diffusion node locally.