Guide
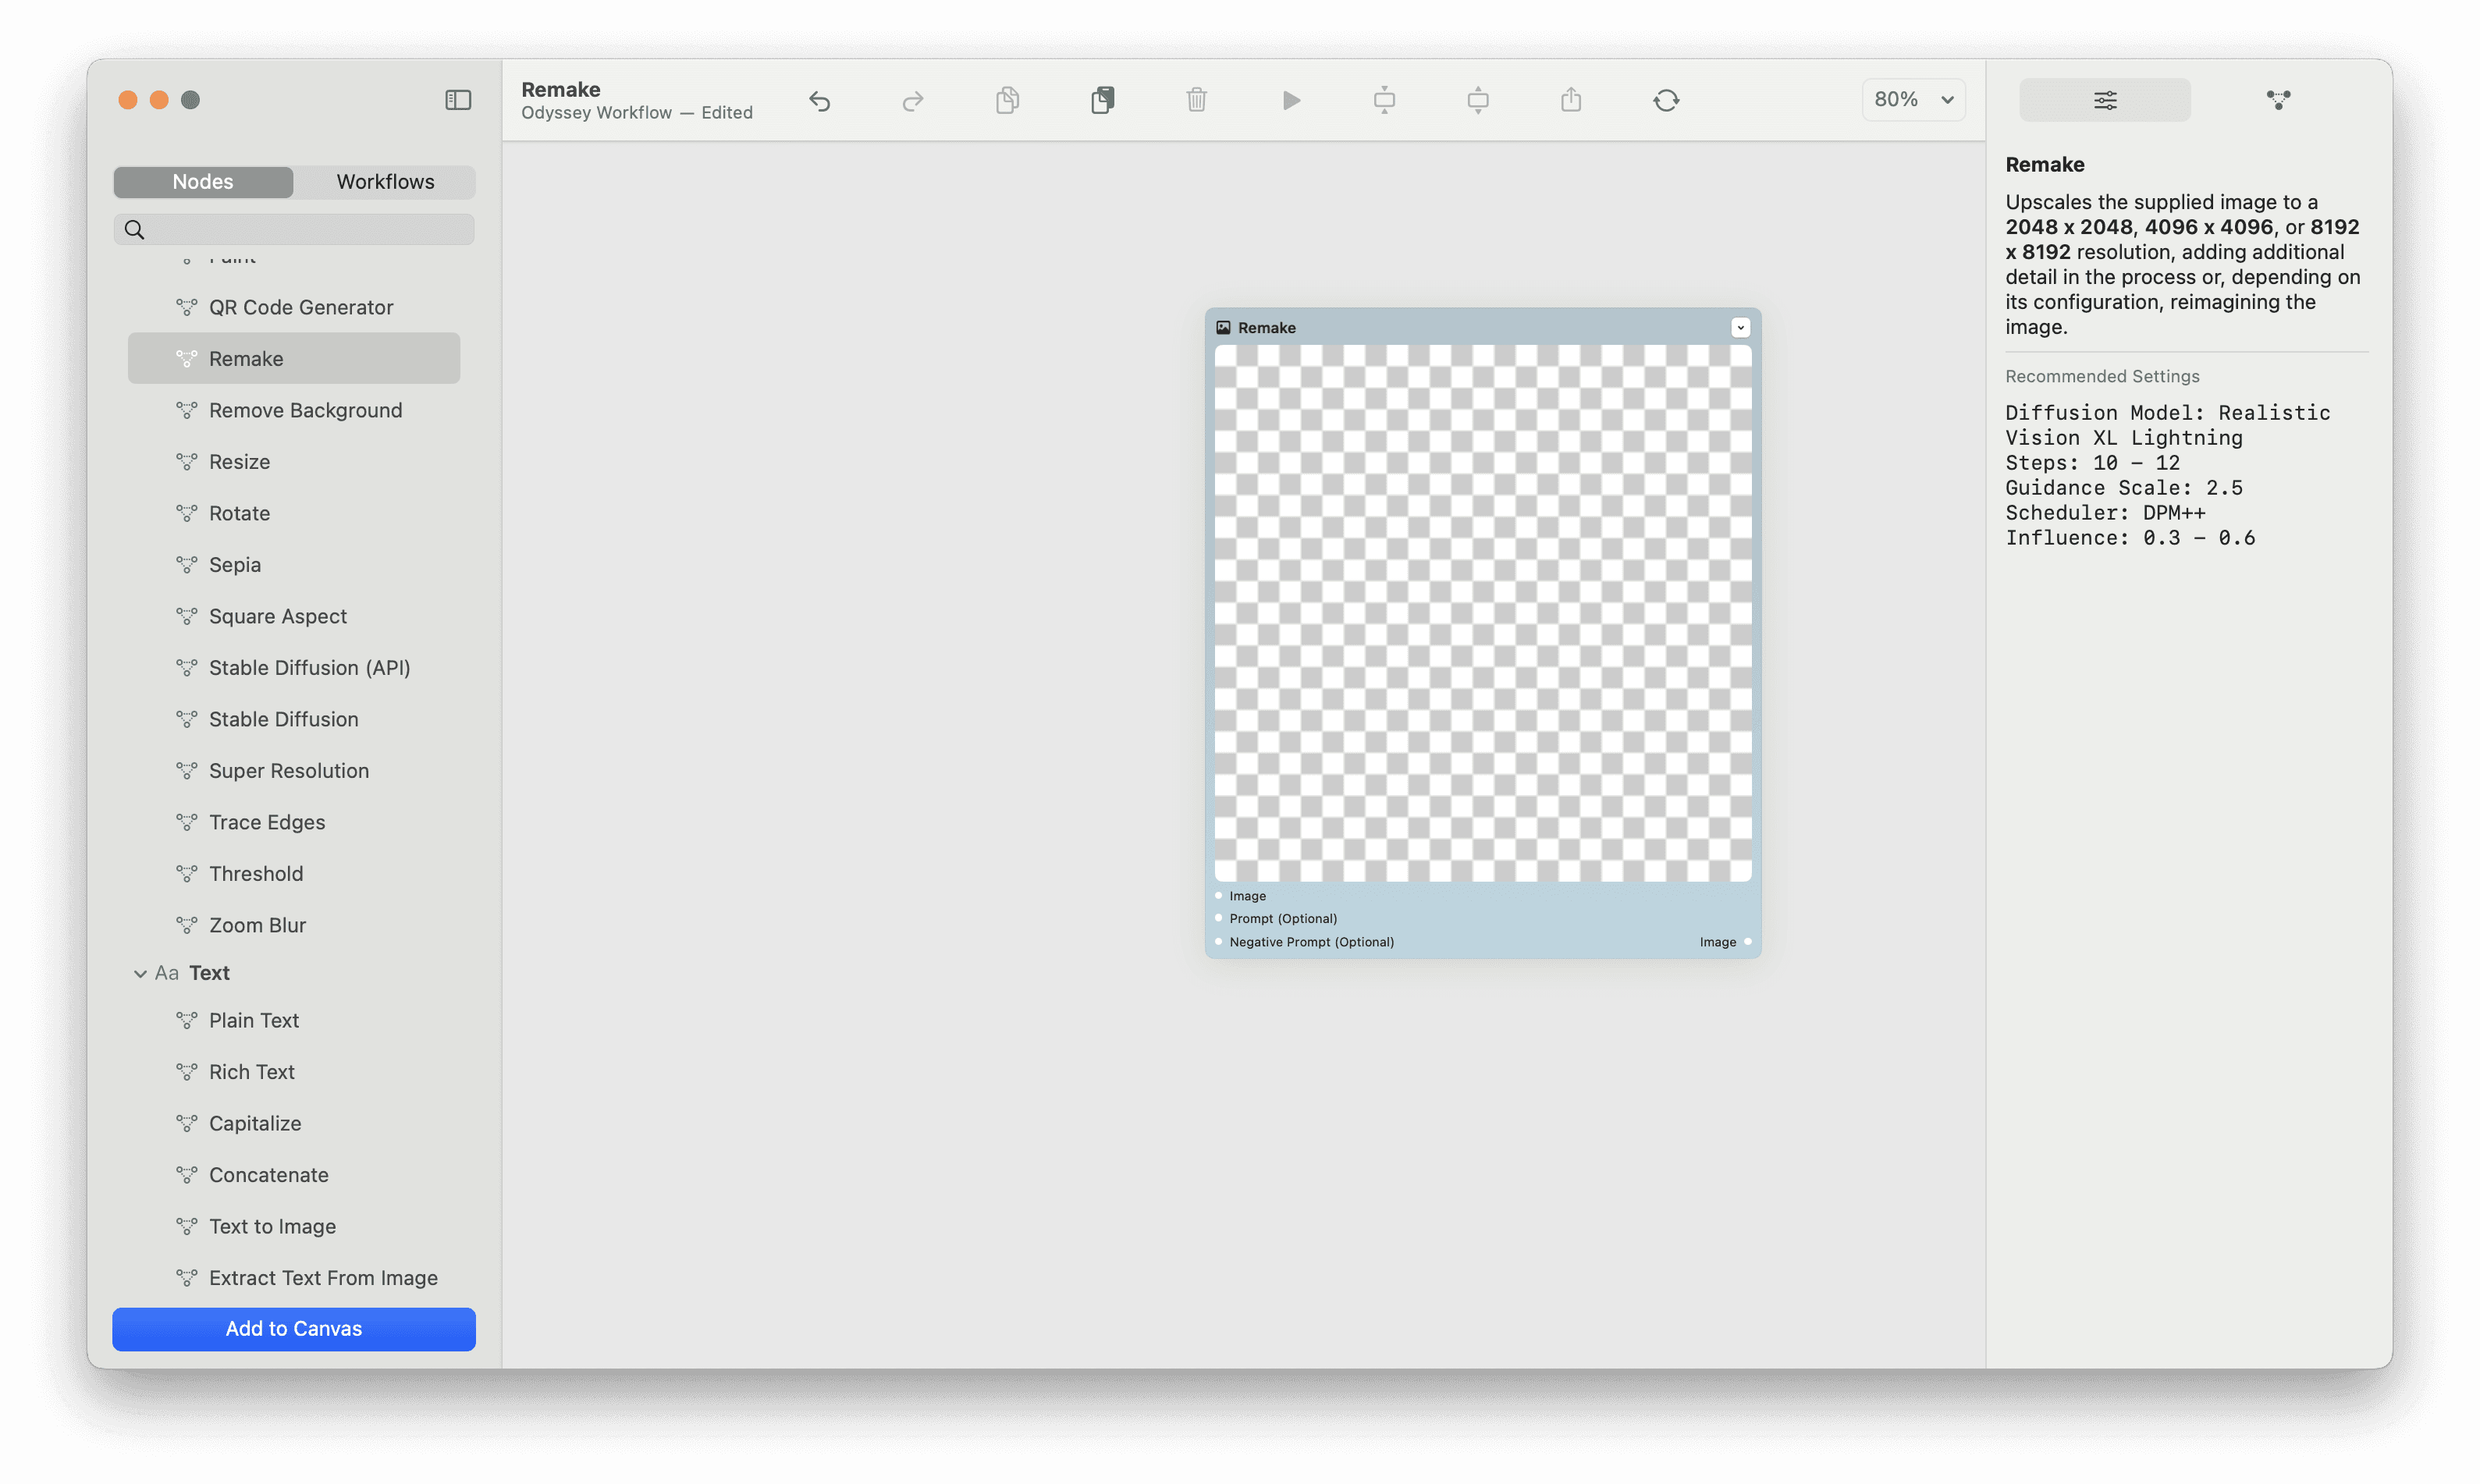
Remake
Odyssey Remake
There are a few ways to use the Remake node. The first is to creatively upscale an image up to 8192 x 8192 resolution while adding additional detail to the image in the process. The second, more advanced way to leverage the Remake node is to reimagine an image entirely. Finally, there's also manual mode - which allows you to control certain tiles within an image.
This guide will show you to leverage the Remake node for each use case.
Add detail to an image
Adding detail to an image, or creative upscaling is a term coined for tools like Magnific that enable a user to take an image and upscale it while adding detail to the image. This is especially important for AI generated images since when you zoom into an image there are often inconsistencies or pixellated details that come from the image diffusion process.
To add detail to an image with the Remake node:
Drag the Remake node onto the Odyssey canvas- the remake node takes animage inputand (optionally) apromptand anegative prompt
Connect an image to the Remake node- in this example, we’ve connected a 612 x 408 image of a jungle to the Remake node
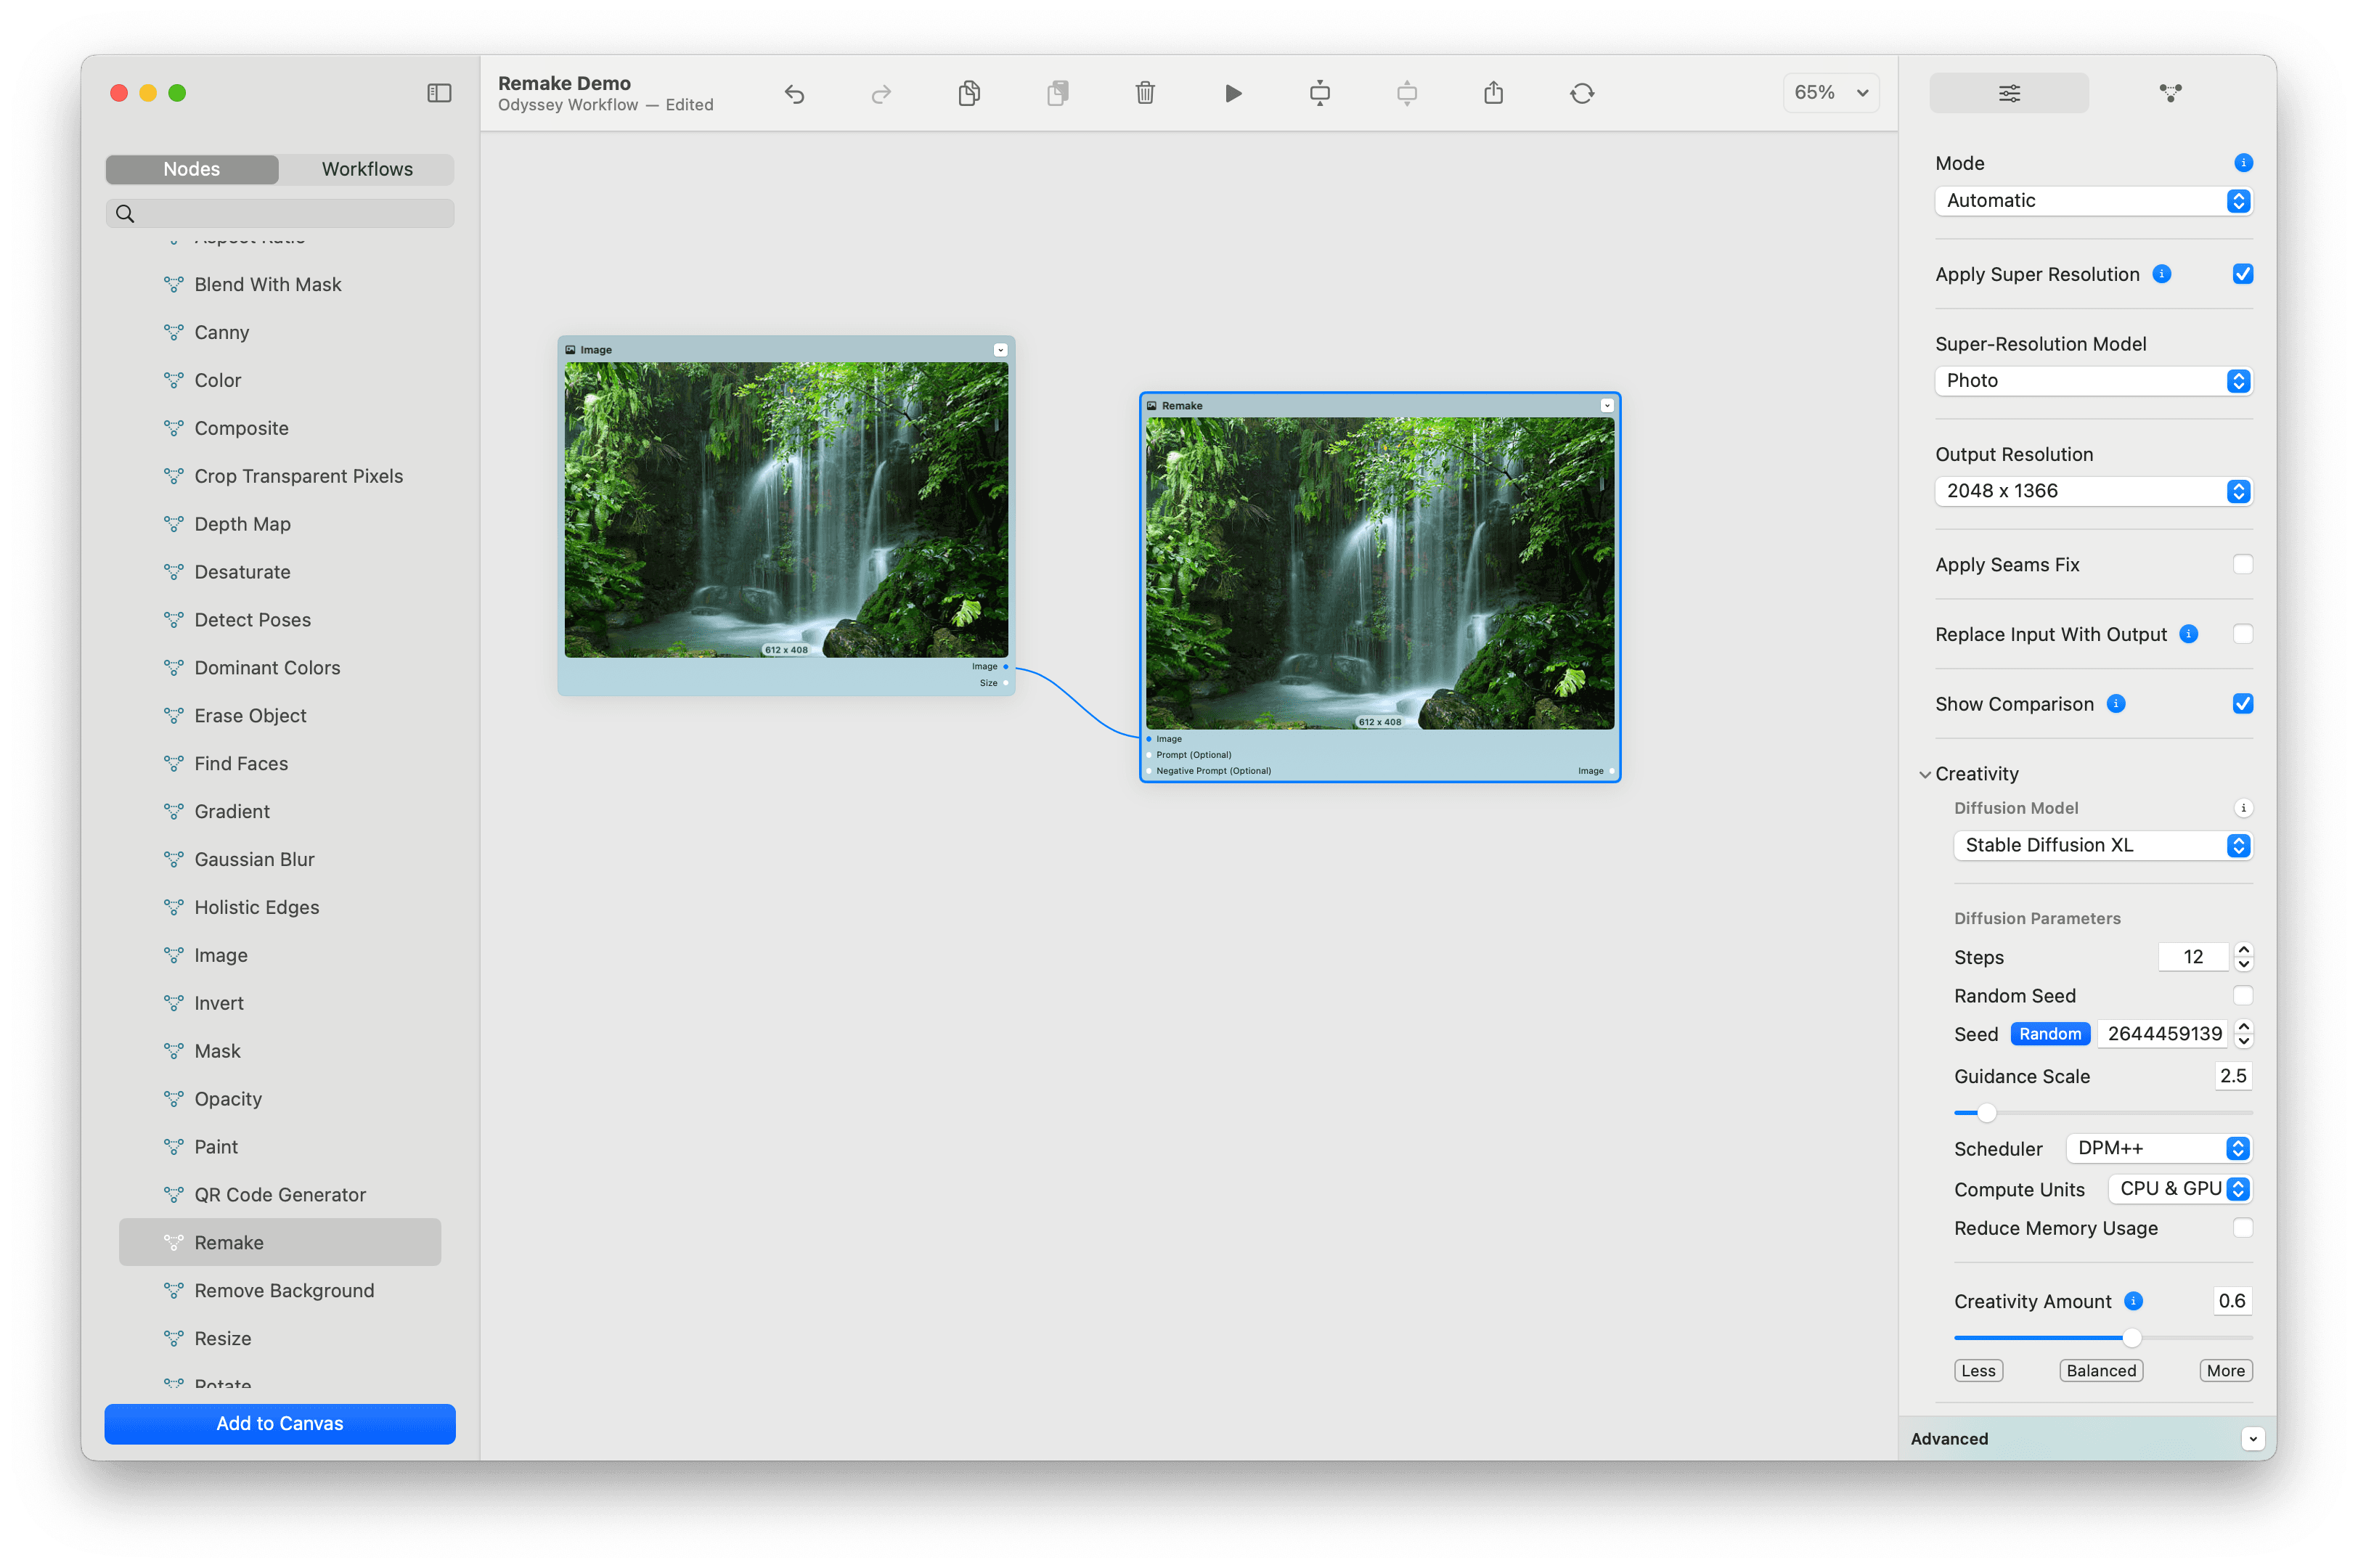
Adjust your settings- in the inspector on the right, there are a few settings you can adjust:
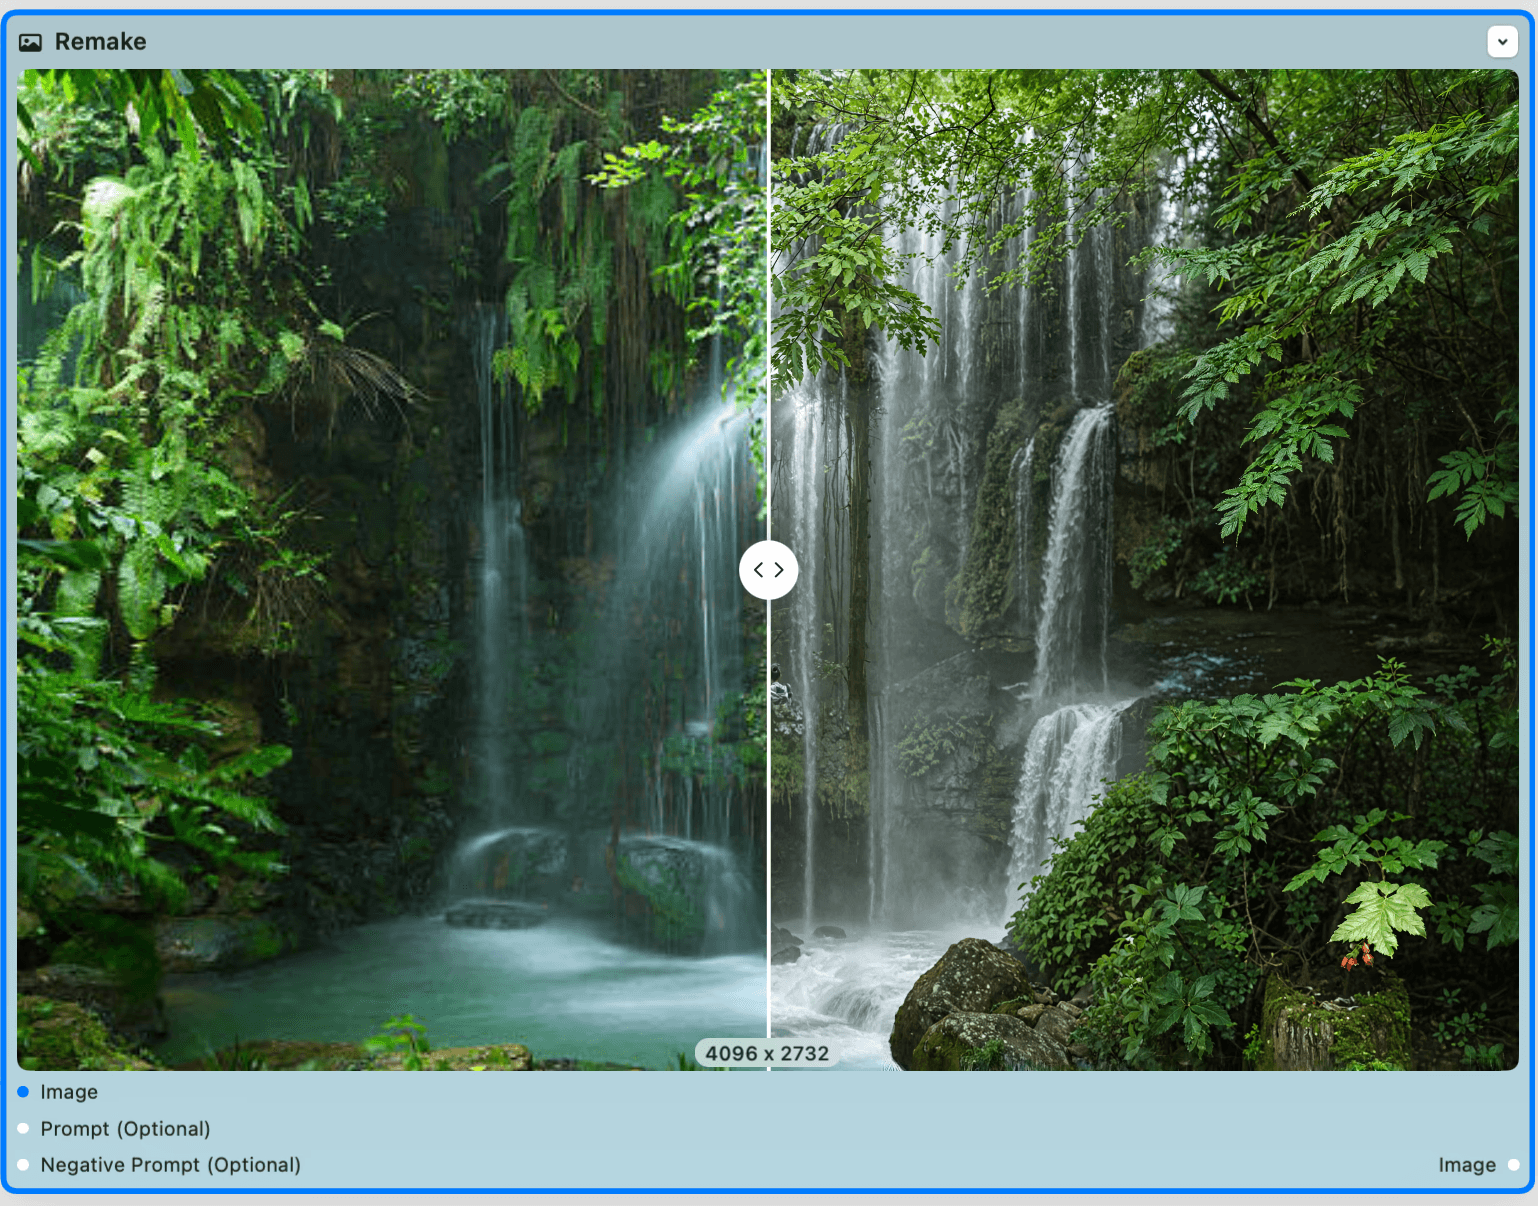
Apply super resolution- super resolution models operate behind the scenes in the remake node to provide a maximum resolution of2048 x 2048. This checkbox uses a super resolution model to bring an image up to a high enough resolution that allows the image to split into tiles for a Stable Diffusion model to run on each individual tile. If you’re using an image larger than 2048 x 2048 in either dimension, uncheck this box.Super-Resolution Model- Odyssey supports four different super resolution models:general,fine detail,photo, andartworkOutput Resolution- the output resolution determines how much an image will be upscaled. The maximum resolution is8192 x 8192in either directionApply Second Diffusion Pass- for4kor8kresolution images, checking off this box will run an image through a diffusion step a second time. This will help reduce tiles and increase the level of detail that's generated in an image. While this may take a very long time, a second diffusion pass will produce the highest-quality image possibleApply Seams Fix- Remake works by breaking up an image into tiles, upscaling the image, running Stable Diffusion on each tile, then reassembling the image. Occasionally, tiles will be visible in the final image. By checking offapply seams fix, seams will be less visible between tiles.This is unchecked by default since the tiling algorithm typically works without visible seams.Replace Input With Output- checking this off allows you to replace the node’s input image with the remade image once it’s been processed. Doing so allows the node to process the result again, but, this time, starting with the source image. If you have this checked off for an image that has already reached 8k, the processing window will be too small so the results will not be satisfactory. This node allows you to continue to add detail to an image as you increase the upscaled resolution.Show comparison- enabling this will show a slider to compare the remade image with the original. The slider will not appear until the remade image is complete.
Creativity
Diffusion model- we default toRealistic Vision XL Lightningbut the Remake node supports any Stable Diffusion XL model that works with Odyssey. This means you can import your own custom models to have an impact on the Remake node results. You can find a wide range of custom models that are converted to CoreML hereSteps- default is 12 steps. You can adjust the number of steps based on which model you are using and how much detail you want each tile to add. Just remember that the more steps you add, the more time an image will take.Random seed- check this off if you want theseed valueto change each time you remake an imageGuidance scale- default is 2.5. This determines how much an image adheres to a prompt (if provided)Scheduler- default is DPM++ the scheduler your Stable Diffusion model runs withCompute units- default is CPU & GPUCreativity- there are three defaults for Creativity amount.Morecreative will stray drastically from the initial image. Balanced will keep the integrity of the initial image while upscaling and adding detail.Lesscreative will upscale the image while staying true to the initial image. The slider is very sensitive - here's an example of how different settings look:
Run the Remake node- next, run the Remake node. As the node runs, you will see light yellow tiles upscale each part of the image. A tiling algorithm is selecting the number of tiles each image needs, overlapping tiles, then generating each tile individually.Compare your results- the result is an upscaled image that adds detail rather than loses detail with the final result.
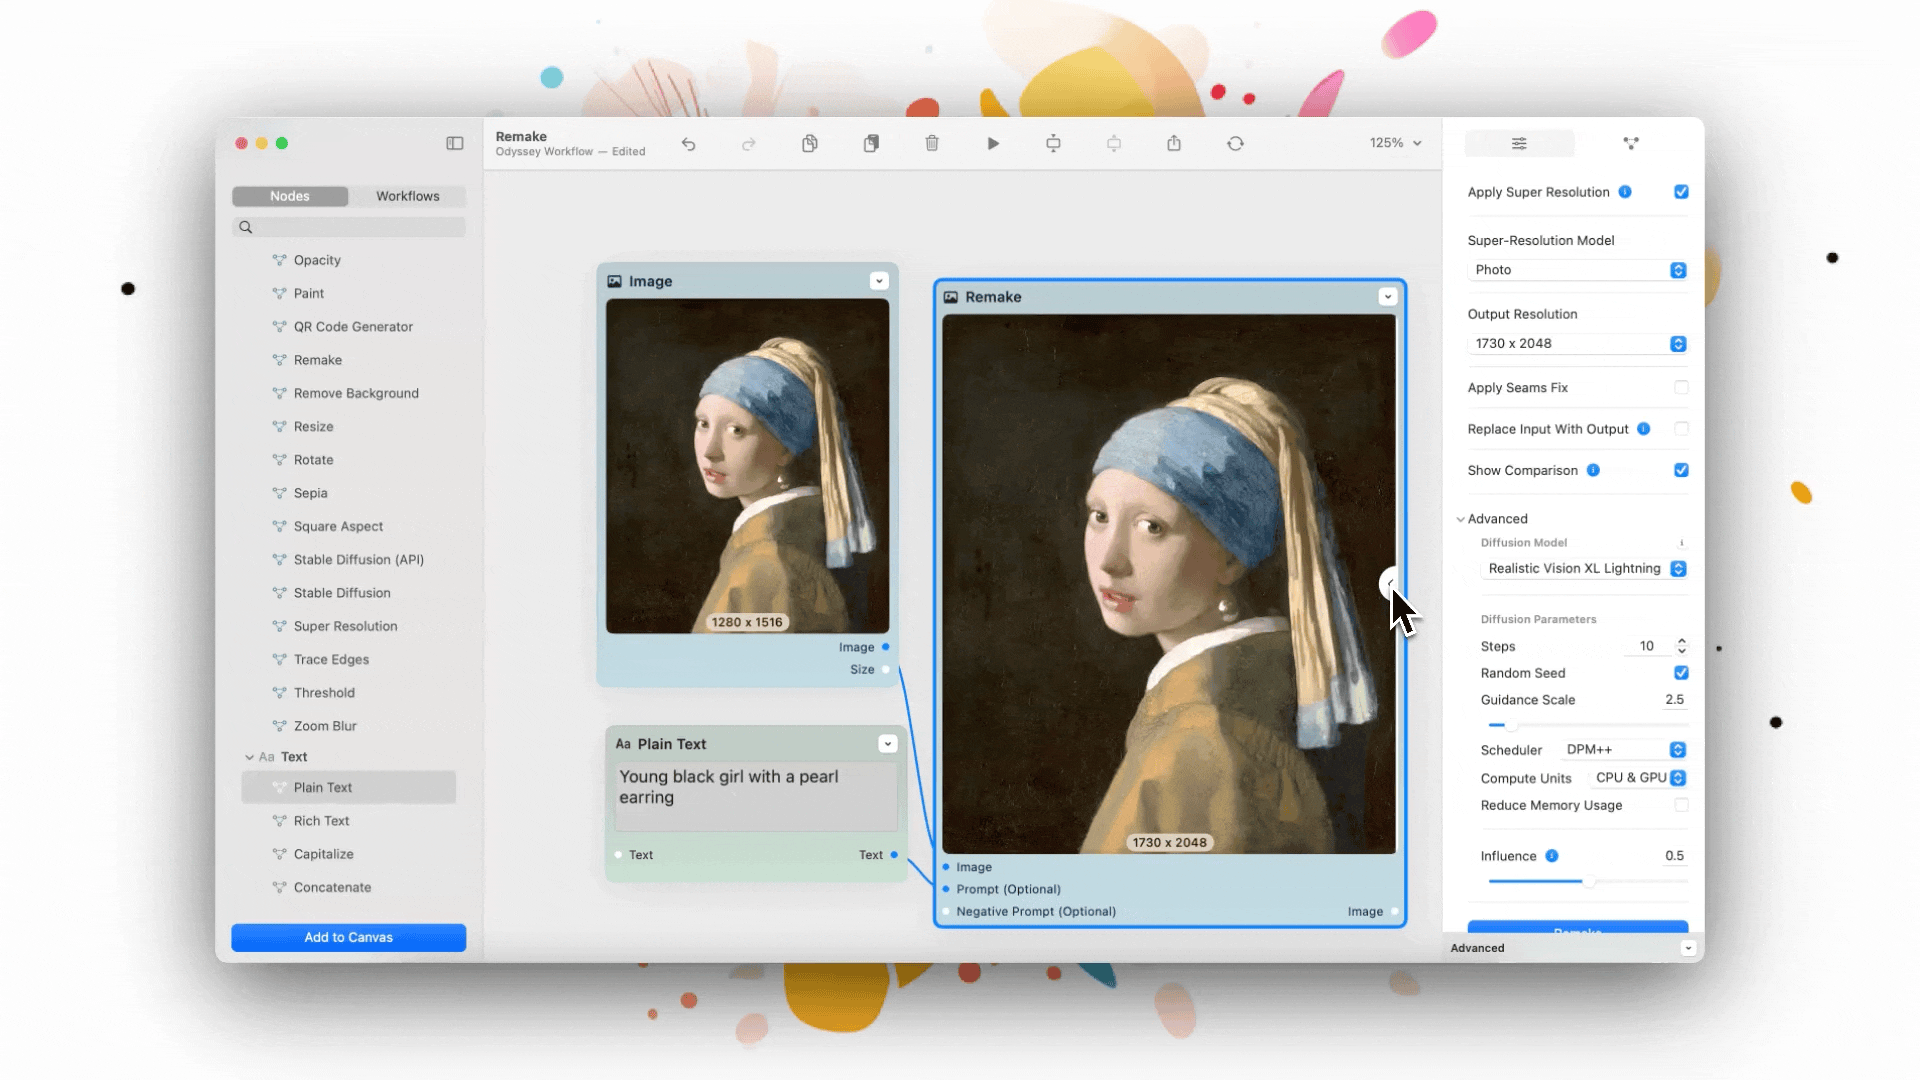
Reimagine an Image
To completely reimagine an image, Odyssey allows you to add a prompt and a negative prompt. These inputs enable you to prompt each tile that’s being upscaled via the Remake node to output something you’re specifically after.
Let’s look at how we can use the Remake node to completely transform an image.
Connect the imageyou want to transform to the Remake node.Add a prompt and a negative prompt.In this example, we are going to replace the Mona Lisa with Princess Leia.Dial up the Creativity. To best remake an image entirely, you will need the model to creatively update an image. In this example,Creativity(formerly known as Influence) is set to0.5.Click run.
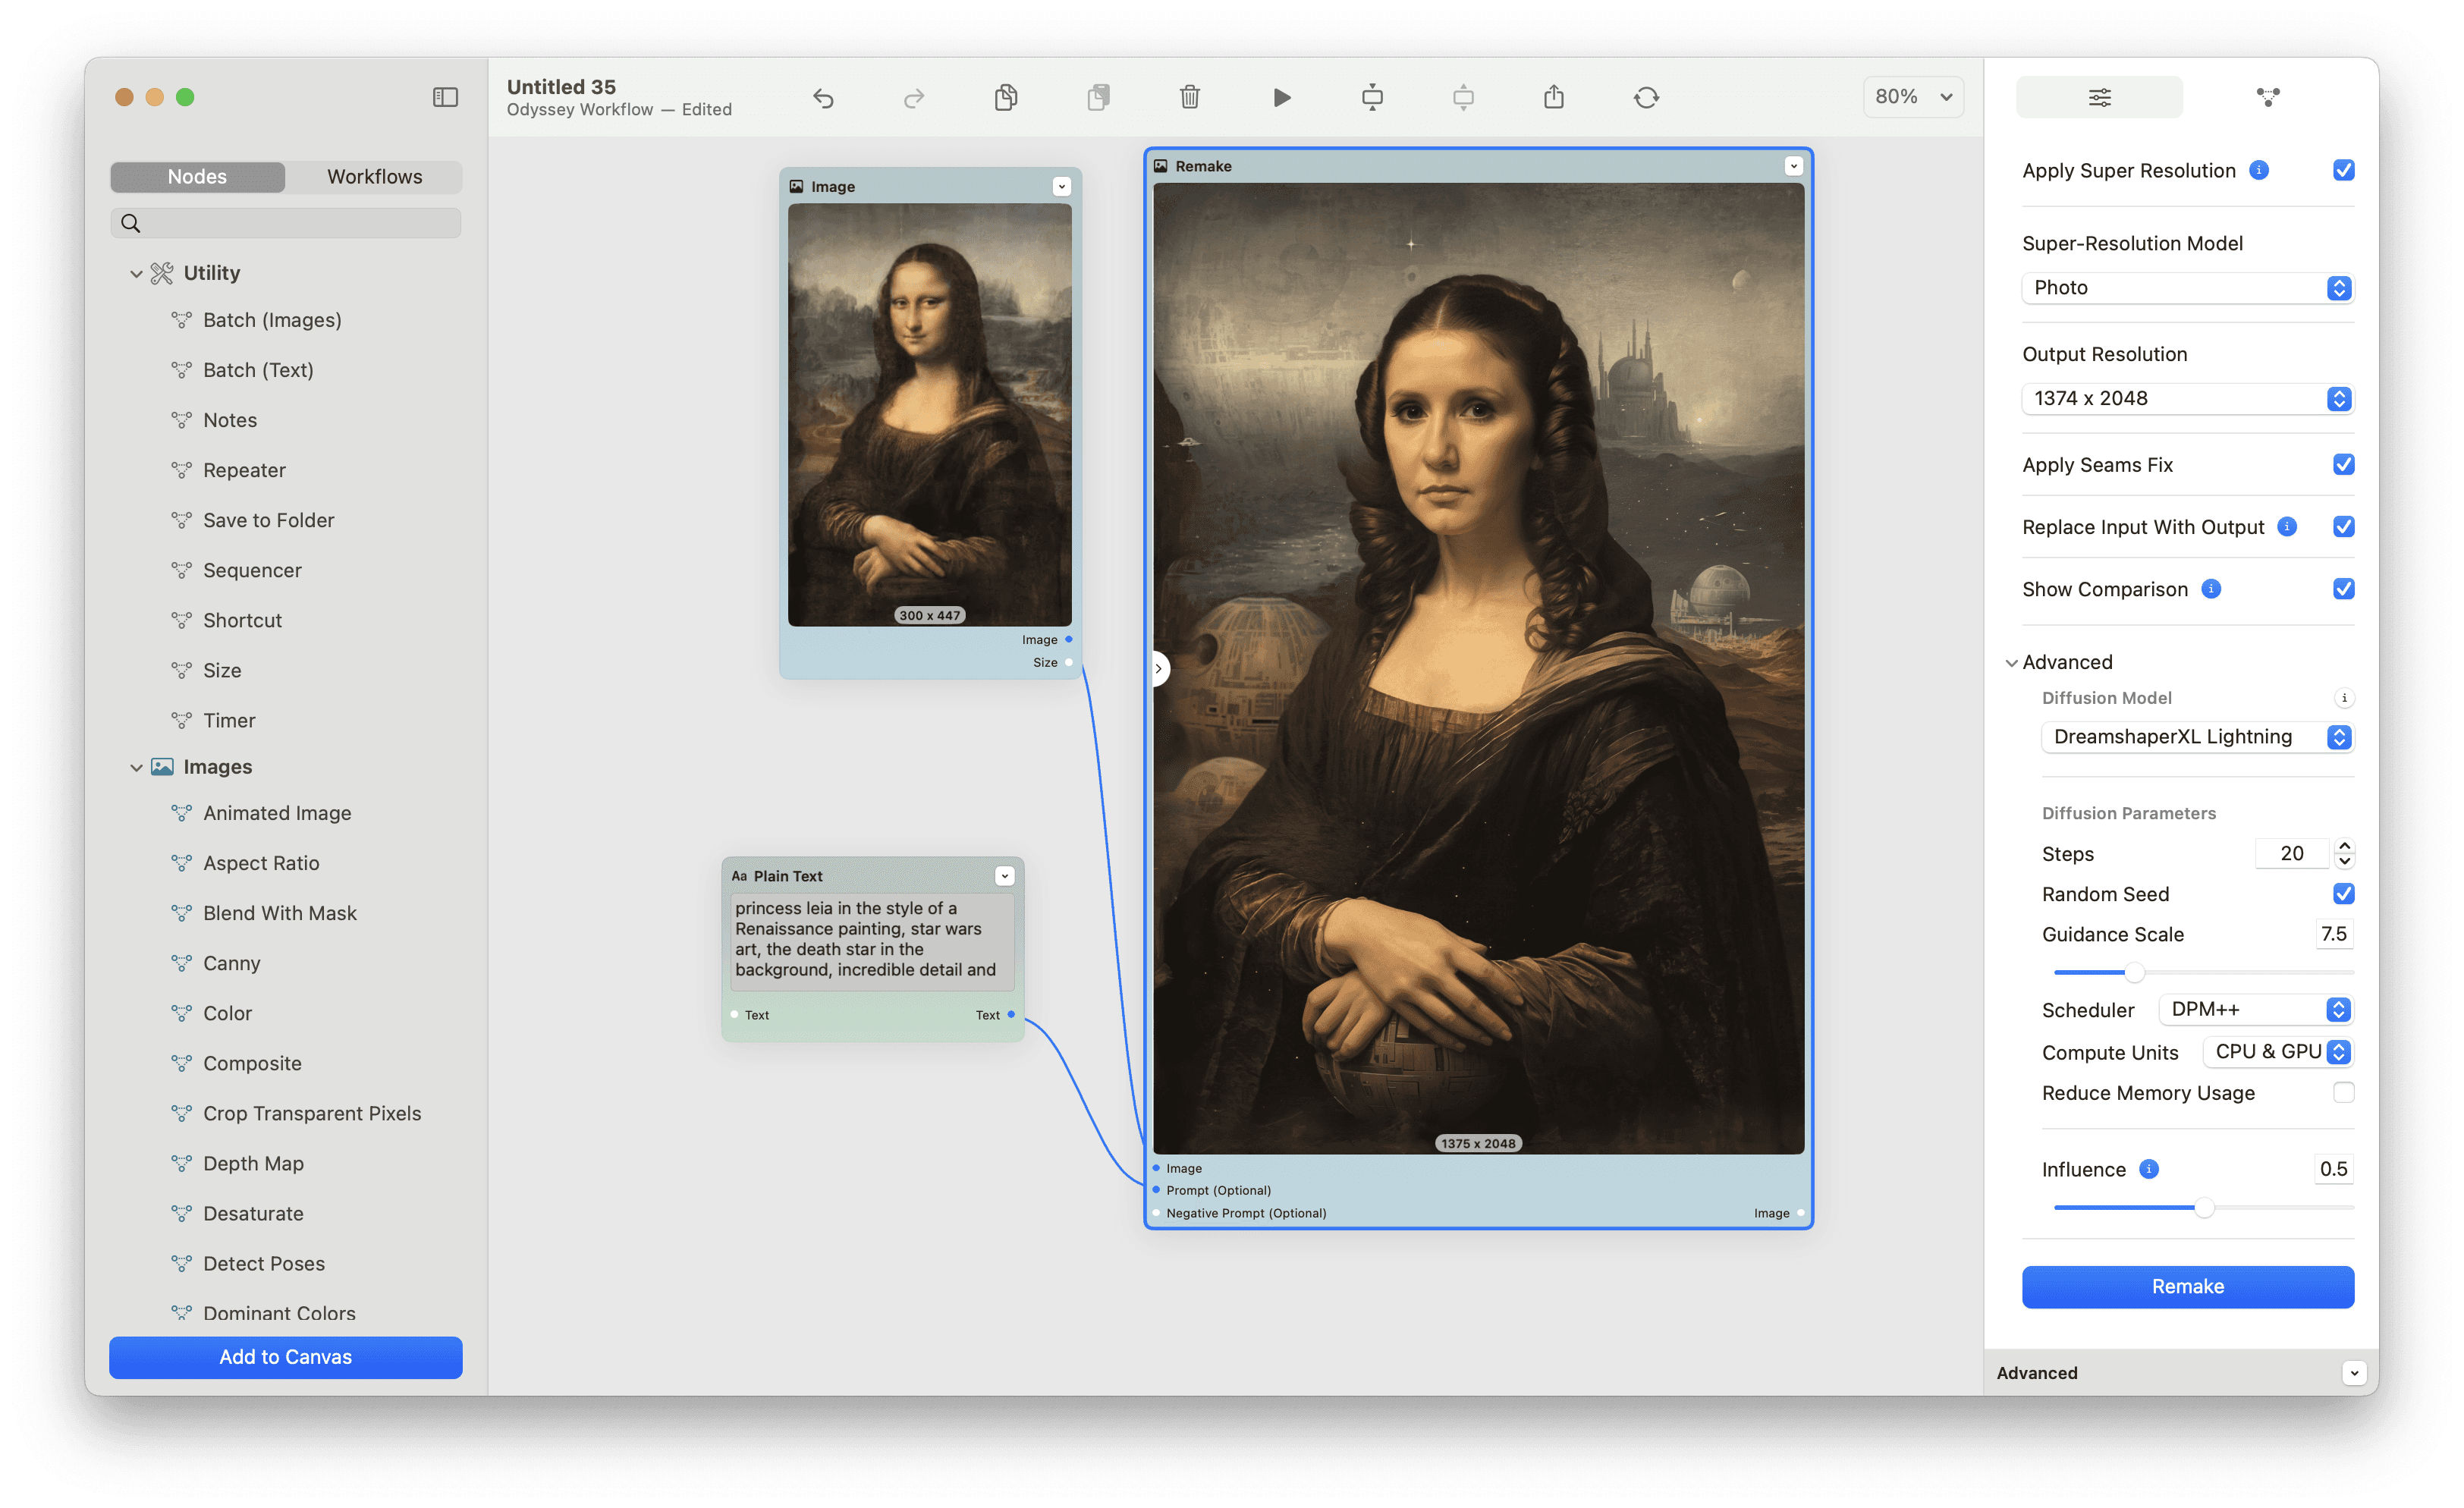
Here are a few more examples of how the Odyssey Remake node can completely reimagine your images.

Manual mode
While remake's automatic mode breaks up an image into tiles and runs models on each one, Manual mode allows you to move a selectable tile around your image and choose which area to remake. The effect is achieved through configurable blending - where we create a square mask then blur the mask so the generated result fits seamlessly into the surrounding image.
Let's take a look at how to use Manual mode.
Change the mode- selectManualfrom the dropdownMove your tile- select theRemakenode and you'll see a tile appear on your image. Move the tile around to choose which area of the image you want to impact then clickAnchorto anchor your tile's position.Adjust your Blend Amount- Blend amount determine the radius that's affected by the Remake tile. When a blend amount is increased, the area that's immediately impacted is smaller while more of the remade tile is blended with the rest of the image. A lower blend amount leads to more of the image being immediately impacted. By default, the blend amount will spread equally around the tile. But by deselecting checkboxes around the tile, you can stop a side of the tile being impacted by image blending.Change your settings- similar toautomaticmode you can change the Creativity details of yourRemaketile.(Optional) Add a prompt and negative prompt- adding prompts will help dictate what will be generated within the tile you've selected.Click Process Tile- processing the tile will run the Stable Diffusion model on the single tile and blend the generated image into its surroundings