Guide
Using Shortcuts with Odyssey
Running Shortcuts from an Odyssey Workflow
Importing
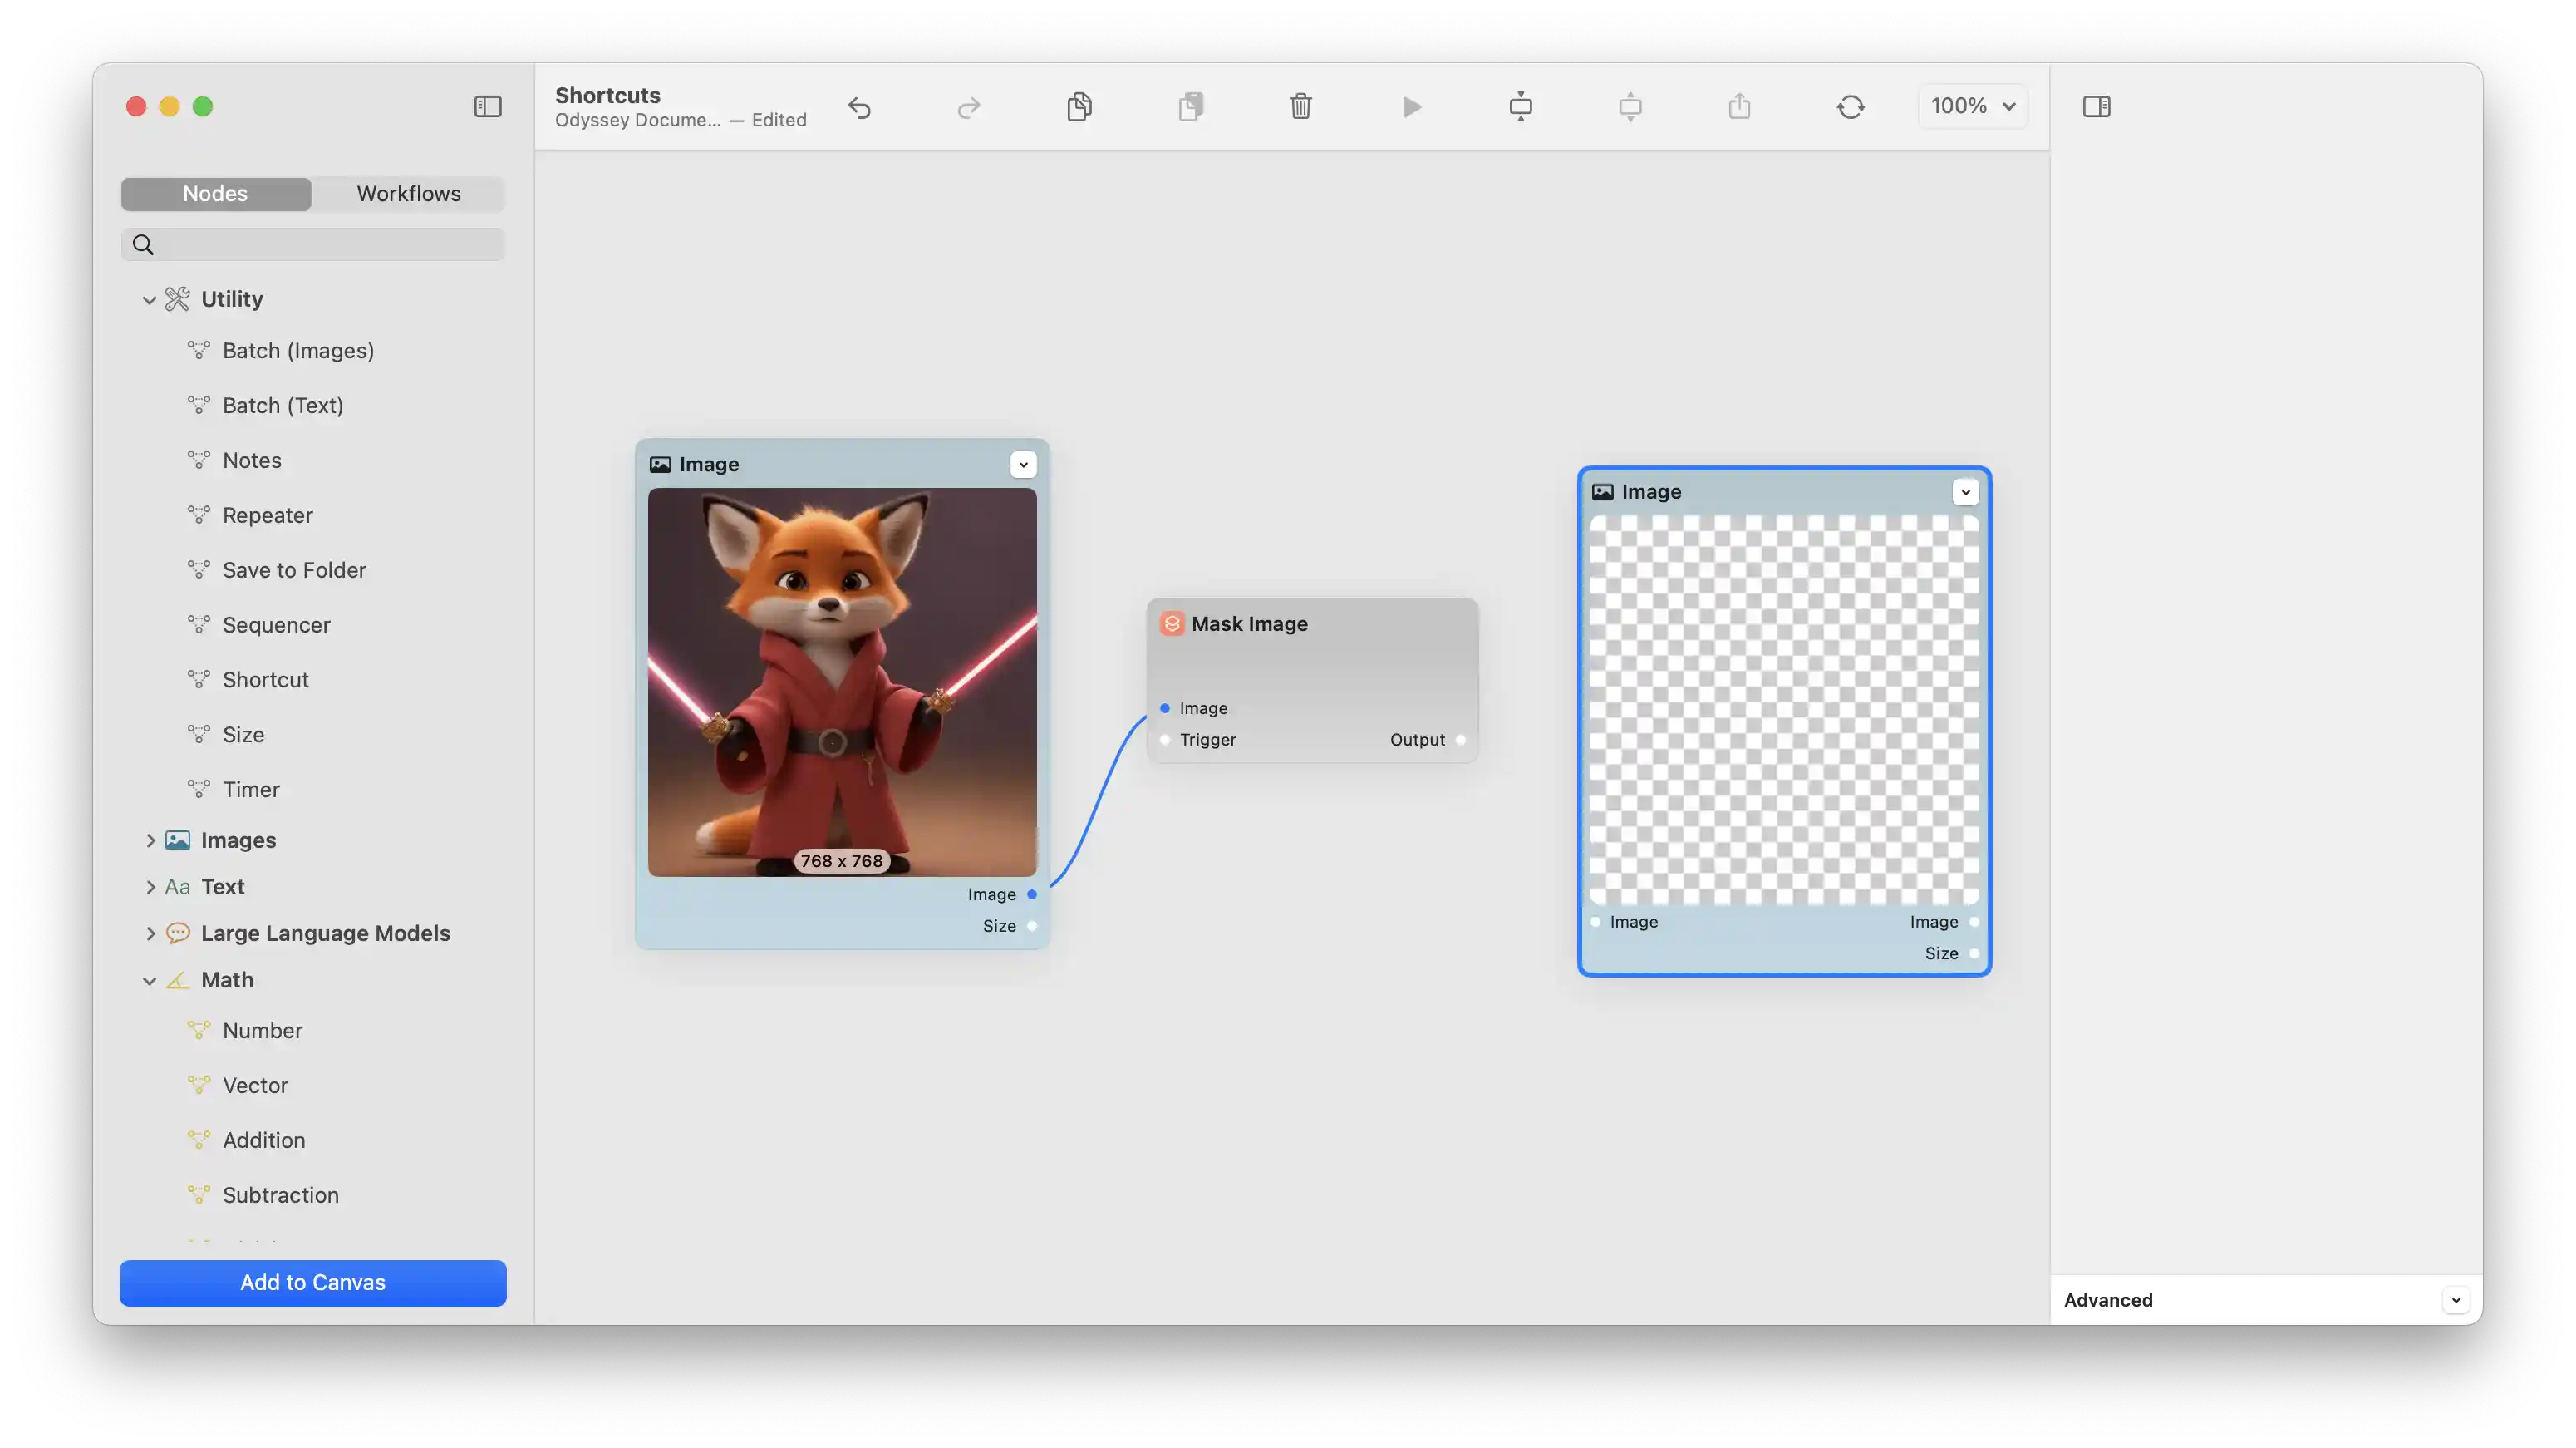
You can import a shortcut into an Odyssey workflow through the Shortcut node.
Find the
Shortcutnode in the sidebar under theUtilitiescategory.Drag the node onto the canvas.

Click on the node to select it.
In the inspector, click
Choose Shortcut.From the shortcut-selection window, choose the shortcut you want to import.

Click the
Selectbutton to import the shortcut.
Configuration (Node)
The
Shortcutnode offers two inputs: ageneric inputand atrigger.The
generic inputcan receiveany type of dataexcept forevent data(such as triggers).To
specializethegeneric input, drag an output from another node and attach it. Attaching an image output, for example, will configure thegeneric inputas animage input. Torevertthe newly createdimage inputto its generic status,detachthe connection by dragging it away from the node and dropping it on the canvas.You can similarly
specializetheShortcutnode’s output by attaching an input of a particular type. TheShortcutnode offers quite a bit of flexibility in this regard: it can receive, say, an image and output text — or vice versa.
Configuration (Shortcut)
To ensure that your shortcut works well with Odyssey, there are a few considerations to keep in mind.
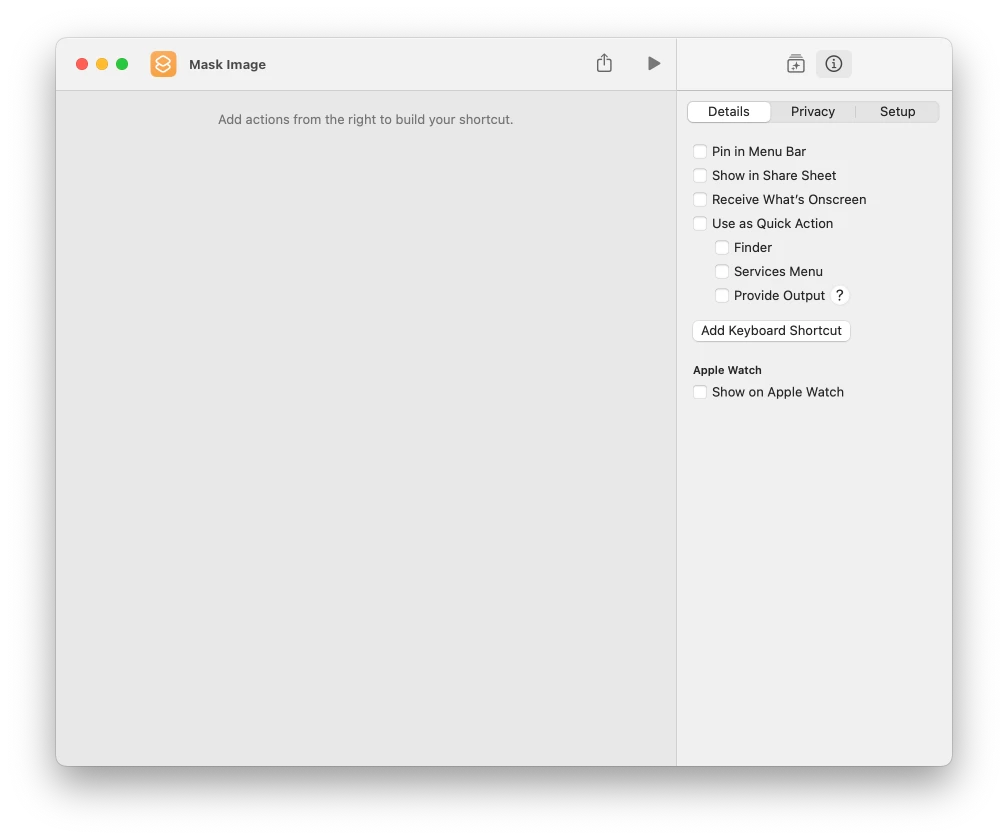
If your shortcut requires input, you’ll need to add an
input actionto the beginning of the shortcut.Click the
Shortcut Detailsbutton in the inspector.Enable
Use as Quick Action. This will add aninput actionto the top of your shortcut.
In the
input action, clickImages and 18 More, then select thedata typeyour shortcut needs. Ideally, select both adata typesuch asImagesorTextas well as theFilesoption.

If your shortcut produces
outputof some sort, you’ll need to add aStop and Outputaction.You can do so by clicking
Shortcut Detailsin the inspector and enablingProvide Output. Alternatively, search for theStop and Outputaction in theAction Library.Select an
output typethat’s appropriate for your Odyssey workflow. Currently, Odyssey supportsimages,plain text,rich text, andnumbers. Odyssey also supports images and text asfilesordocuments.
Don’t name your shortcut
Shortcut. Odyssey reserves that name for theShortcutnode itself.If your shortcut performs long-running asynchronous tasks (such as downloading images from a website), select the
Shortcutnode and enableRun from Command Linein Odyssey’s inspector.
Execution
Once you’ve configured the
Shortcutnode, clickRunin the inspector to run it.Alternatively, connect a node that provides an
eventoutput. For example, theTimernode provides aStartoutput that you can use totriggertheShortcutnode.
Running an Odyssey Workflow from a Shortcut
You can run an Odyssey workflow from within a shortcut by using one of Odyssey’s shortcut actions. Odyssey provides four actions:
An image-to-image action
A plain-text-to-plain-text action
A rich-text-to-rich-text action
A generic action that can receive any supported data type and output any supported data type.
The action you select depends on your workflow’s input and output. For example, for image-based workflows that take in an image and produce an image, use the image-to-image action.
Configuring Your Workflow
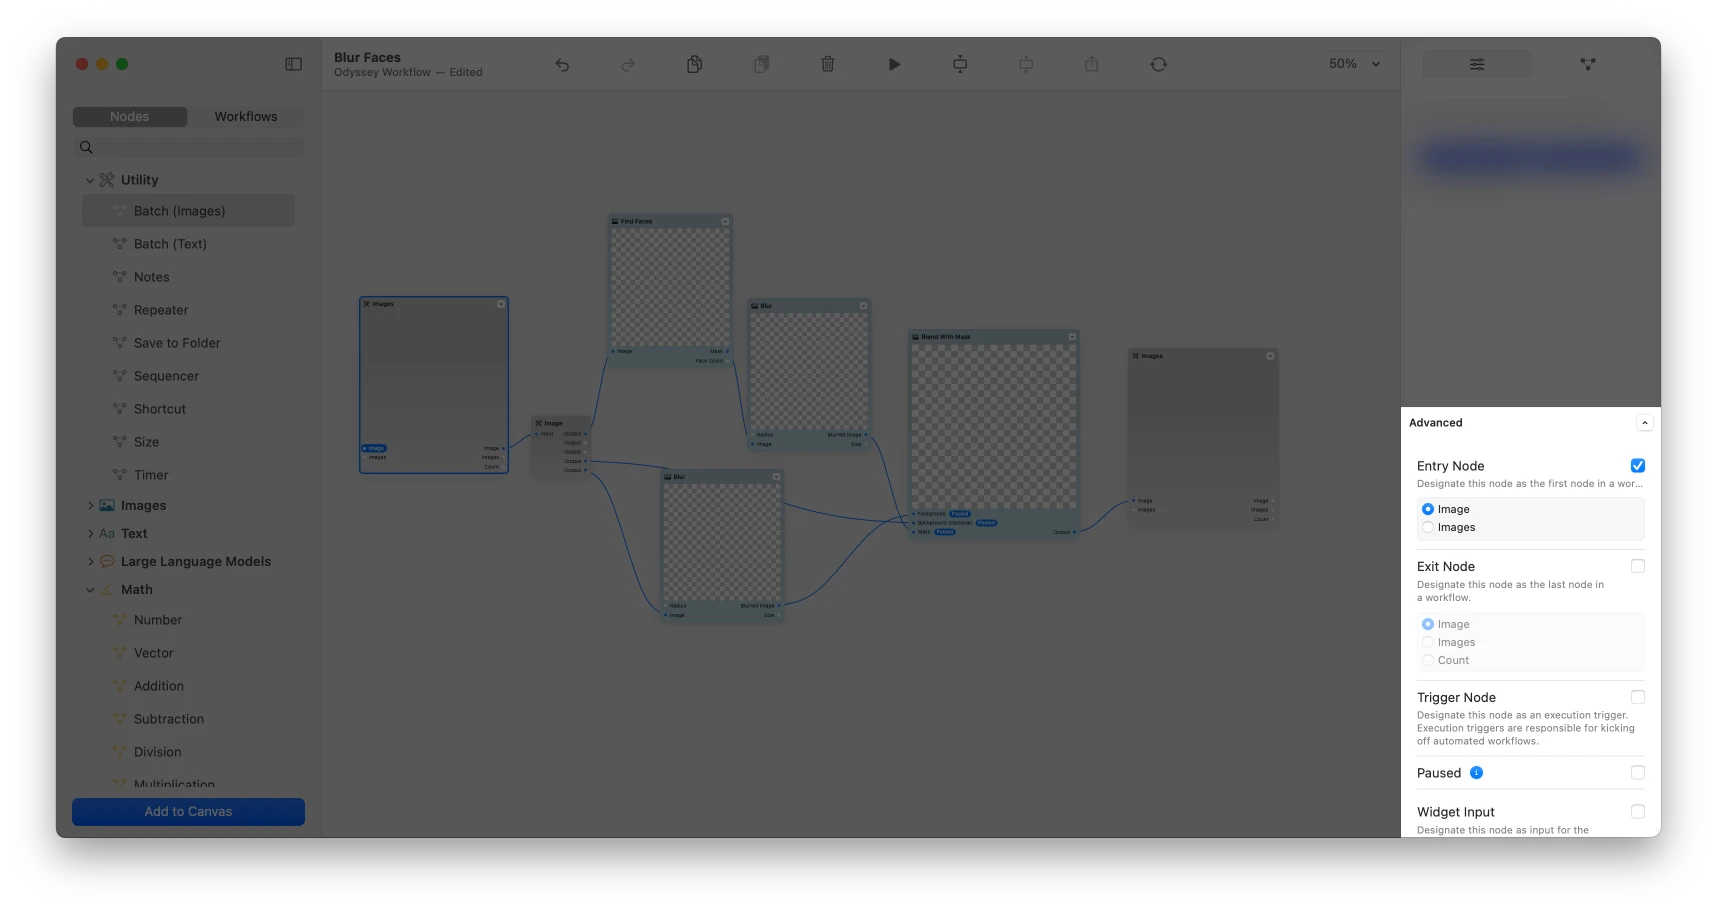
Designating Entry and Exit Nodes
Once you’ve created a workflow (by clicking Save as workflow… in the File menu), ensure that your workflow contains the following:
a designated
entrynodea designated
exitnode.
Odyssey uses these designations to identify the workflow’s entry and exit points. Not all nodes are a good fit for entry and exit points. The Batch (Images) node and the Batch (Text) node provide an easy way to receive a number of items and output a number of items.
To designate an appropriate node as an entry node, select the node, expand the Advanced panel in the inspector, then enable Entry Node, and select the input you want to designate as the workflow’s entry point. (Although, the batch nodes’ inputs distinguish between single and multiple items, in practice, Odyssey will pass single or multiple items to the entry node regardless of which input you’ve designated.)
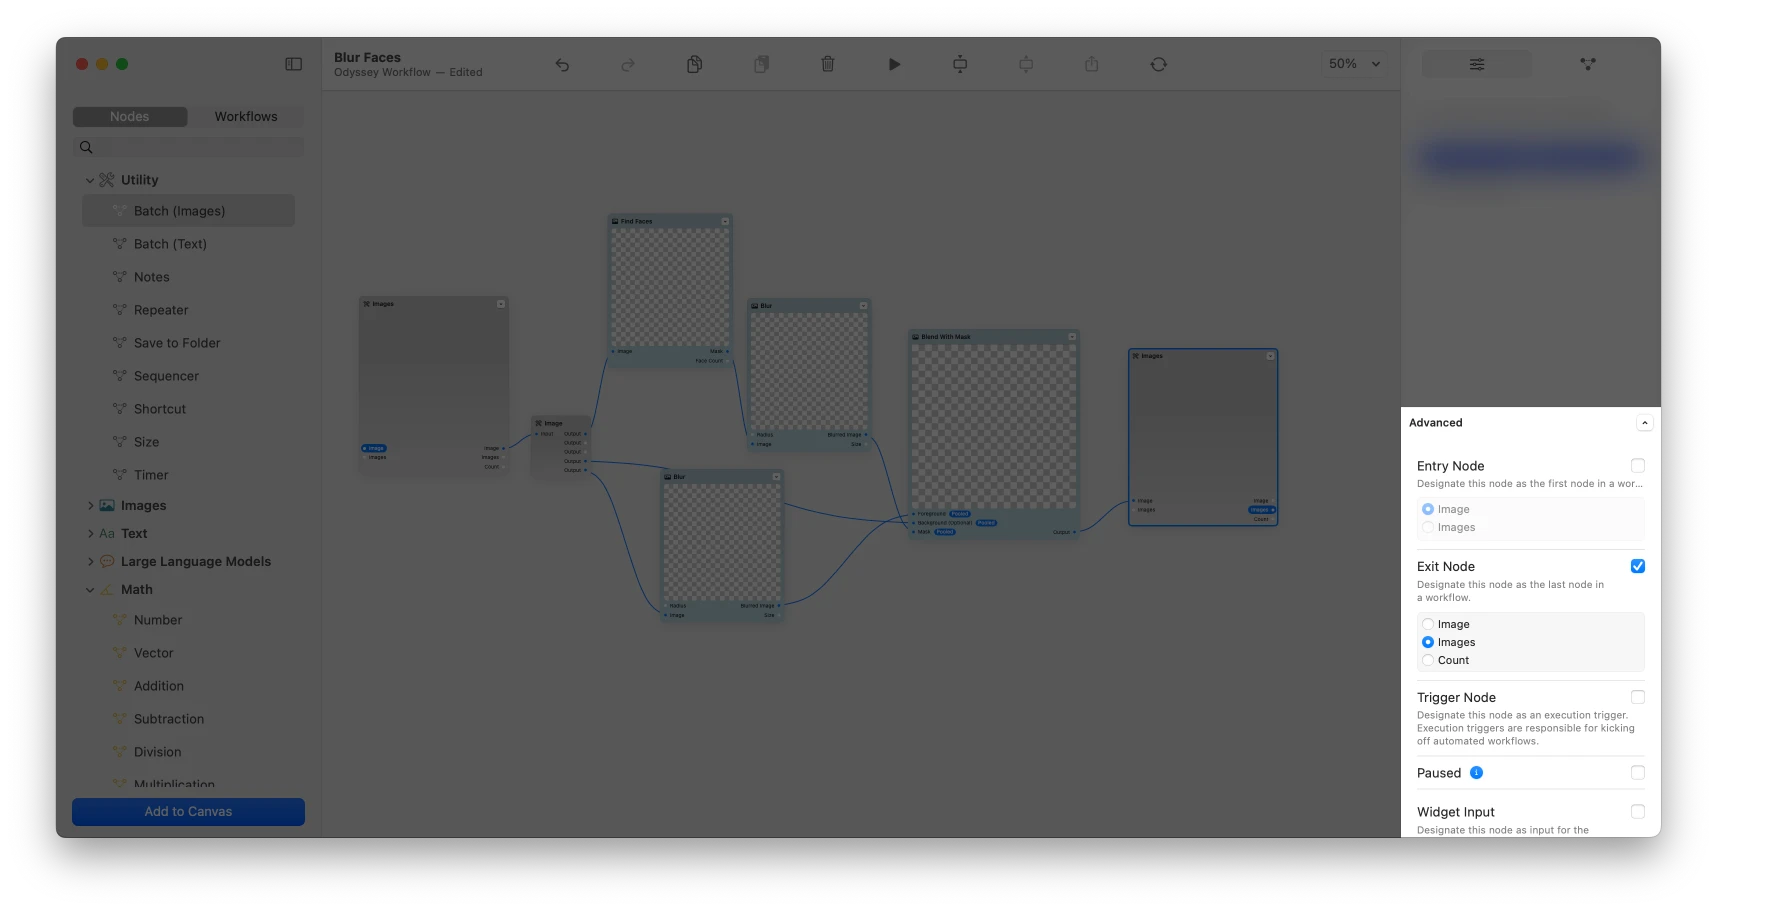
Next, to designate an appropriate node as an exit node, select the node, expand the Advanced panel in the inspector, then enable Exit Node, and select the output you want to designate as the workflow’s entry point. In most cases, you’ll want to designate the output that provides multiple items.
A Note On Pooling
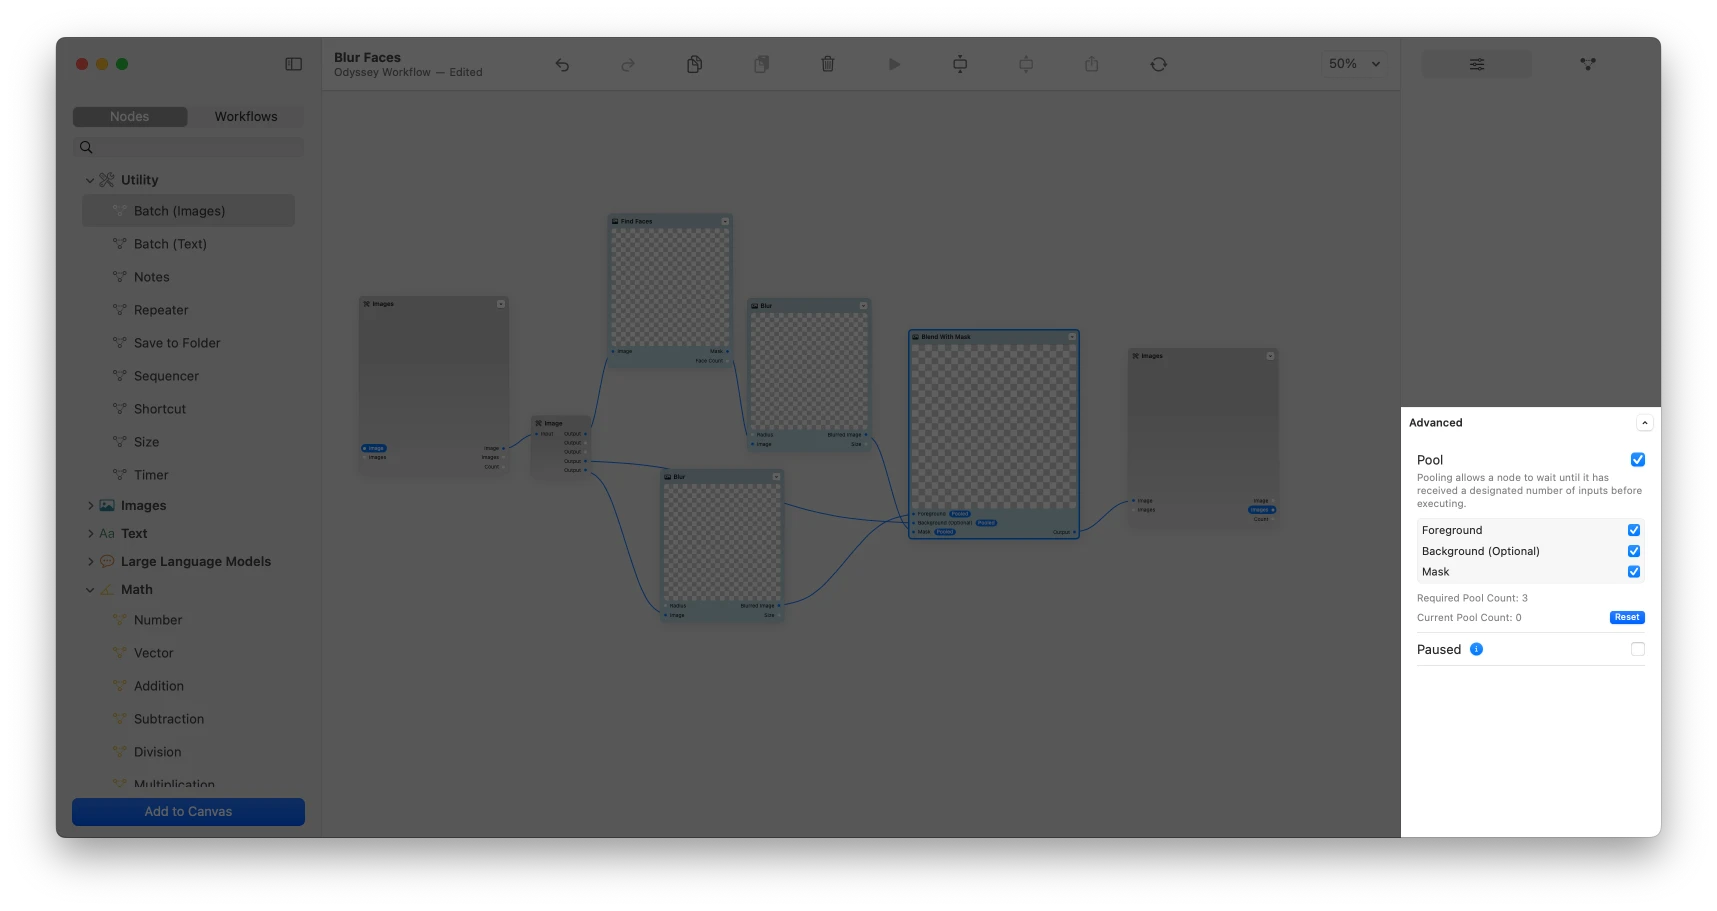
When running a workflow, nodes that have multiple inputs can receive those inputs out of order. Since most nodes will perform their task as soon as they receive an input, you might find your workflow producing outputs that are either unfinished or duplicated. To avoid this state of affairs, you can enable pooling for your node’s inputs. Pooling allows a node to wait until it has received a new value for each of its designated inputs before executing. To enable pooling, select the node, expand the Advanced panel, and enable the Pool checkbox. Then, select the inputs that you want to opt into pooling. In the example below, the Blend With Mask node requires a new value for each of its three inputs, and so we’ve enabled pooling for each of them.
Enable Automation
Once you’ve designated the appropriate nodes, select the Workflow option in the inspector, then click Enable Automation. Next, save your workflow, and open the Shortcuts app.

Configuring Your Shortcut
For the purposes of this guide, we’ll create a new shortcut called Blur Faces. The shortcut will rely on our Blur Faces workflow seen in the screenshots above.
Create the shortcut by clicking the
+button in the toolbar.Give the shortcut an
appropriate name(notShortcut!).Select the
Shortcut Detailsinspector, then enableUse as Quick Actionto add aninput actionto the shortcut.
Click
Images and 18 Morein theinput actionand enable onlyImagesandFiles.
Click the
Action Libraryinspector.Enter
Odysseyin the search bar.
Drag the
Run image workflowaction from the inspector into the action editor.Click
Shortcut Inputin the new action (now calledProcess Shortcut Input with Odyssey Workflow).From the
typedrop-down menu, selectImage.
Click
Odyssey Workflowand find the workflow you want to use. By default, Odyssey stores workflows in yourDocumentsfolder underCustom Workflows.
Next, click the
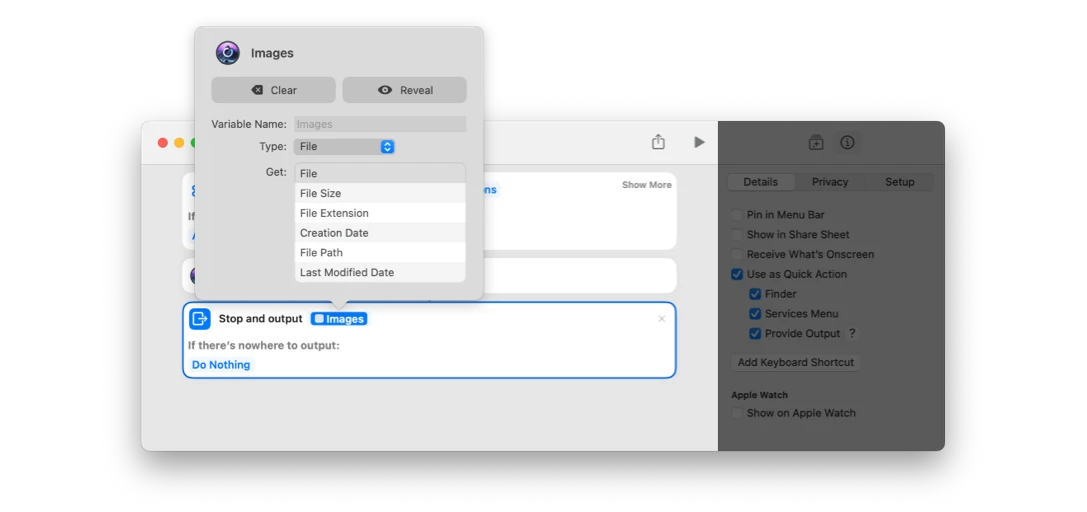
Shortcut Detailsinspector again and select theProvide Outputcheckbox.Then, select
Images(or an equivalent) in theStop and Outputaction and ensure that thetypedrop-down is set toImage.
Running Your Shortcut
You can run your shortcut directly from the Shortcuts app. Alternatively, you can right-click a file in the Finder or on your Desktop, find the shortcut in the Quick Actions section of the file’s contextual menu, and run it from there. As we discuss below, you can also run a shortcut that uses an Odyssey workflow from within an Odyssey workflow.
Running a Shortcut from a Node’s Contextual Menu
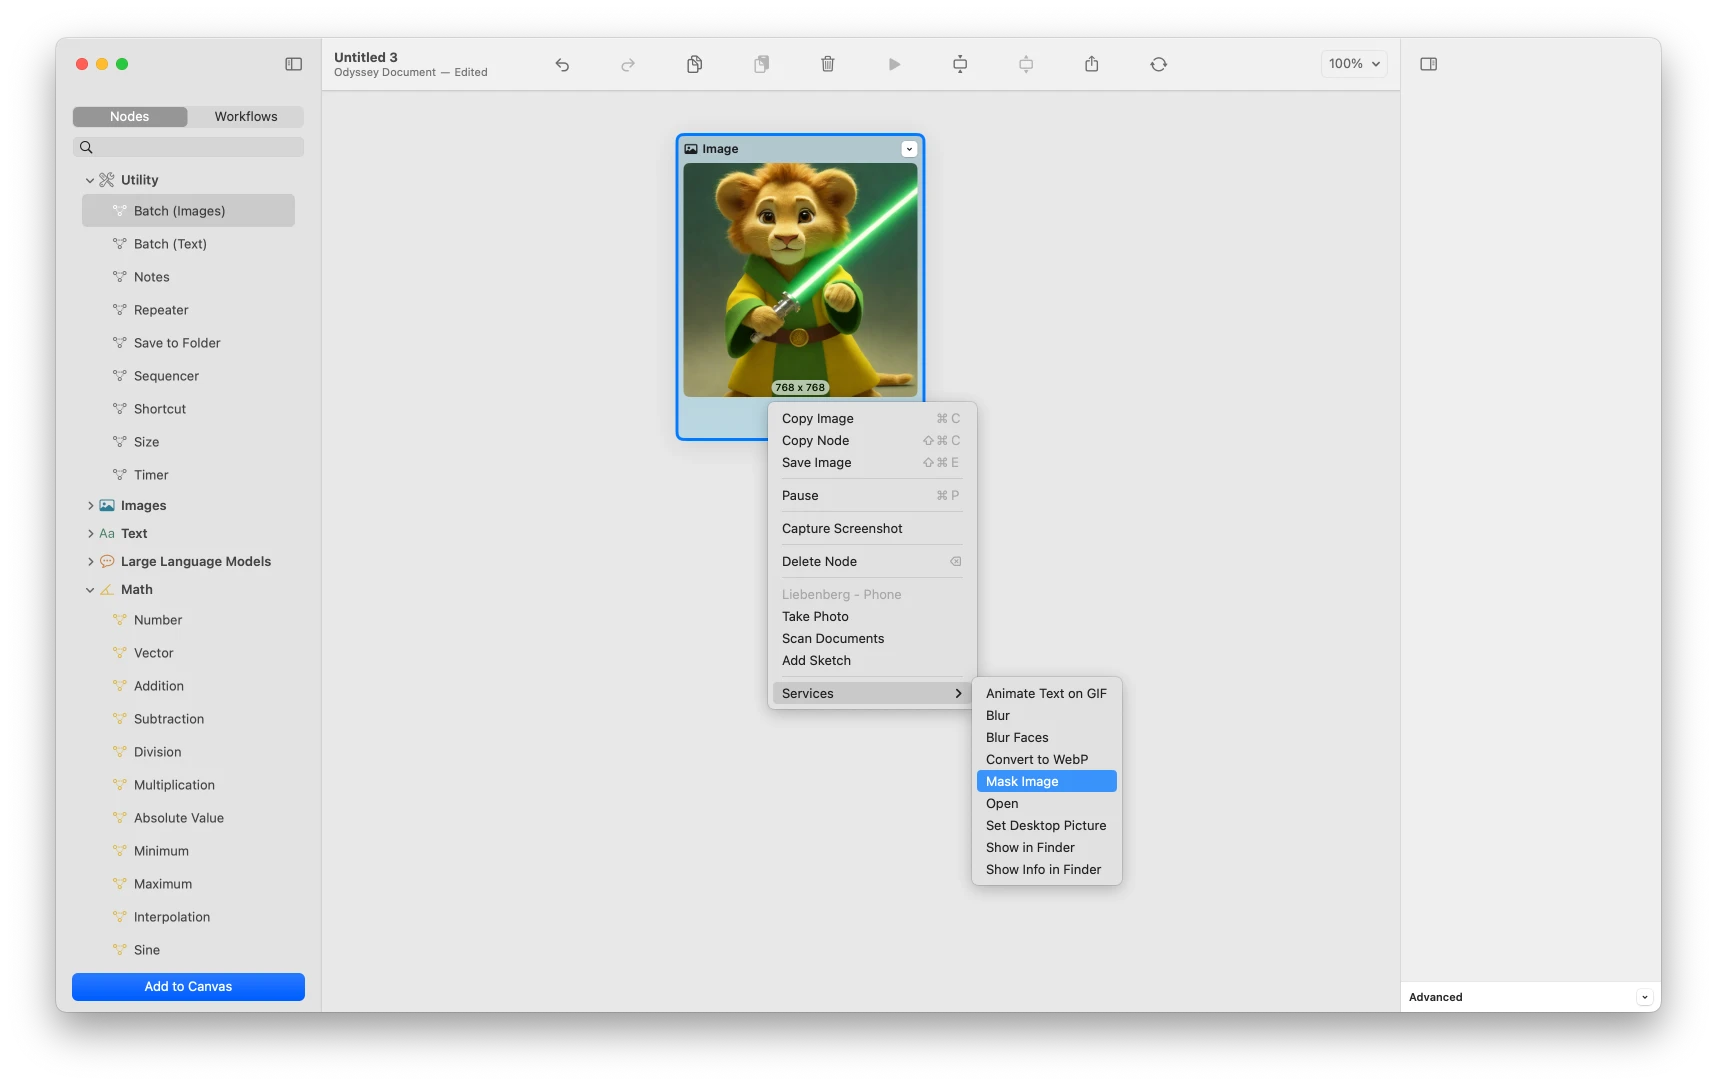
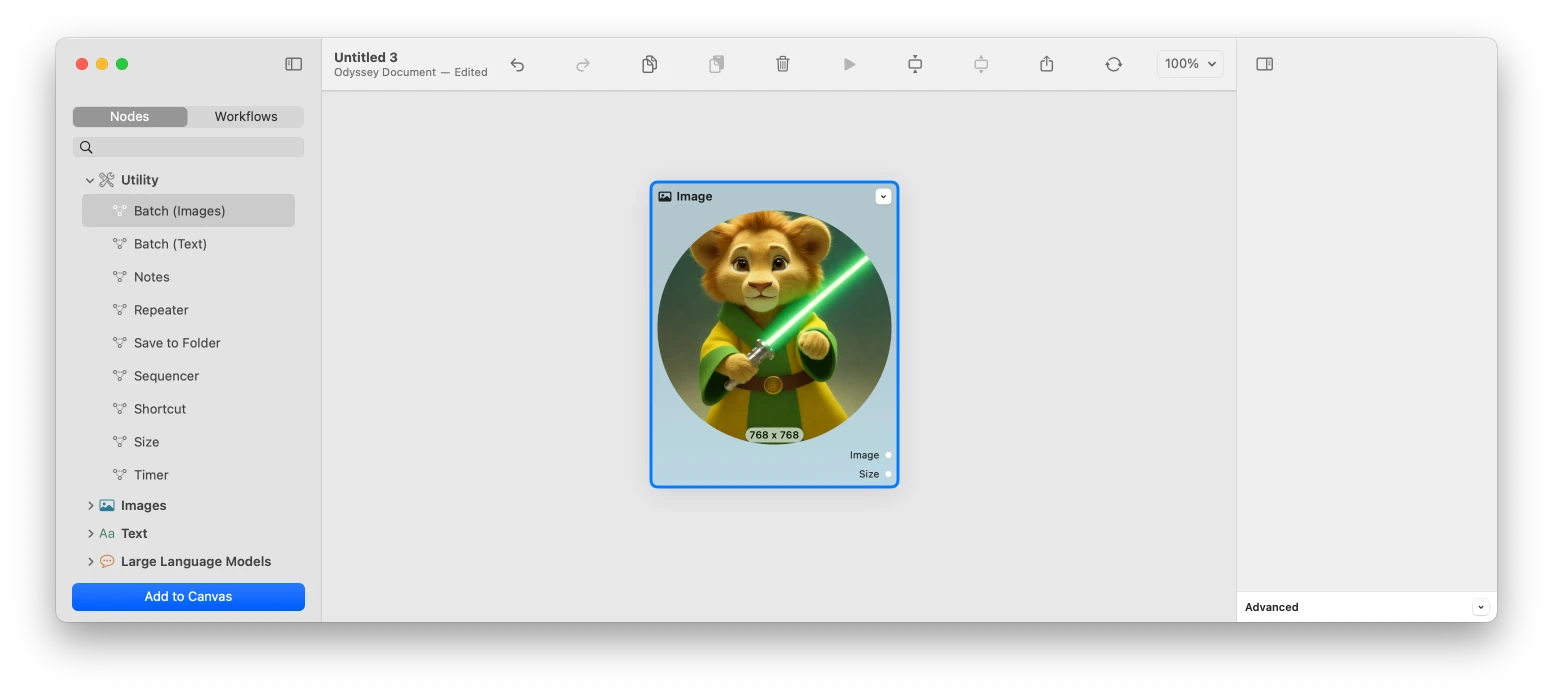
Odyssey supports running shortcuts on the Image and Plain Text nodes. To run a shortcut on an Image node, select the node, ensure that the node contains an image, then right-click the node to open its contextual menu. From the Services section of the contextual menu, select your shortcut.
If your shortcut isn’t visible in the contextual menu, ensure that you’ve done the following in the Shortcuts app:
In the
Shortcut Detailsinspector, ensure that you’ve enabledServices Menu.In the shortcut’s
Stop and Outputaction, ensure that you’ve set theoutput typeto anappropriatetype. For example, if you’re working with anImagenode, the shortcut’soutput typeshould be set toImage.