Aug 21, 2024
|
6
min read

If you're new to AI image generators, they can still feel like magic. You simply type in a prompt, press a button, and within minutes (or seconds) get back an incredible image.
There are a lot of different ways to generate images out there. But the most popular by far is Stable Diffusion. Some estimates state that people have used Stable Diffusion to generate over 12.6 billion images.
A technology like this, with so much usage over such a fast period of time, can feel exciting, overwhelming, and even frightening.
So how do you make the tech less daunting? Simple: understand how it works.
Latent Diffusion Models
The concept of a latent diffusion model was developed by German researchers in 2021. They later joined Stability AI, which released the first Stable Diffusion model in 2022. A latent diffusion model is slightly different than a standard diffusion model. Standard diffusion models are trained to denoise random Gaussian noise to output a result (for our purposes, an image.) But the denoising step in traditional diffusion models is quite slow - which wouldn’t be acceptable for image generation at scale.
Latent diffusion reduces the time and complexity of diffusing an image out of gaussian noise by generating compressed (or latent) representations of the images. There are three components: autoencoder, U-Net, and Text-encoder.
If you want to learn more about the details on how these work, we suggest you check out this Huggingface overview of the technical complexity of Stable Diffusion.
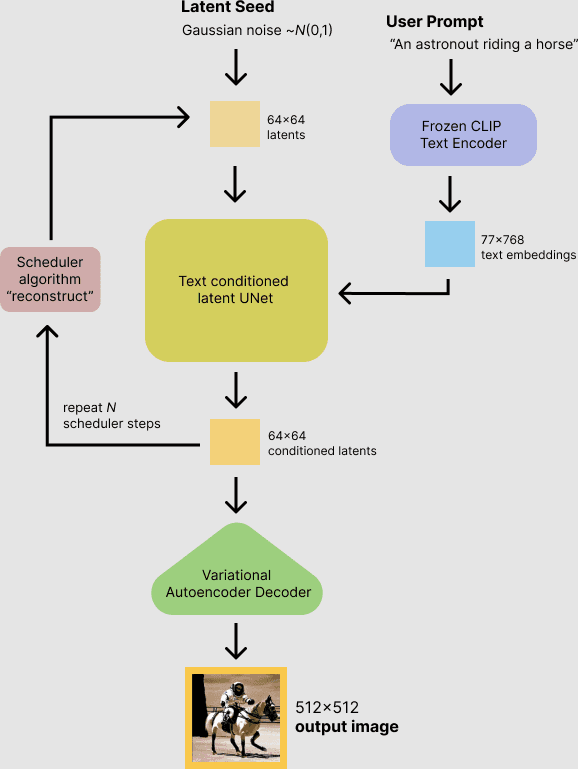
A diagram of how a latent diffusion model works - courtesy of HuggingFace.
For our purposes, we're going to simplify the explanation. A latent diffusion model is trained on billions of images that are associated with text. When you type in text (your "prompt") Gaussian noise is added and removed to output an image result.
In essence, a latent diffusion model is what makes the experience of typing a prompt and getting back an image in seconds possible - and the reason for such a remarkable leap in technology.
Basic Stable Diffusion concepts
Basic implementations of Stable Diffusion can accept three inputs:
Prompts
Negative Prompts
Starting image
A prompt is a text based description of what you want the model to output. The goal of a prompt is to be as specific as you can to help the model generate something remarkable.
Newer models (like Stable Diffusion 3 and Flux - an alternative latent diffusion model from the original Stable Diffusion founding team) have dramatically improved prompt adherence. This means that rather than needing complex prompts, you can simply describe what you want and the model will output an image that matches it very closely.
Sometimes you also need a negative prompt - which tells a model what not to output. A negative prompt is a great way to avoid some of the common pitfalls of AI generated imagery and some people simply reuse the same negative prompt with each image generation, such as:disfigured, bad art, blurry, pixelated, ugly, tiling, close up, blurry, sketch
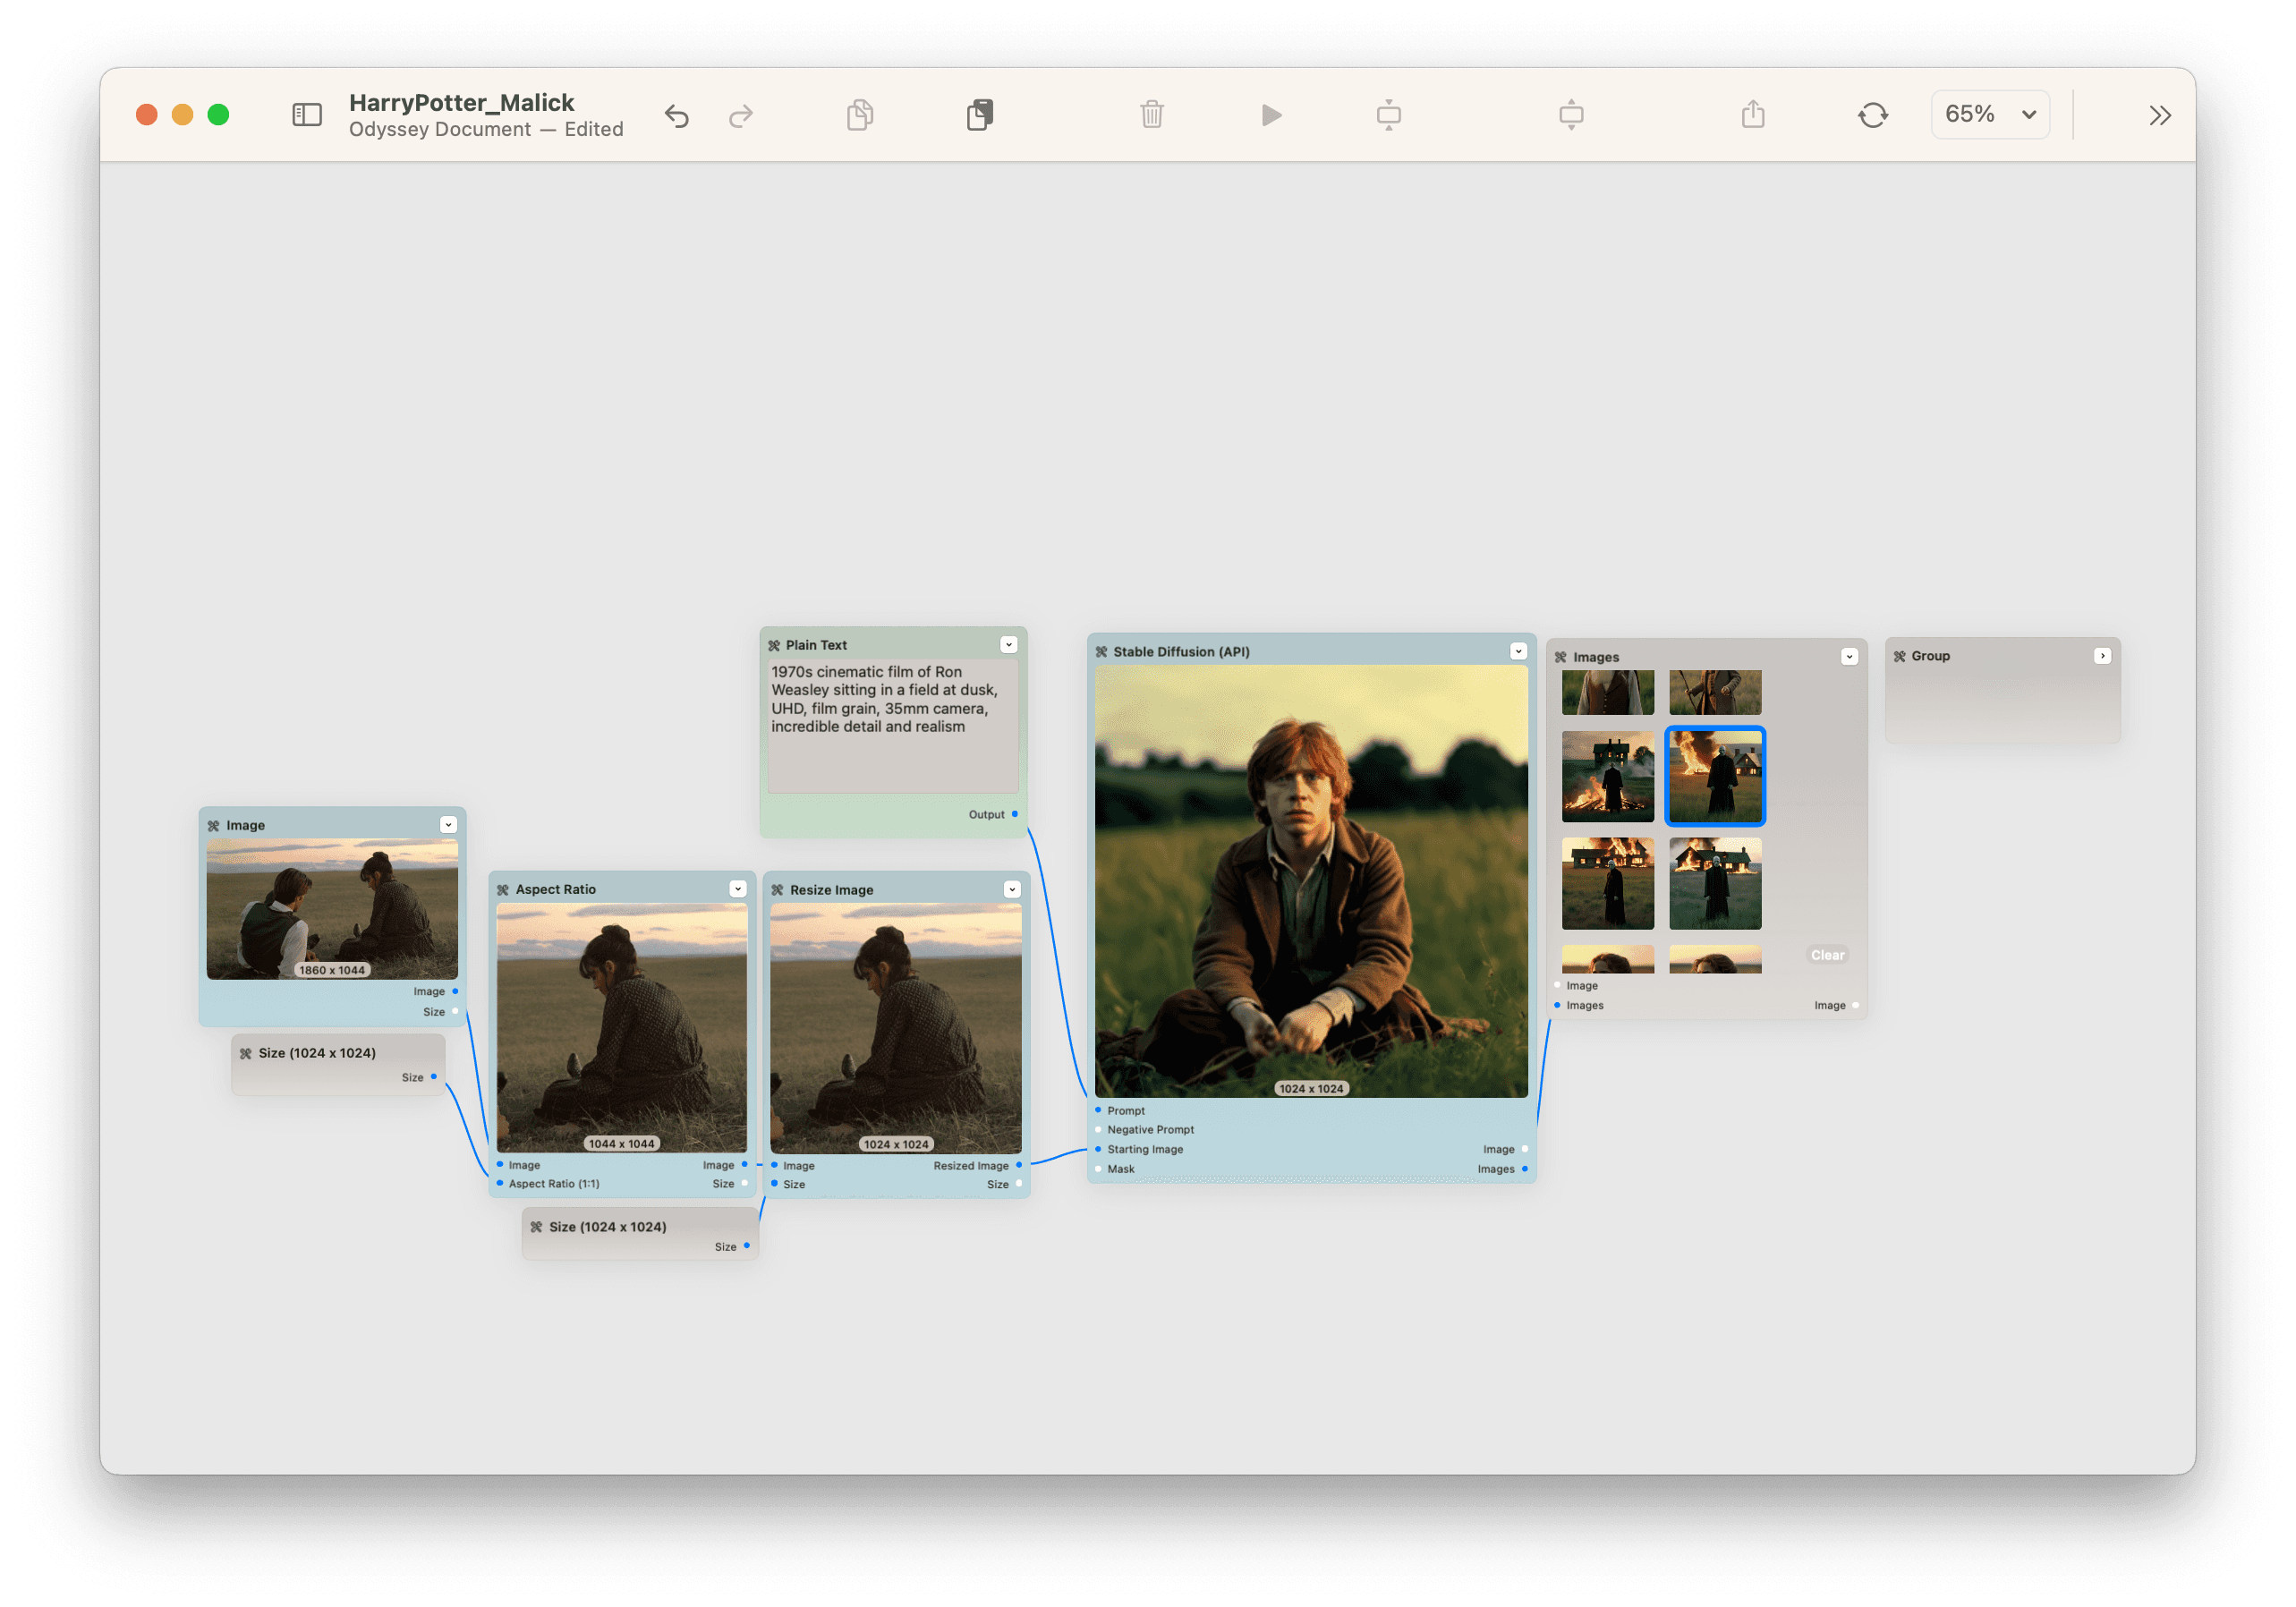
You can also give a model a starting image. By giving the model a starting point, your prompt can serve to help augment the end result to better match the input.
Take, for example, this workflow where we generated Harry Potter characters as if they were in the Terrence Malick classic Days of Heaven. We gave the model a starting cinematic film still and then prompted Harry Potter characters - which outputted this perfect mash up.
Really all you need to know to start creating remarkable images are the basics. Models have gotten so good that if you just type in a simple prompt, you're likely to get an image that achieves what you're after.
But one of the most powerful parts of a model like Stable Diffusion is how much control you can have it over the end result.
Stable Diffusion Settings
By changing the settings for your Stable Diffusion image, you can drastically influence what type of result you get. Let's look at the basics:
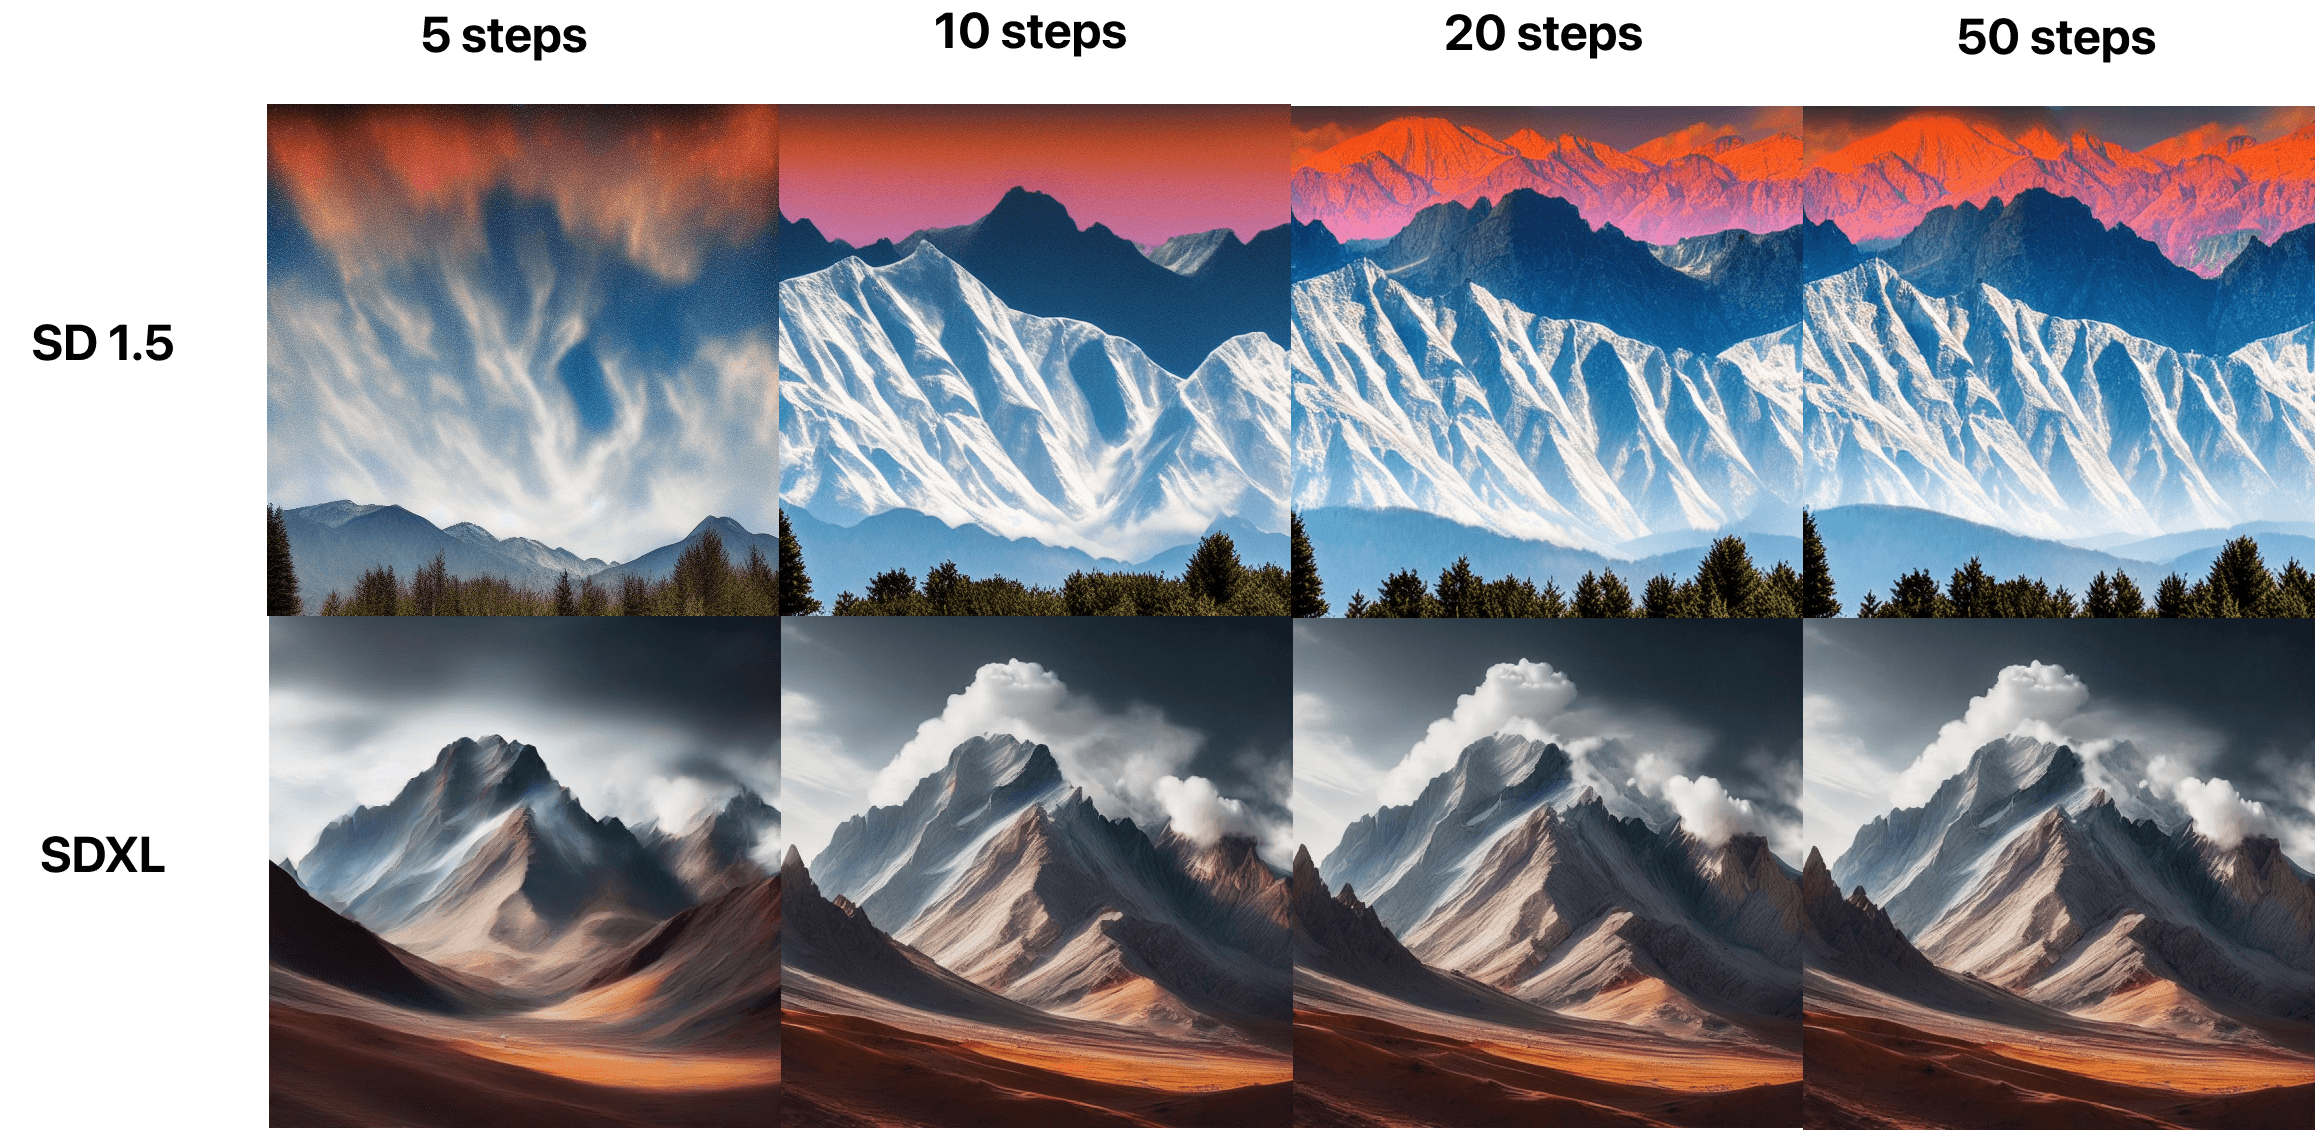
Steps dictate the amount of times the Gaussian noise is diffused. More steps take longer but fill in the image more elaborately. The key is to balance the number of steps - too many and you’re going to sit for a very long time and potentially "overcook" your image. Too few and your image won’t be usable.
Seed is the number that’s used to start the diffusion process. If you keep the seed value the same, the image result will be roughly similar across generations. Once you lock in a prompt and the number of steps, seed values can give you a wide range of different results to pick from - so most folks that use Stable Diffusion randomize seeds until they lock in on one they’re happy with.
At 25 steps, here are different seed values for the same prompt.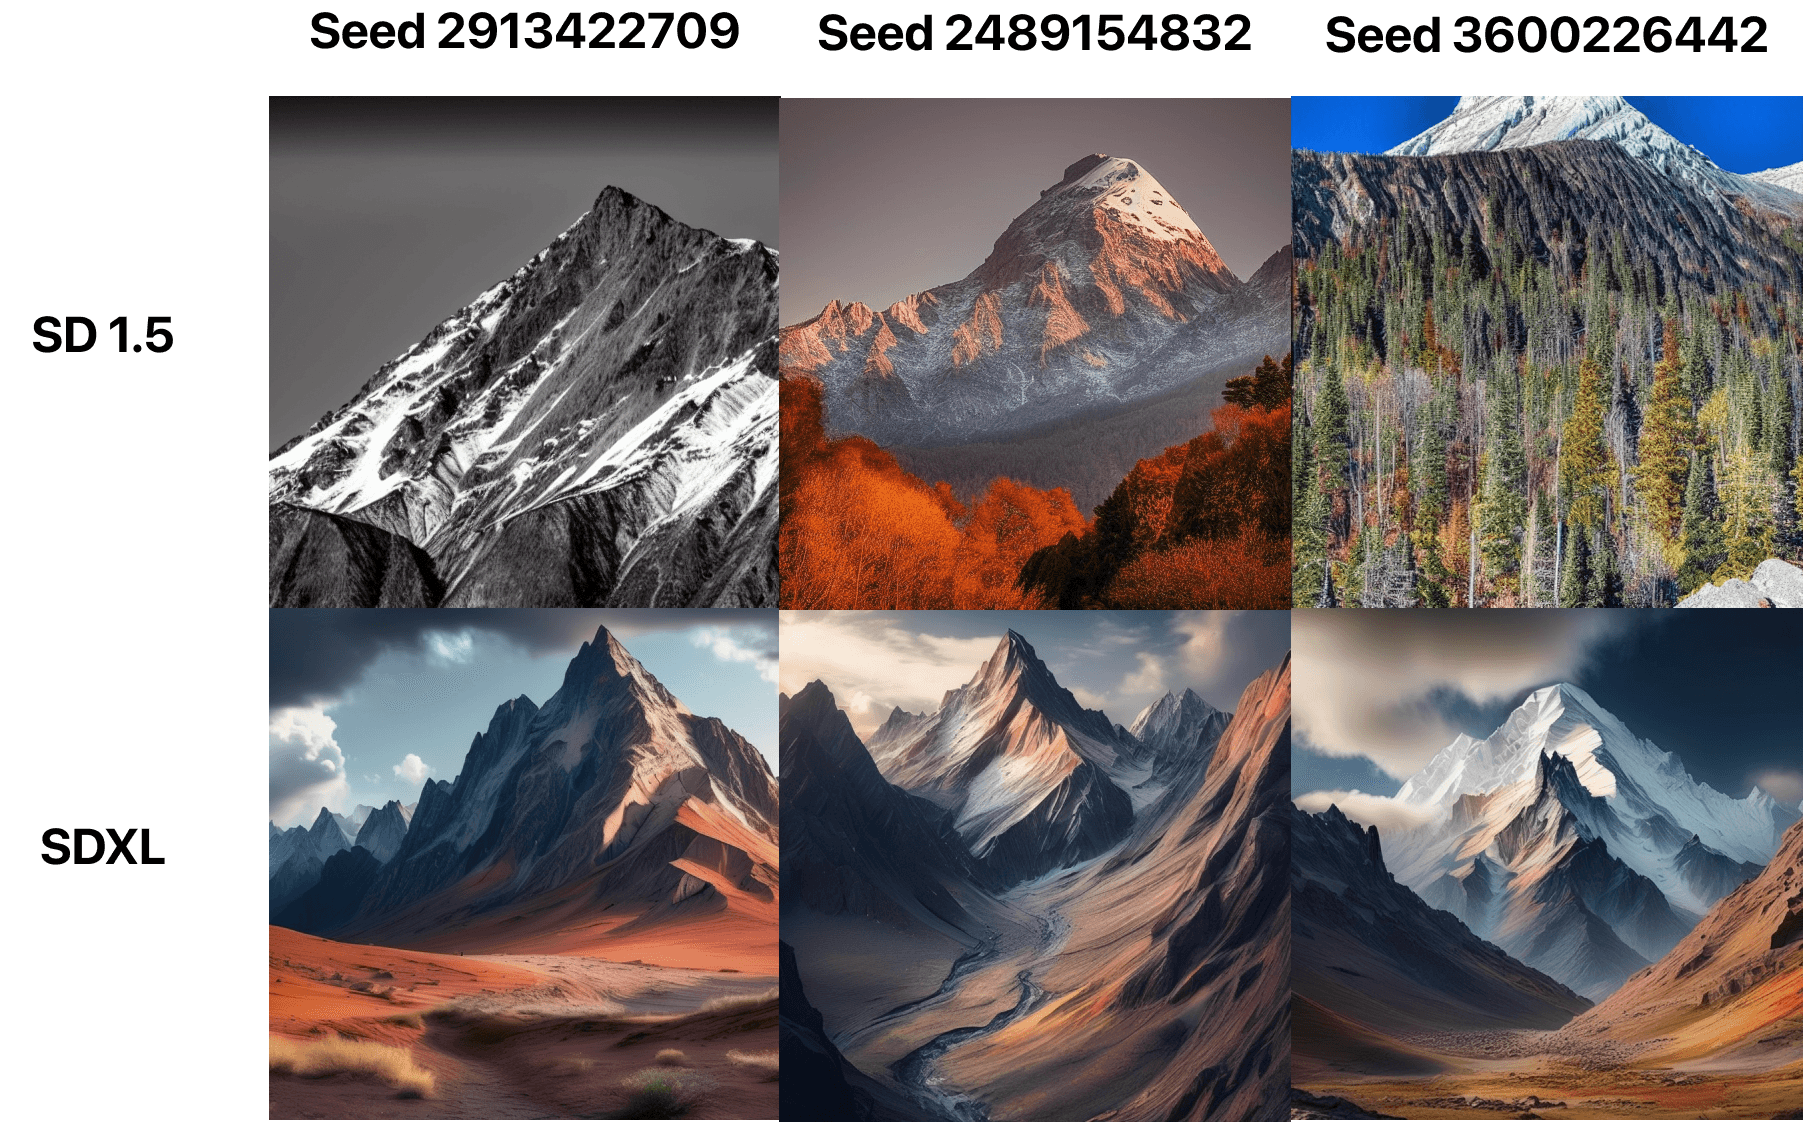
Guidance scale dictates how closely the generated image should follow the prompt. The higher the value, the more the image generation will follow the prompt you enter. Similarly to steps, the key here is balance. Setting the influence too high will lead to a confused result while setting it too low will lead to an image that doesn’t quite match what you’re looking for.
Starting image influence dictates how closely the diffusion model should follow the starting image that you provide it. The meter is essentially the percentage of steps that are directed toward matching the starting image vs. filling in gaps around it.
Scheduler are algorithms that are used alongside the UNet component of the model pipeline and help determine what image is generated out of gaussian noise. Here's how different schedulers impact the same generated image of a bicycle.

How to run Stable Diffusion
So you know how Stable Diffusion works, you understand the basic concepts, and you know what each of the settings do. What's the best way to run it?
There are two main approaches that people take toward generating images with Stable Diffusion: running a model through the cloud and running a model locally.
Generally, there are pros and cons to each approach - but with a tools like Odyssey you can do both right from a native Mac app. You can either connect your Stability AI API key and run models through the cloud or download and run models locally on your Mac.
Odyssey's completely free for 7 days - so download the app give it a try today.